Protein-protein binder design with RFdiffusion using the GUI#
Designing miniprotein binders to IL-7Rα with RFdiffusion and ProteinMPNN using the OpenProtein.AI web interface
In this tutorial, we’ll demonstrate how to use the OpenProtein.AI web interface to design a protein that binds another protein. We refer to the designed protein as the binder and the protein being bound as the target.
The design process consists of four main steps:
Query Specification: Specify the design problem as a “query”, including
the target protein
the specific epitope that we want to target
the length of the binder
Structure Generation: Generate plausible structures for the binder, using RFdiffusion (Watson et al., 2023).
Sequence Design: Design corresponding sequences for each binder structure, using ProteinMPNN (Dauparas et al., 2022).
In Silico Validation: Validate the designed sequences by predicting their structures and computing in silico metrics that are indicative of expression and binding. Filter and select designs for experimental evaluation based on the metrics.
Step 1: Query Specification#
Specify the protein-protein binder design problem
In this tutorial, we focus on designing a binder for Interleukin-7 receptor alpha (IL-7Rα), a key target in the human immune system. This design problem is adapted from the RFdiffusion study (Watson et al., 2023), which demonstrated the de novo design of high-affinity binders to this target.
In this step, we will create the query that represents this design problem.
Target: The sequence and structure of the IL-7Rα extracellular domain.
Epitope: The specific residues of IL-7Rα where the binder should bind.
Binder: The desired length of the de novo protein binder.
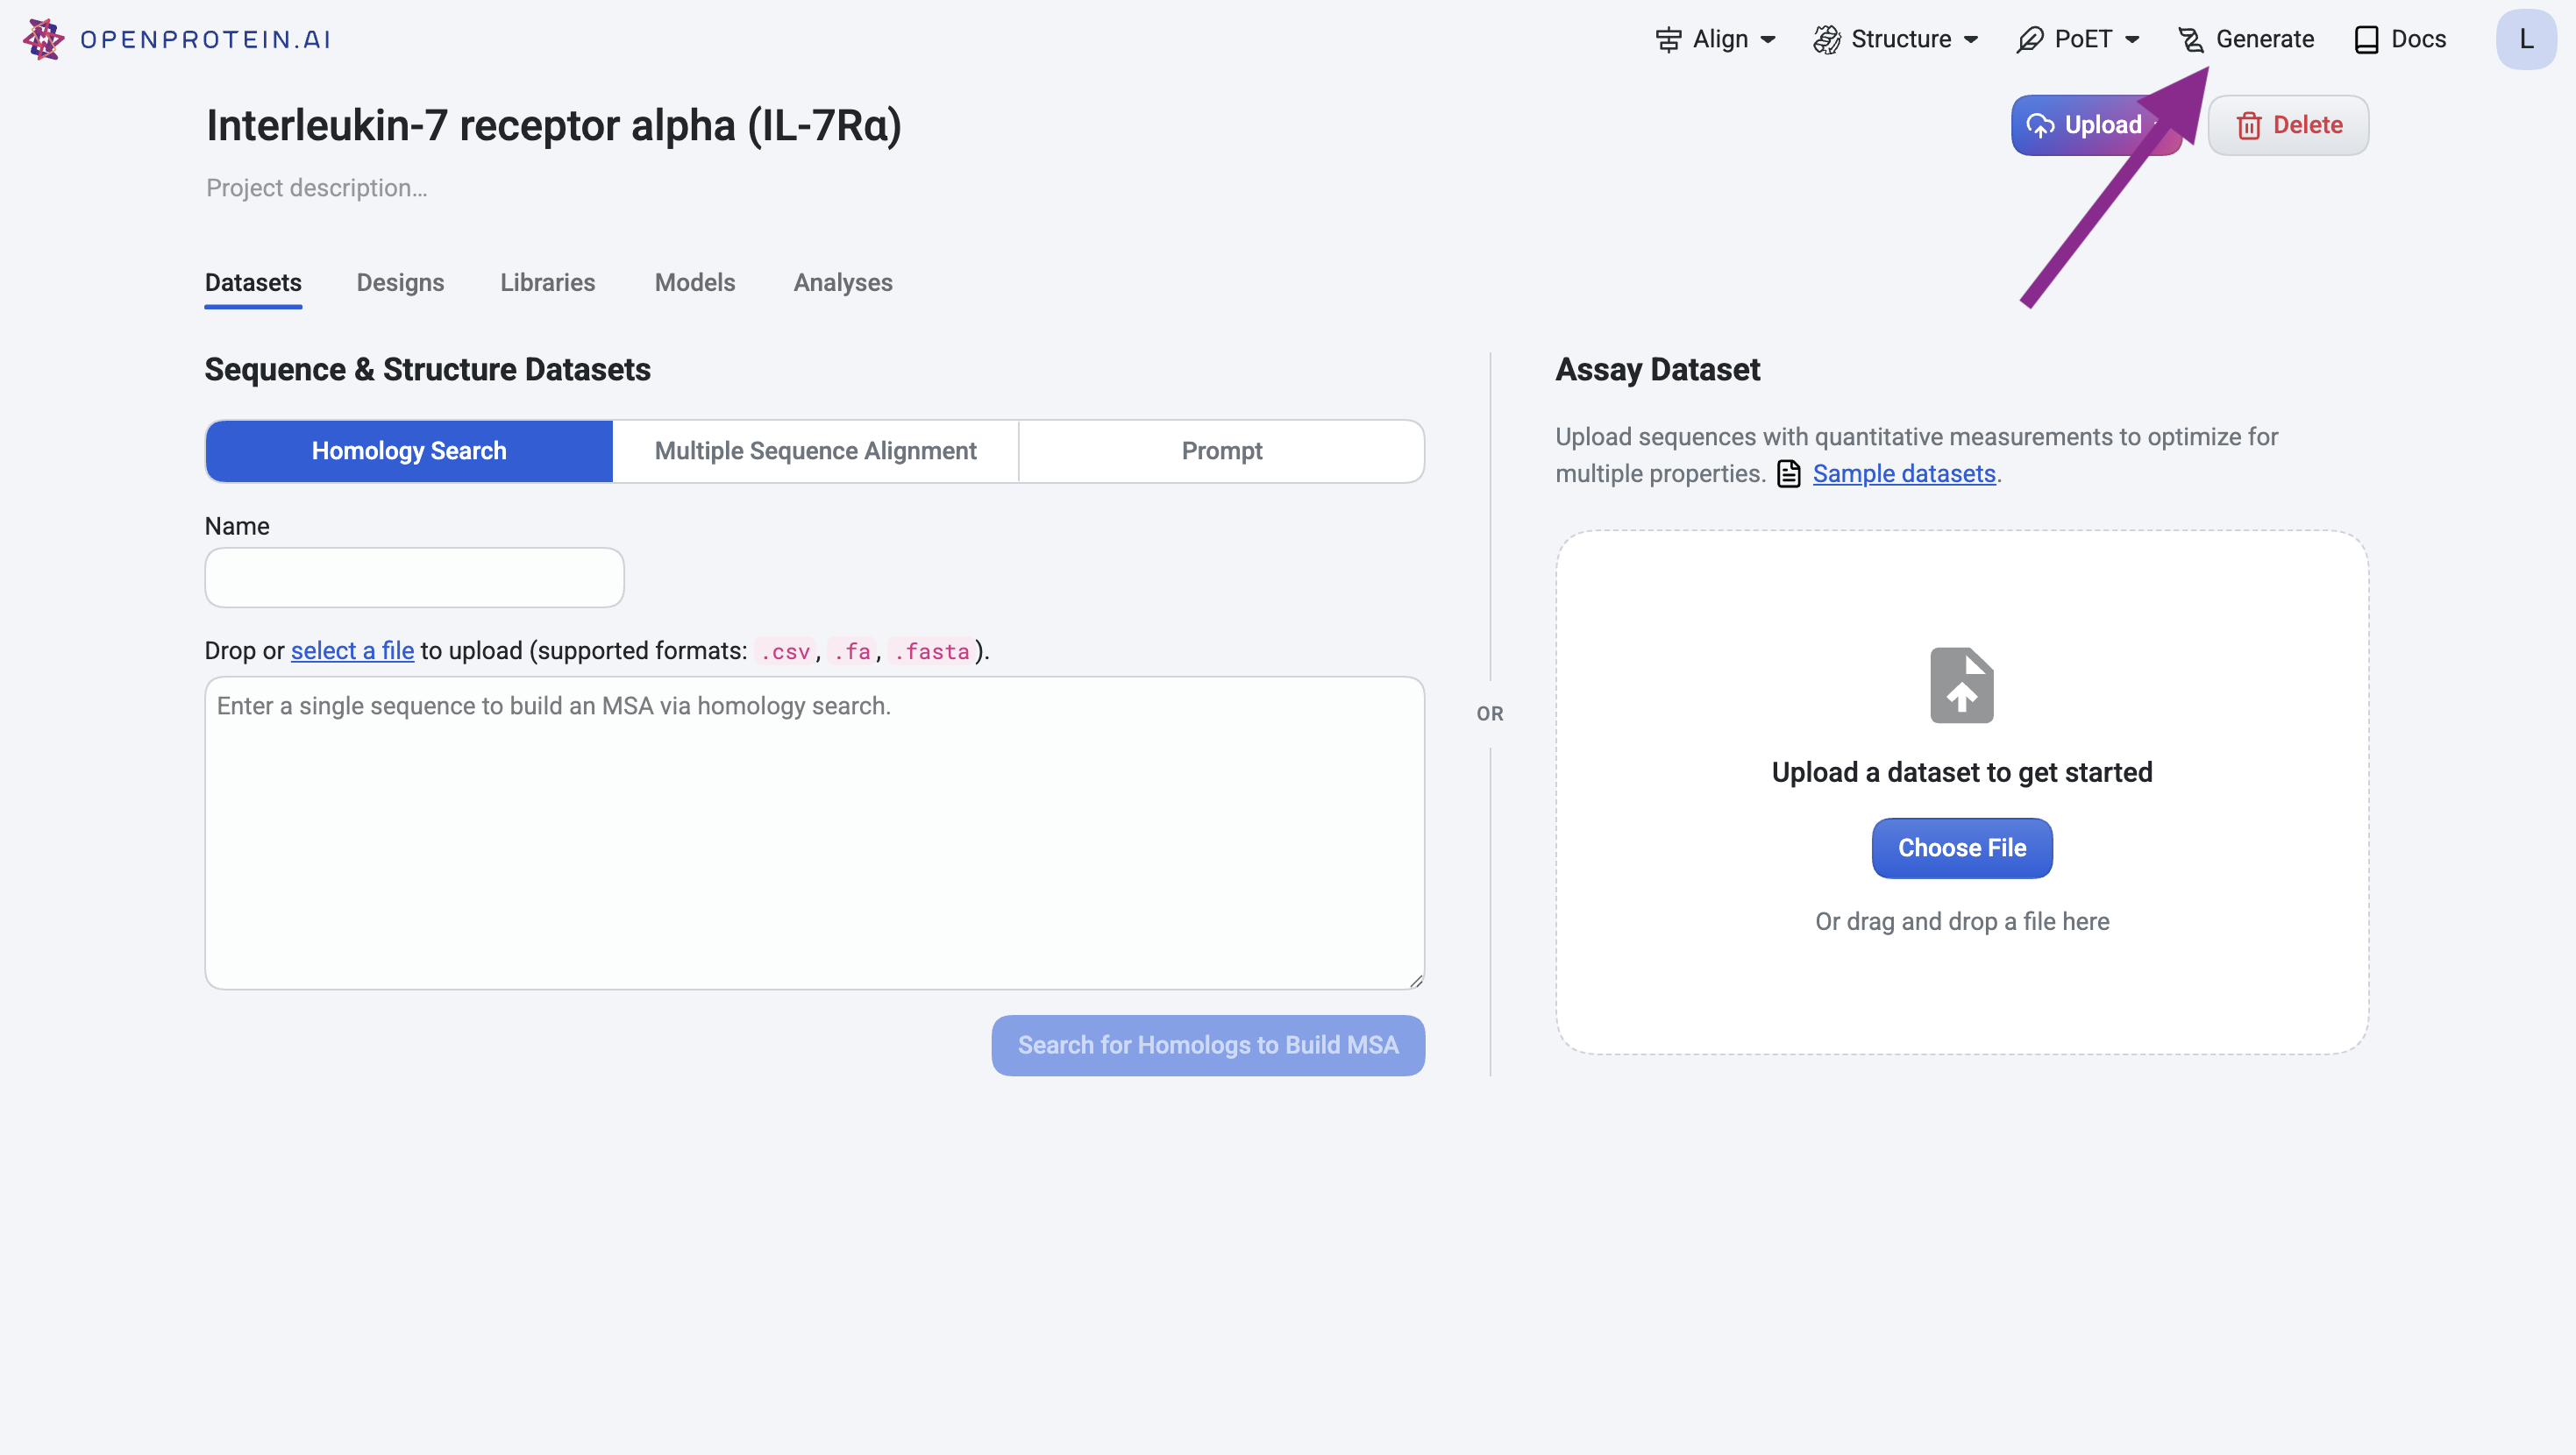
Step 1.1: Specify the target#
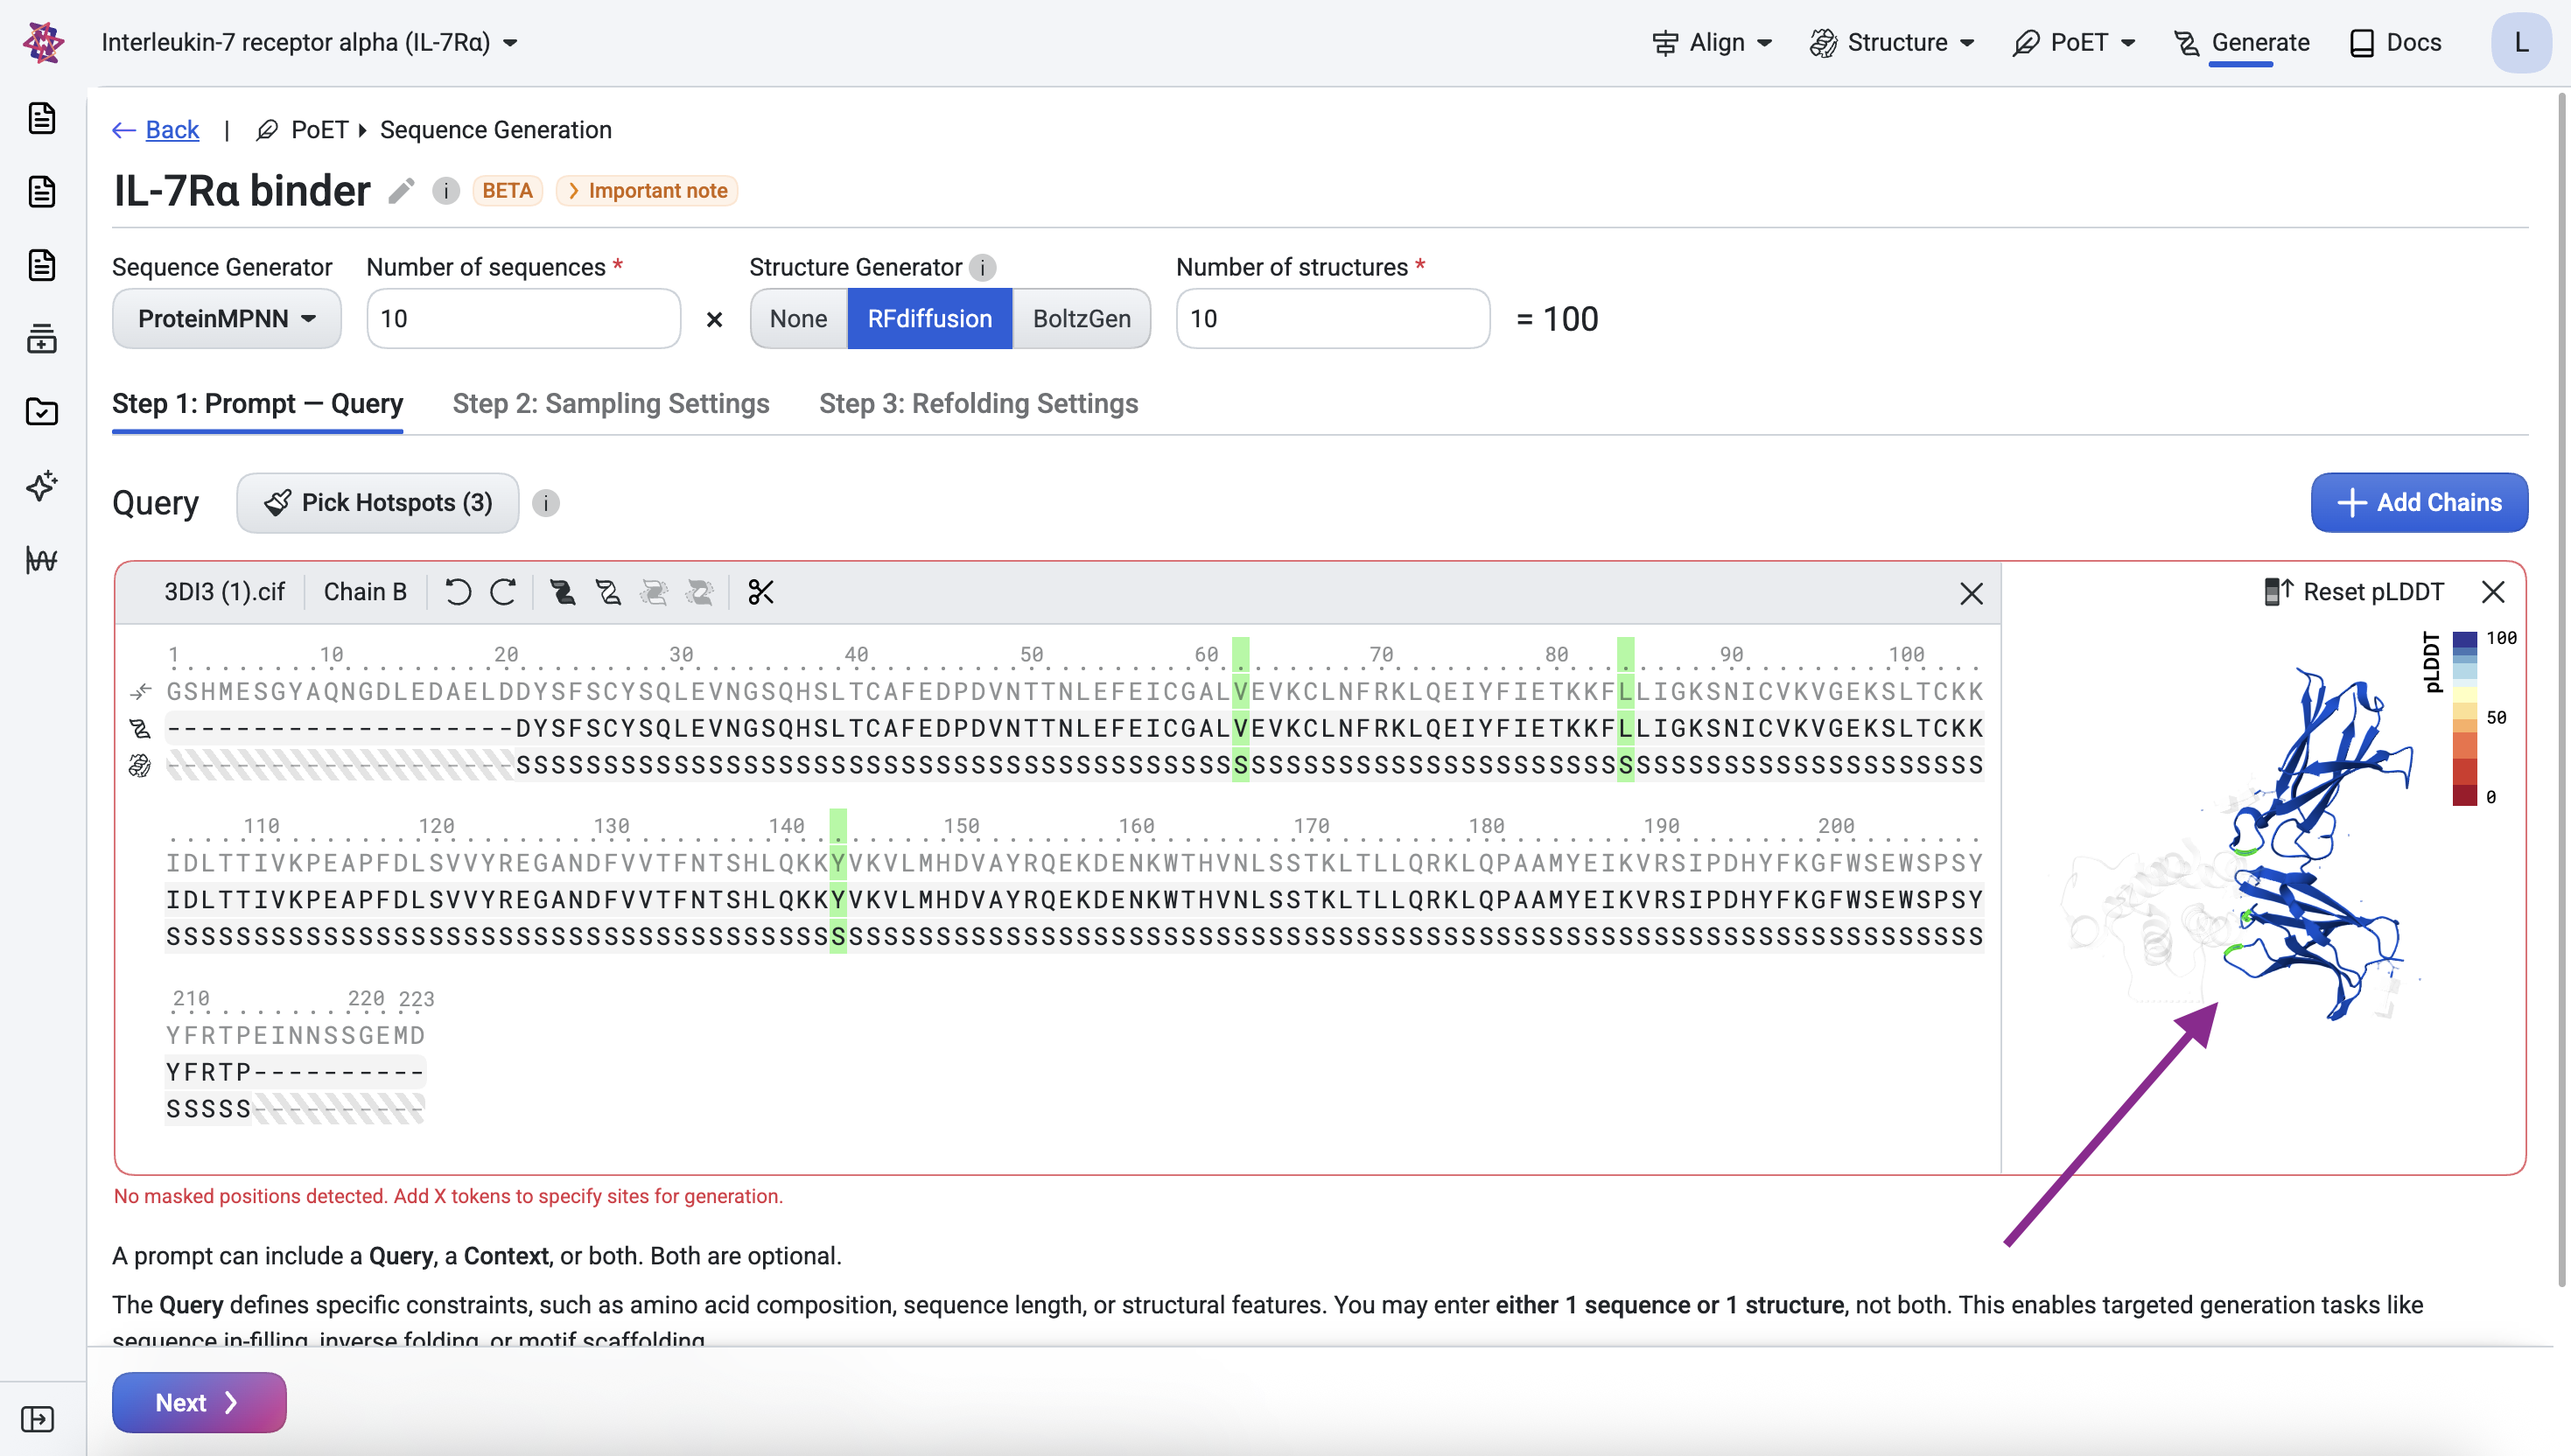
Navigate to the Generate tool.
For the IL-7Rα target, upload the structure from RCSB PDB entry 3DI3 as a CIF file. This entry contains multiple chains, since we only need the IL-7Rα target, remove chain A by clicking the × icon.
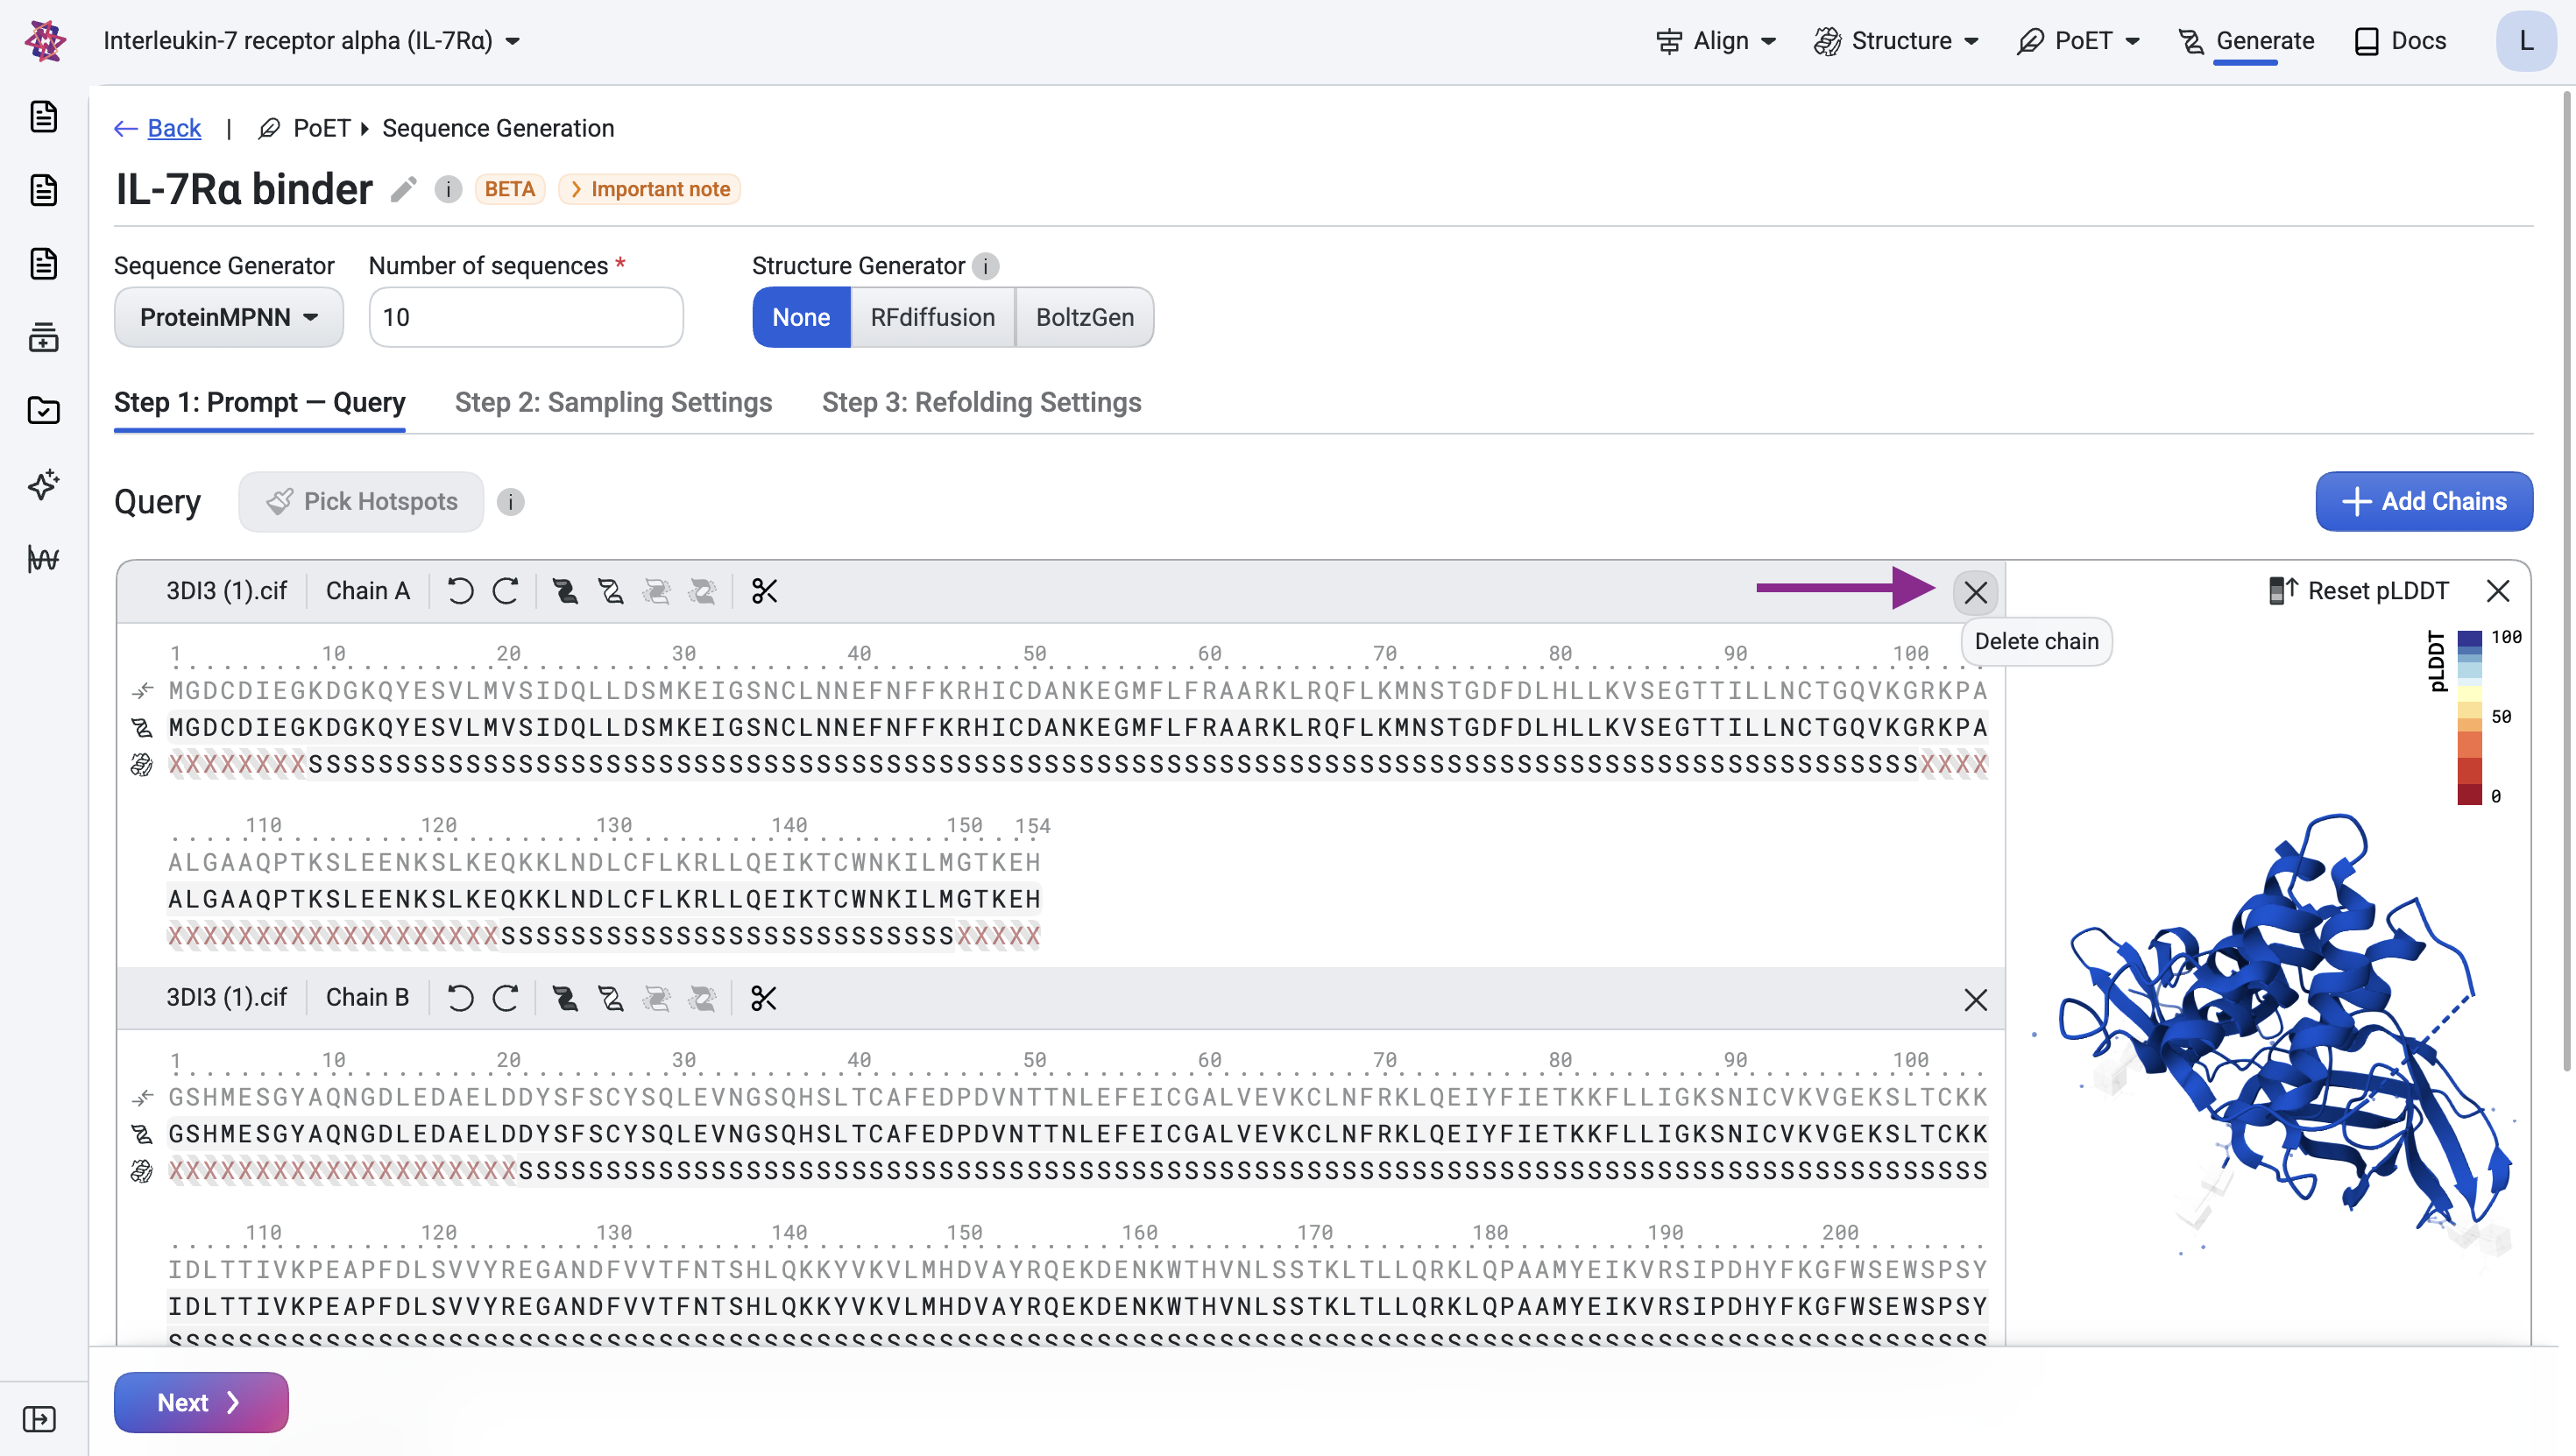
Note that although IL-7Rα has 223 residues, some have undefined structure, meaning the atomic coordinates for those positions are unknown.
Remove residues with undefined structure#
The visualization shows that several residues at the N- and C-termini have undefined structure. Remove them by clicking the scissors icon.

Step 1.2: Specify the epitope#
The epitope is the set of target residues we want the binder to bind to. We use residues 62, 84, and 143, following the RFdiffusion study.
To specify the epitope, click Pick Hotspots and select those positions. This tells the model which target residues should form the binding interface with the designed binder chain.
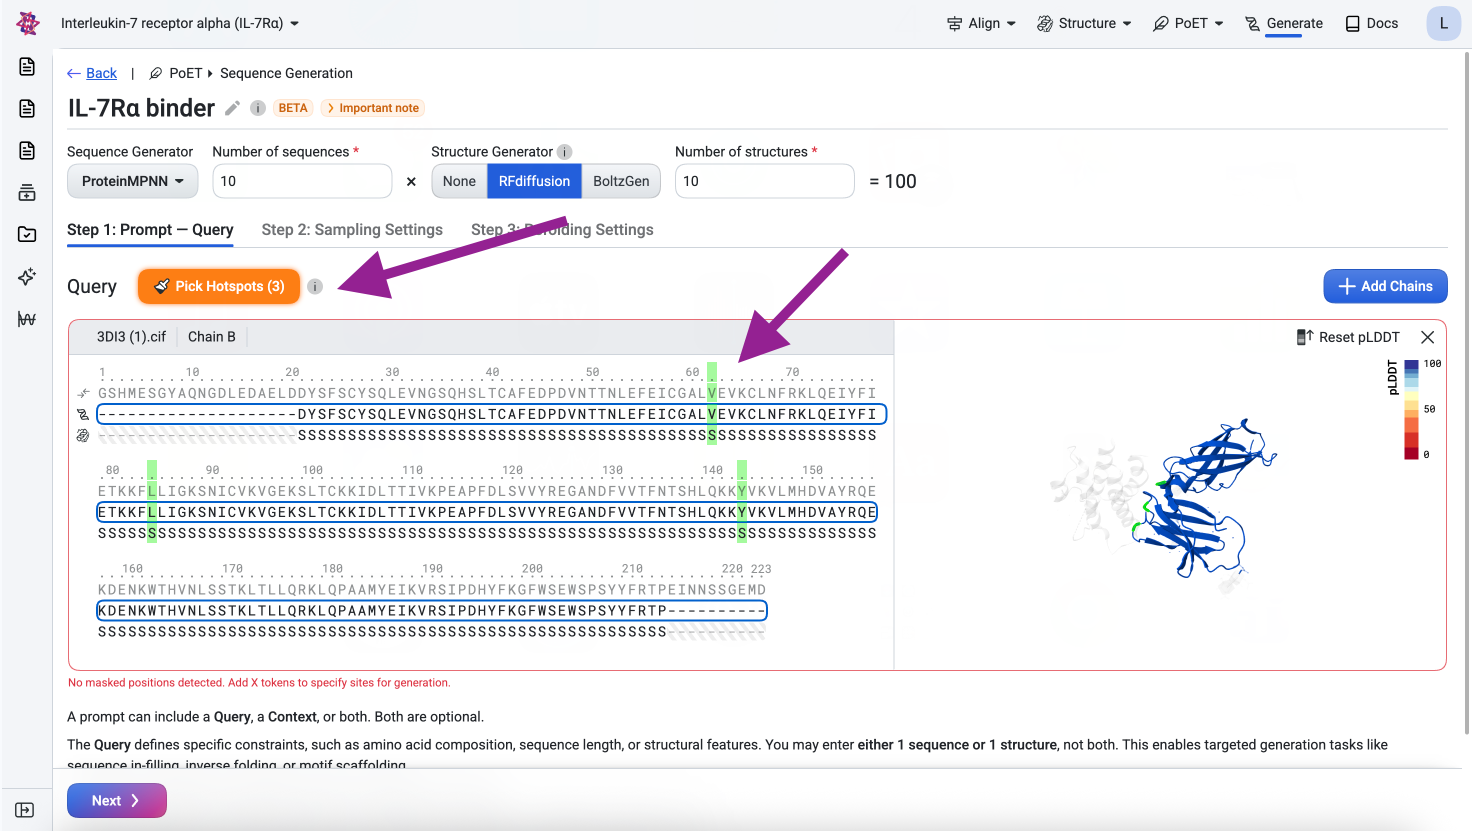
Visualize#
Before submitting, confirm the query looks correct in the structure viewer. The visualization should show the IL-7Rα structure with the three epitope residues highlighted across their respective loop regions.
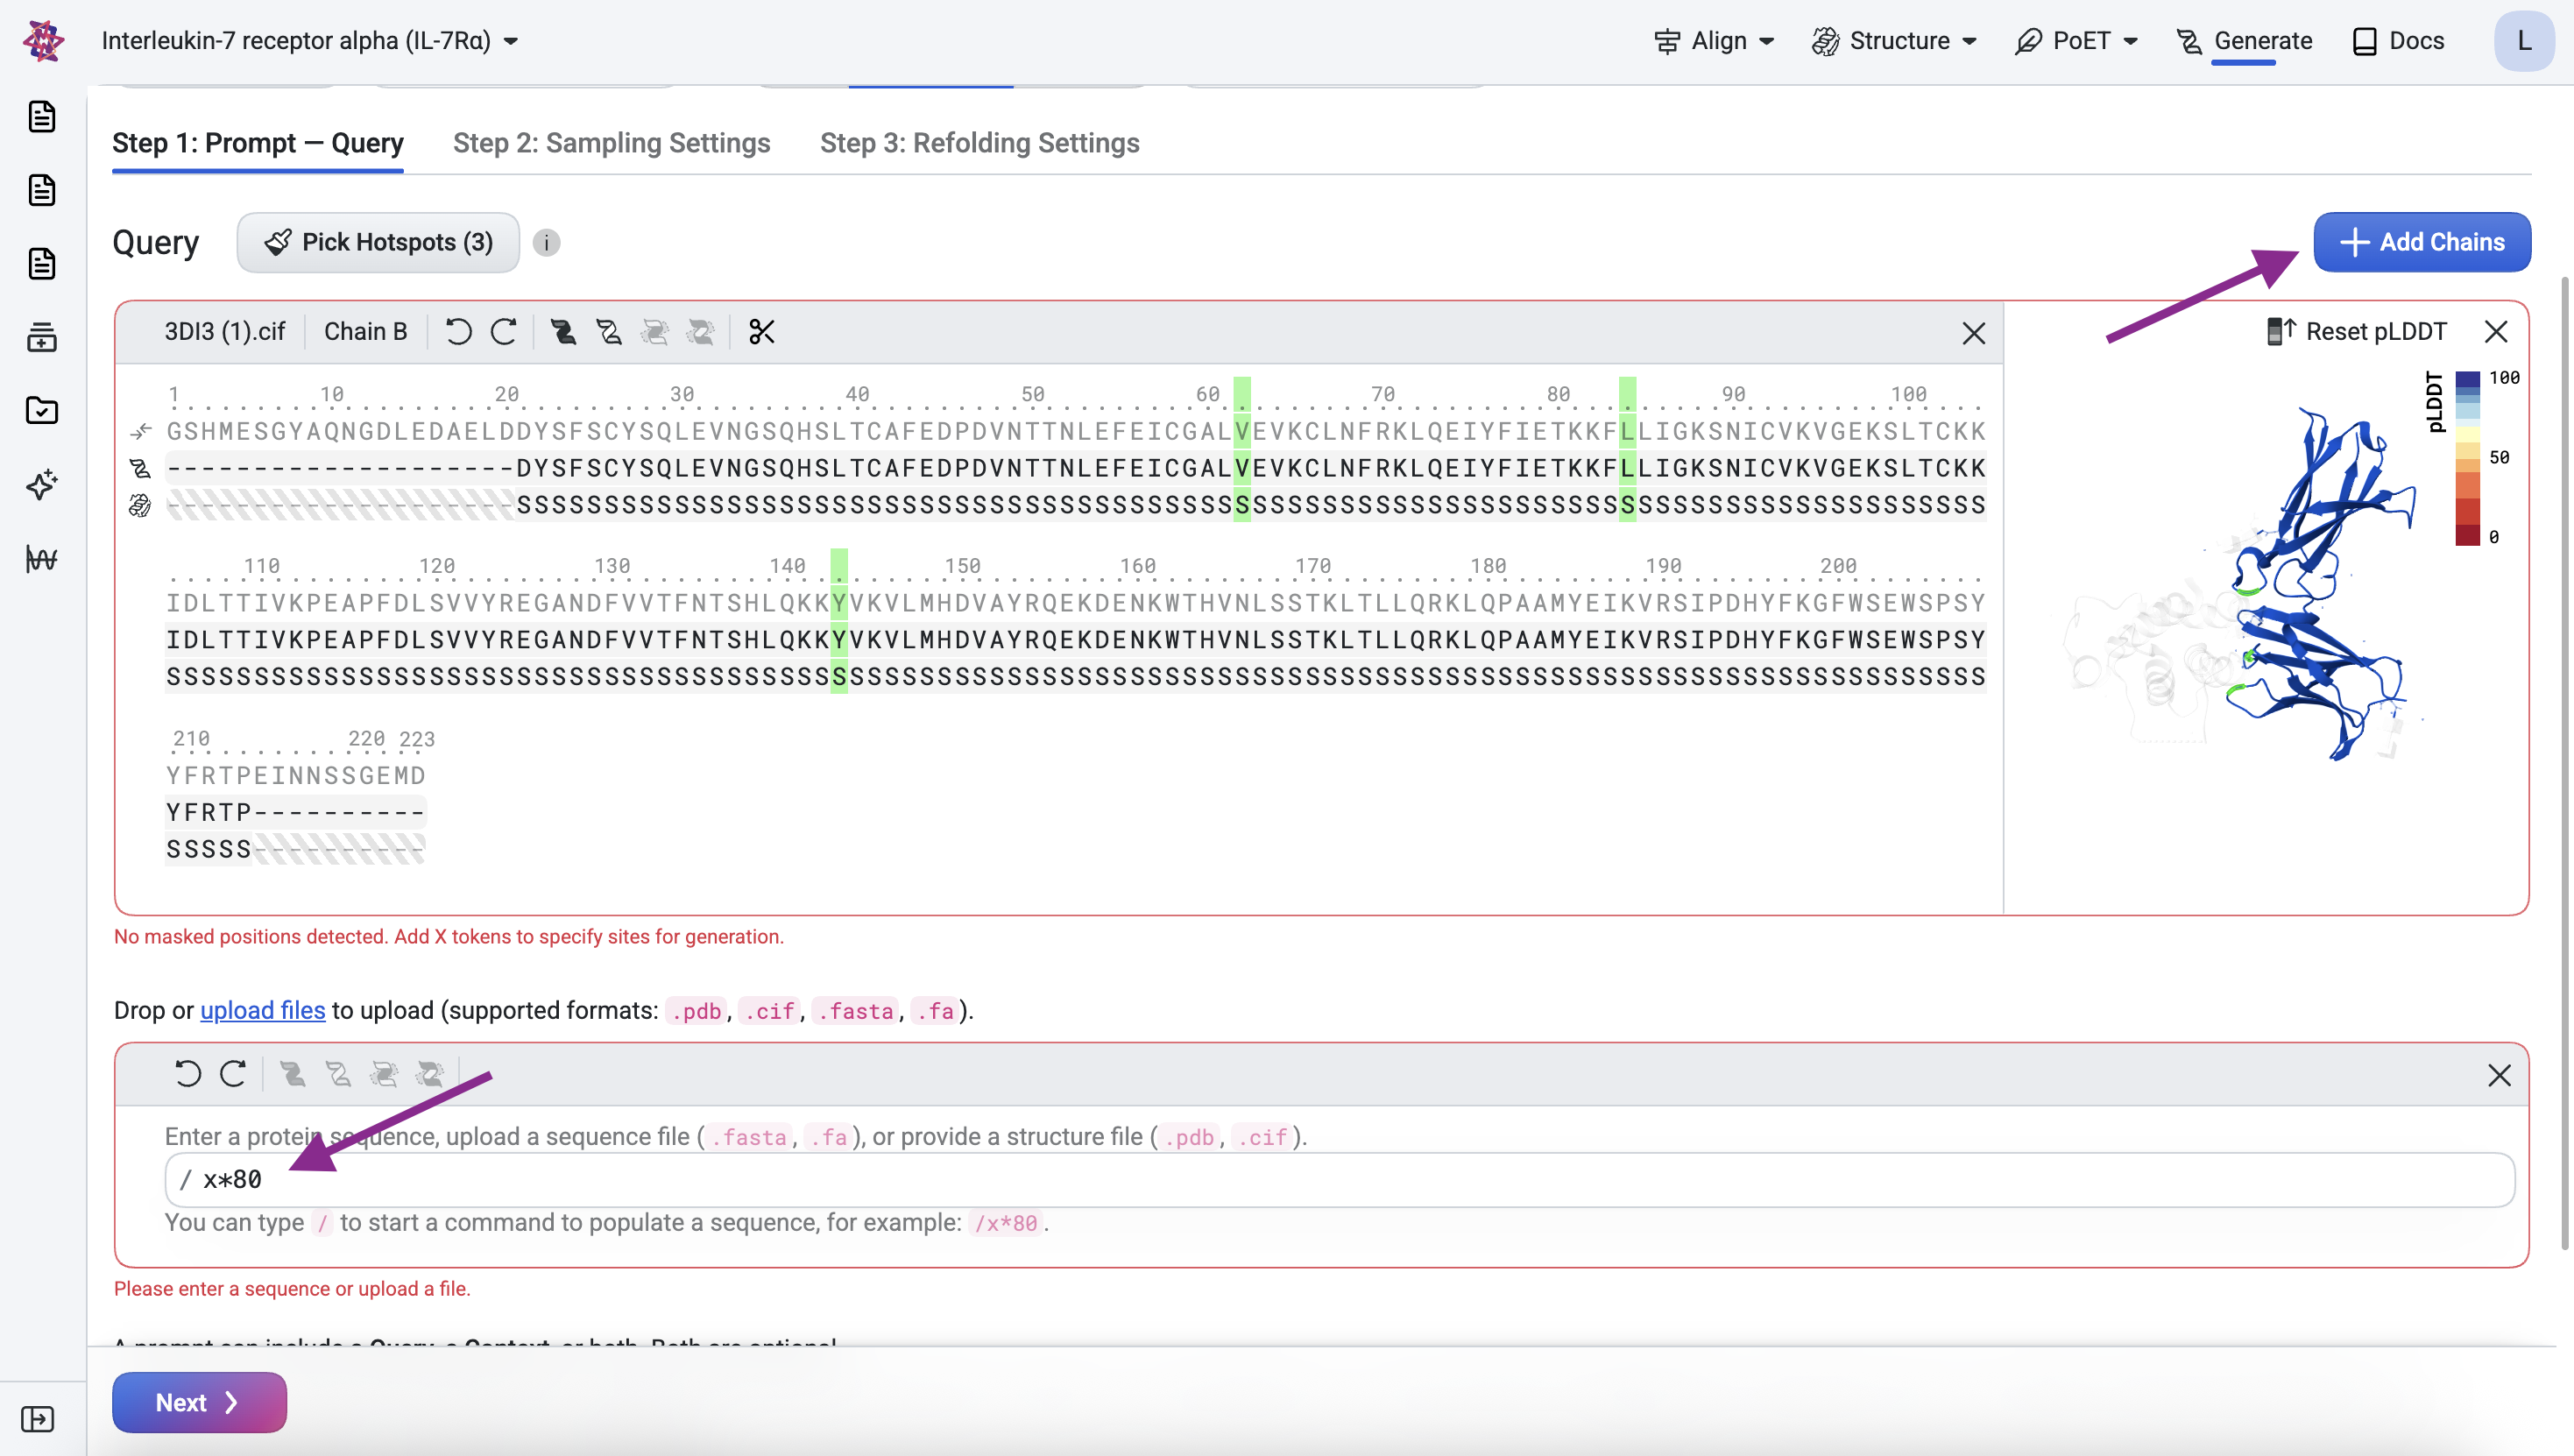
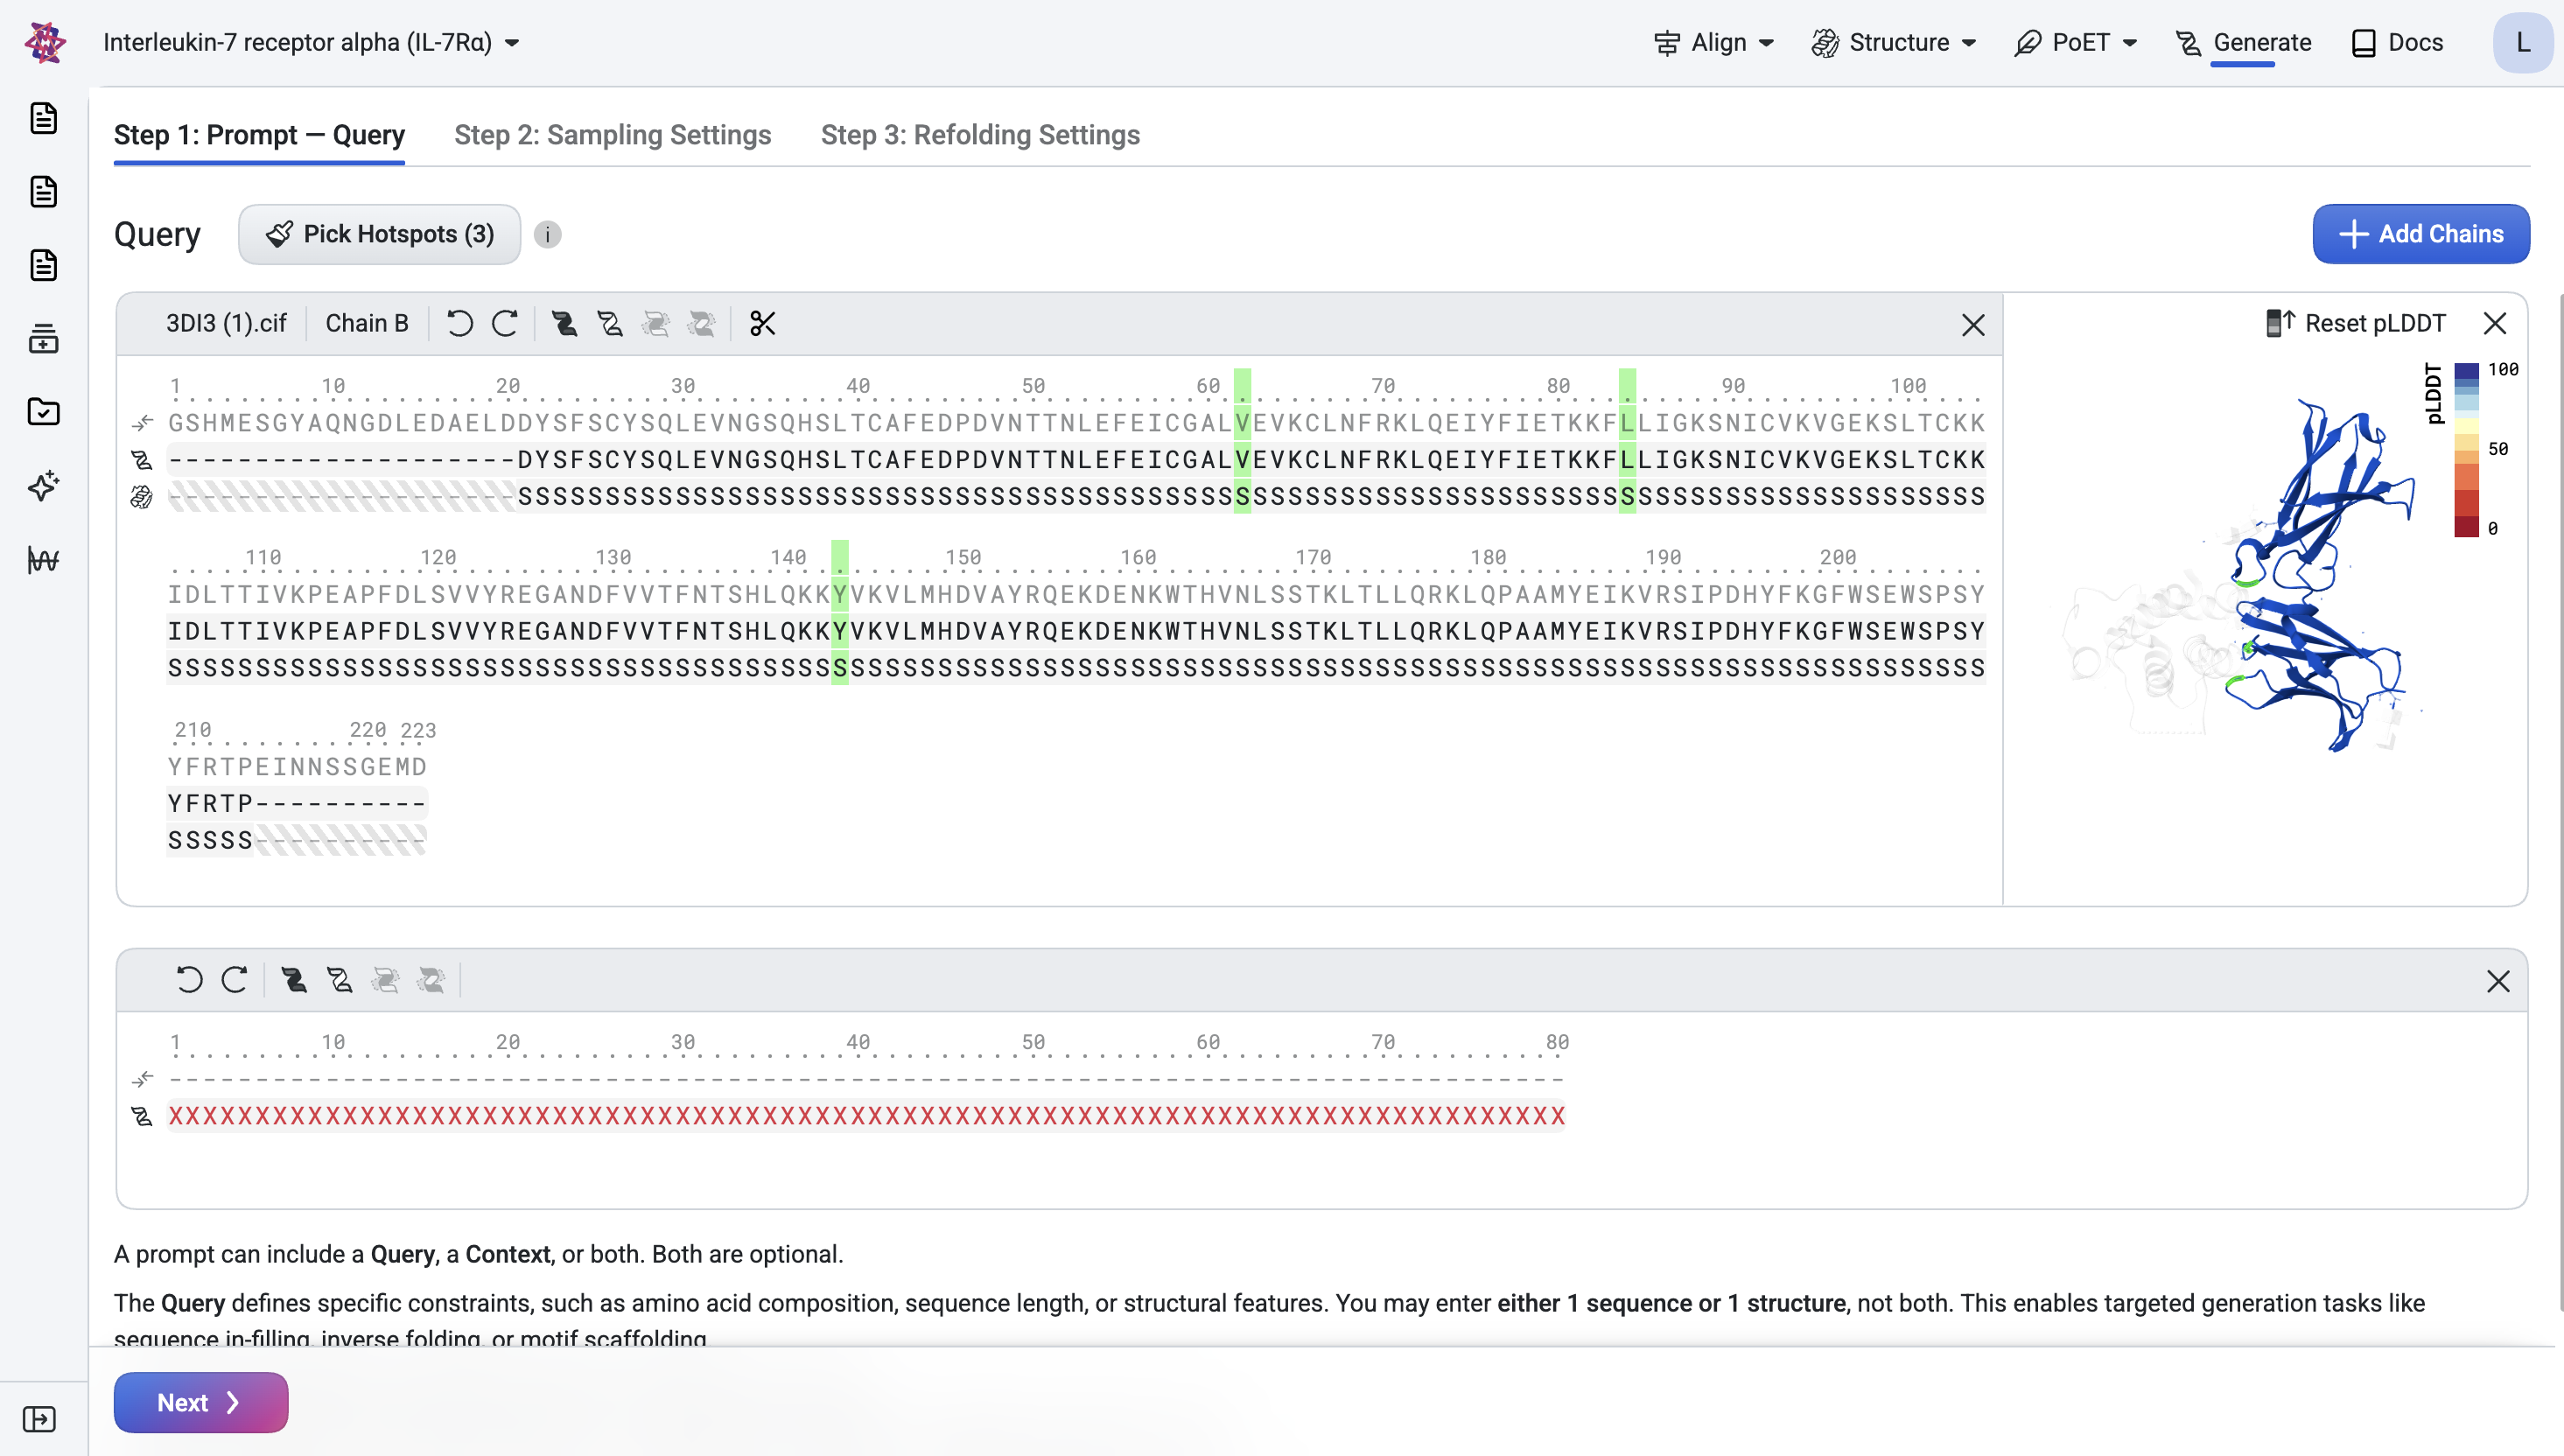
Step 1.3: Specify the binder#
Click Add Chain, enter the formula /x*80, and press Enter to add a binder chain of
80 masked residues with undefined structure.
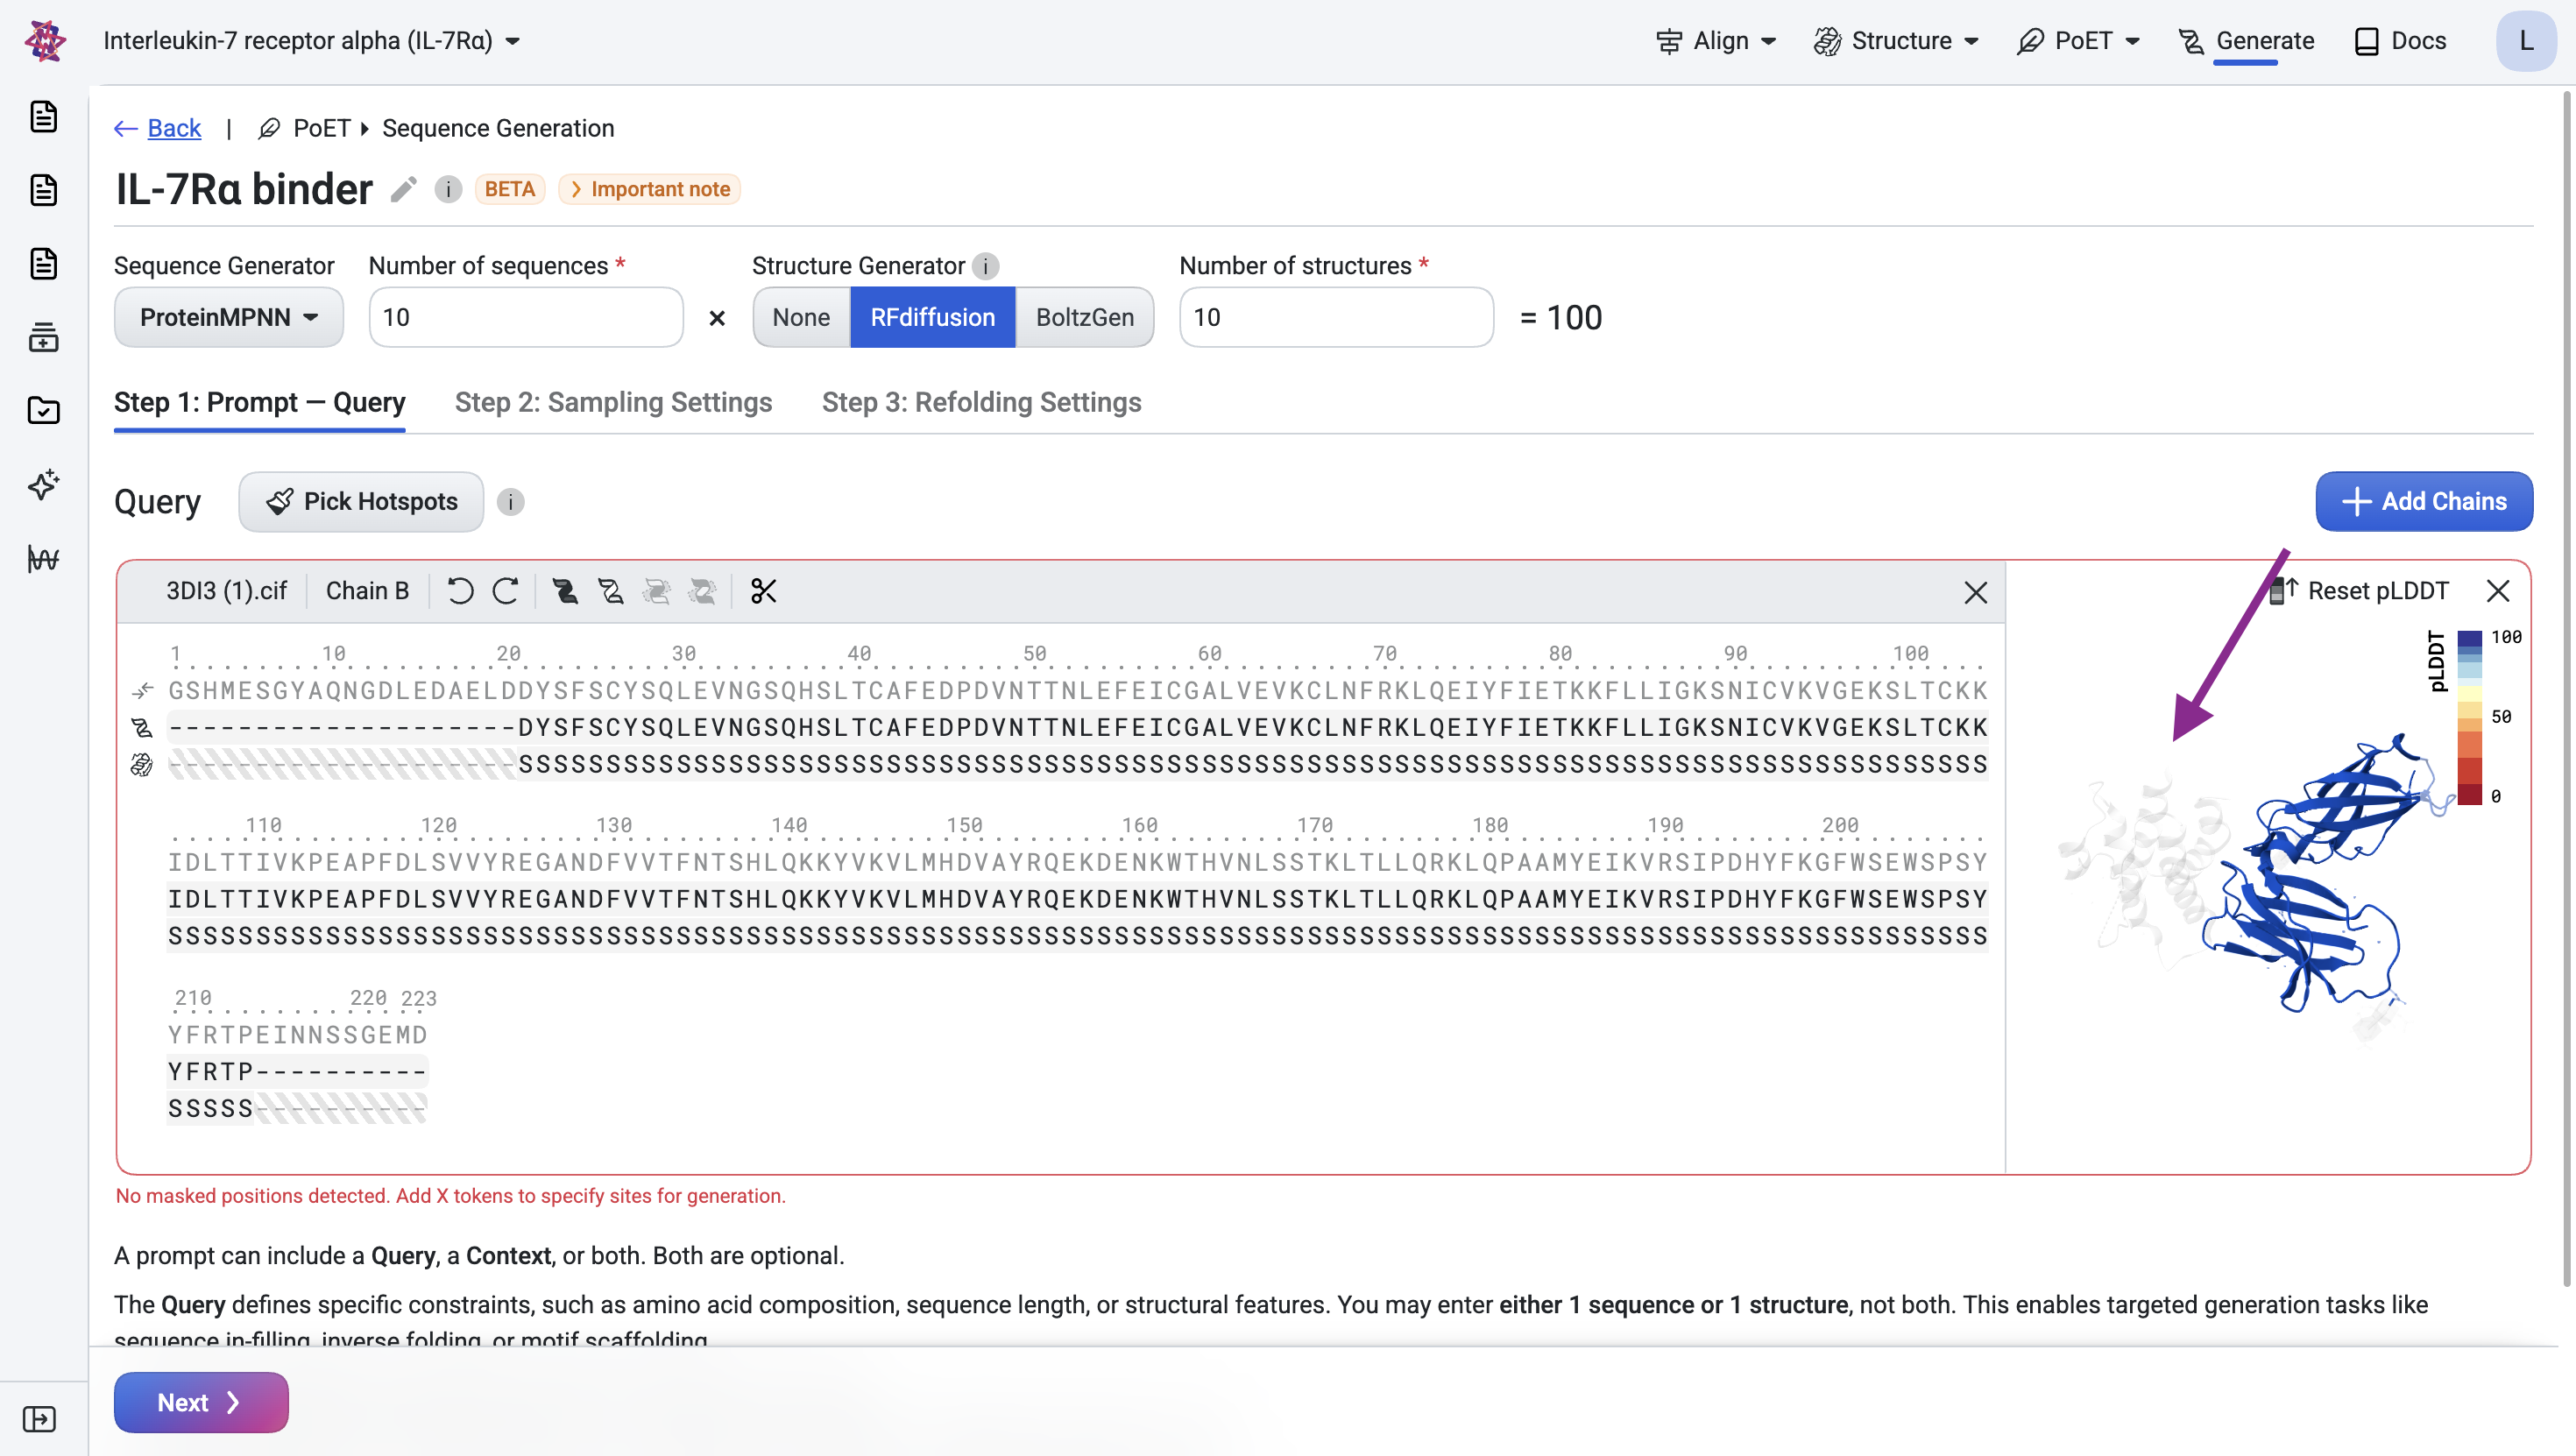
Step 2: Structure Generation#
Generate plausible structures for the binder
In this step, we sample plausible 3D backbones for the binder that geometrically complement the target.
Generate structures with RFdiffusion#
Select RFdiffusion as the structure generator.
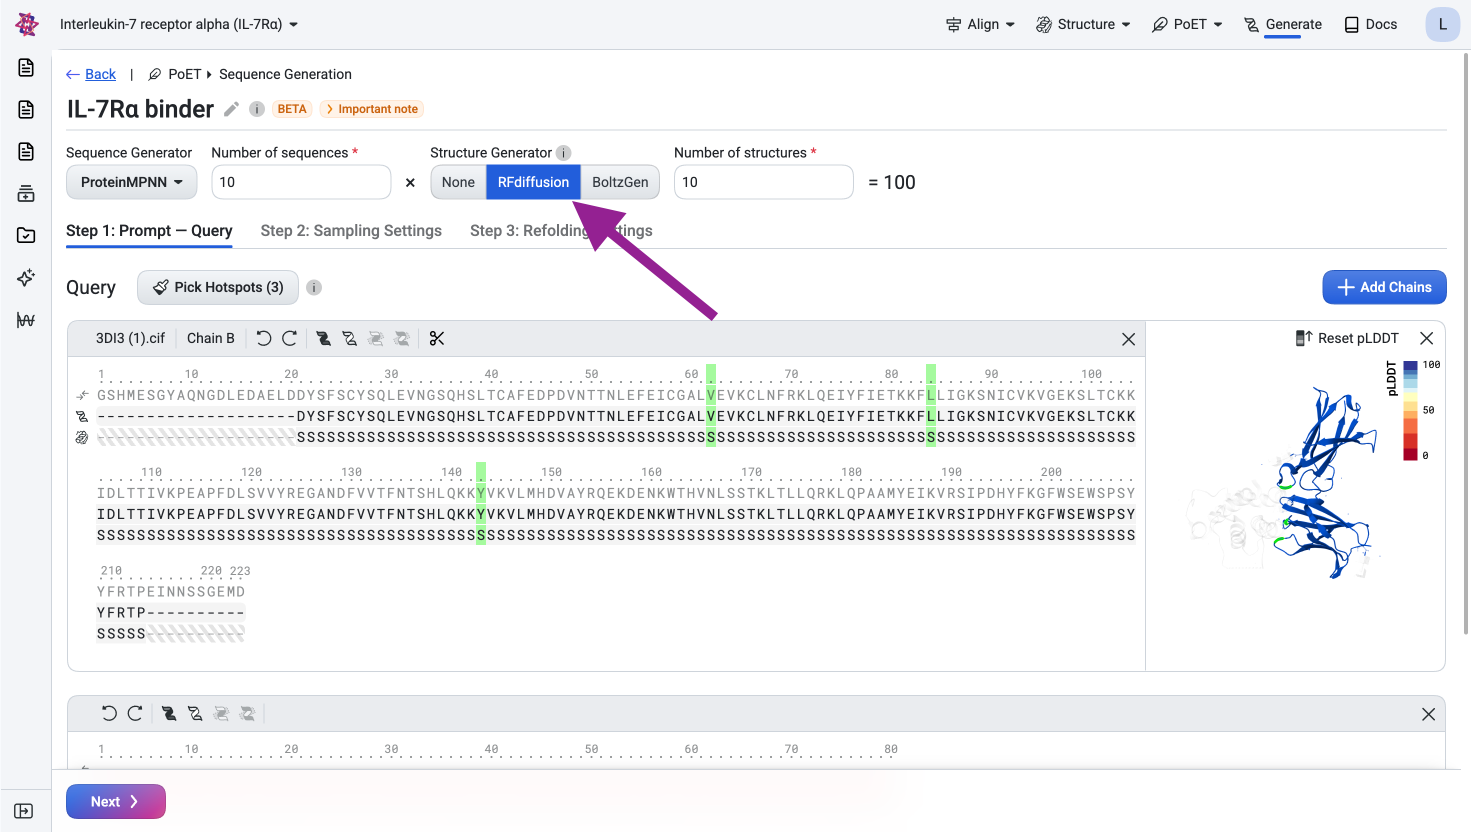
Visualize the generated structures#
Inspect the generated structures in the viewer to verify that the binder is positioned at the specified epitope and has the correct length.
Step 3: Sequence Design#
Design sequences for the binder
For each generated backbone structure, we use an inverse folding model to design multiple candidate sequences, increasing the chance that at least one folds into the desired structure.
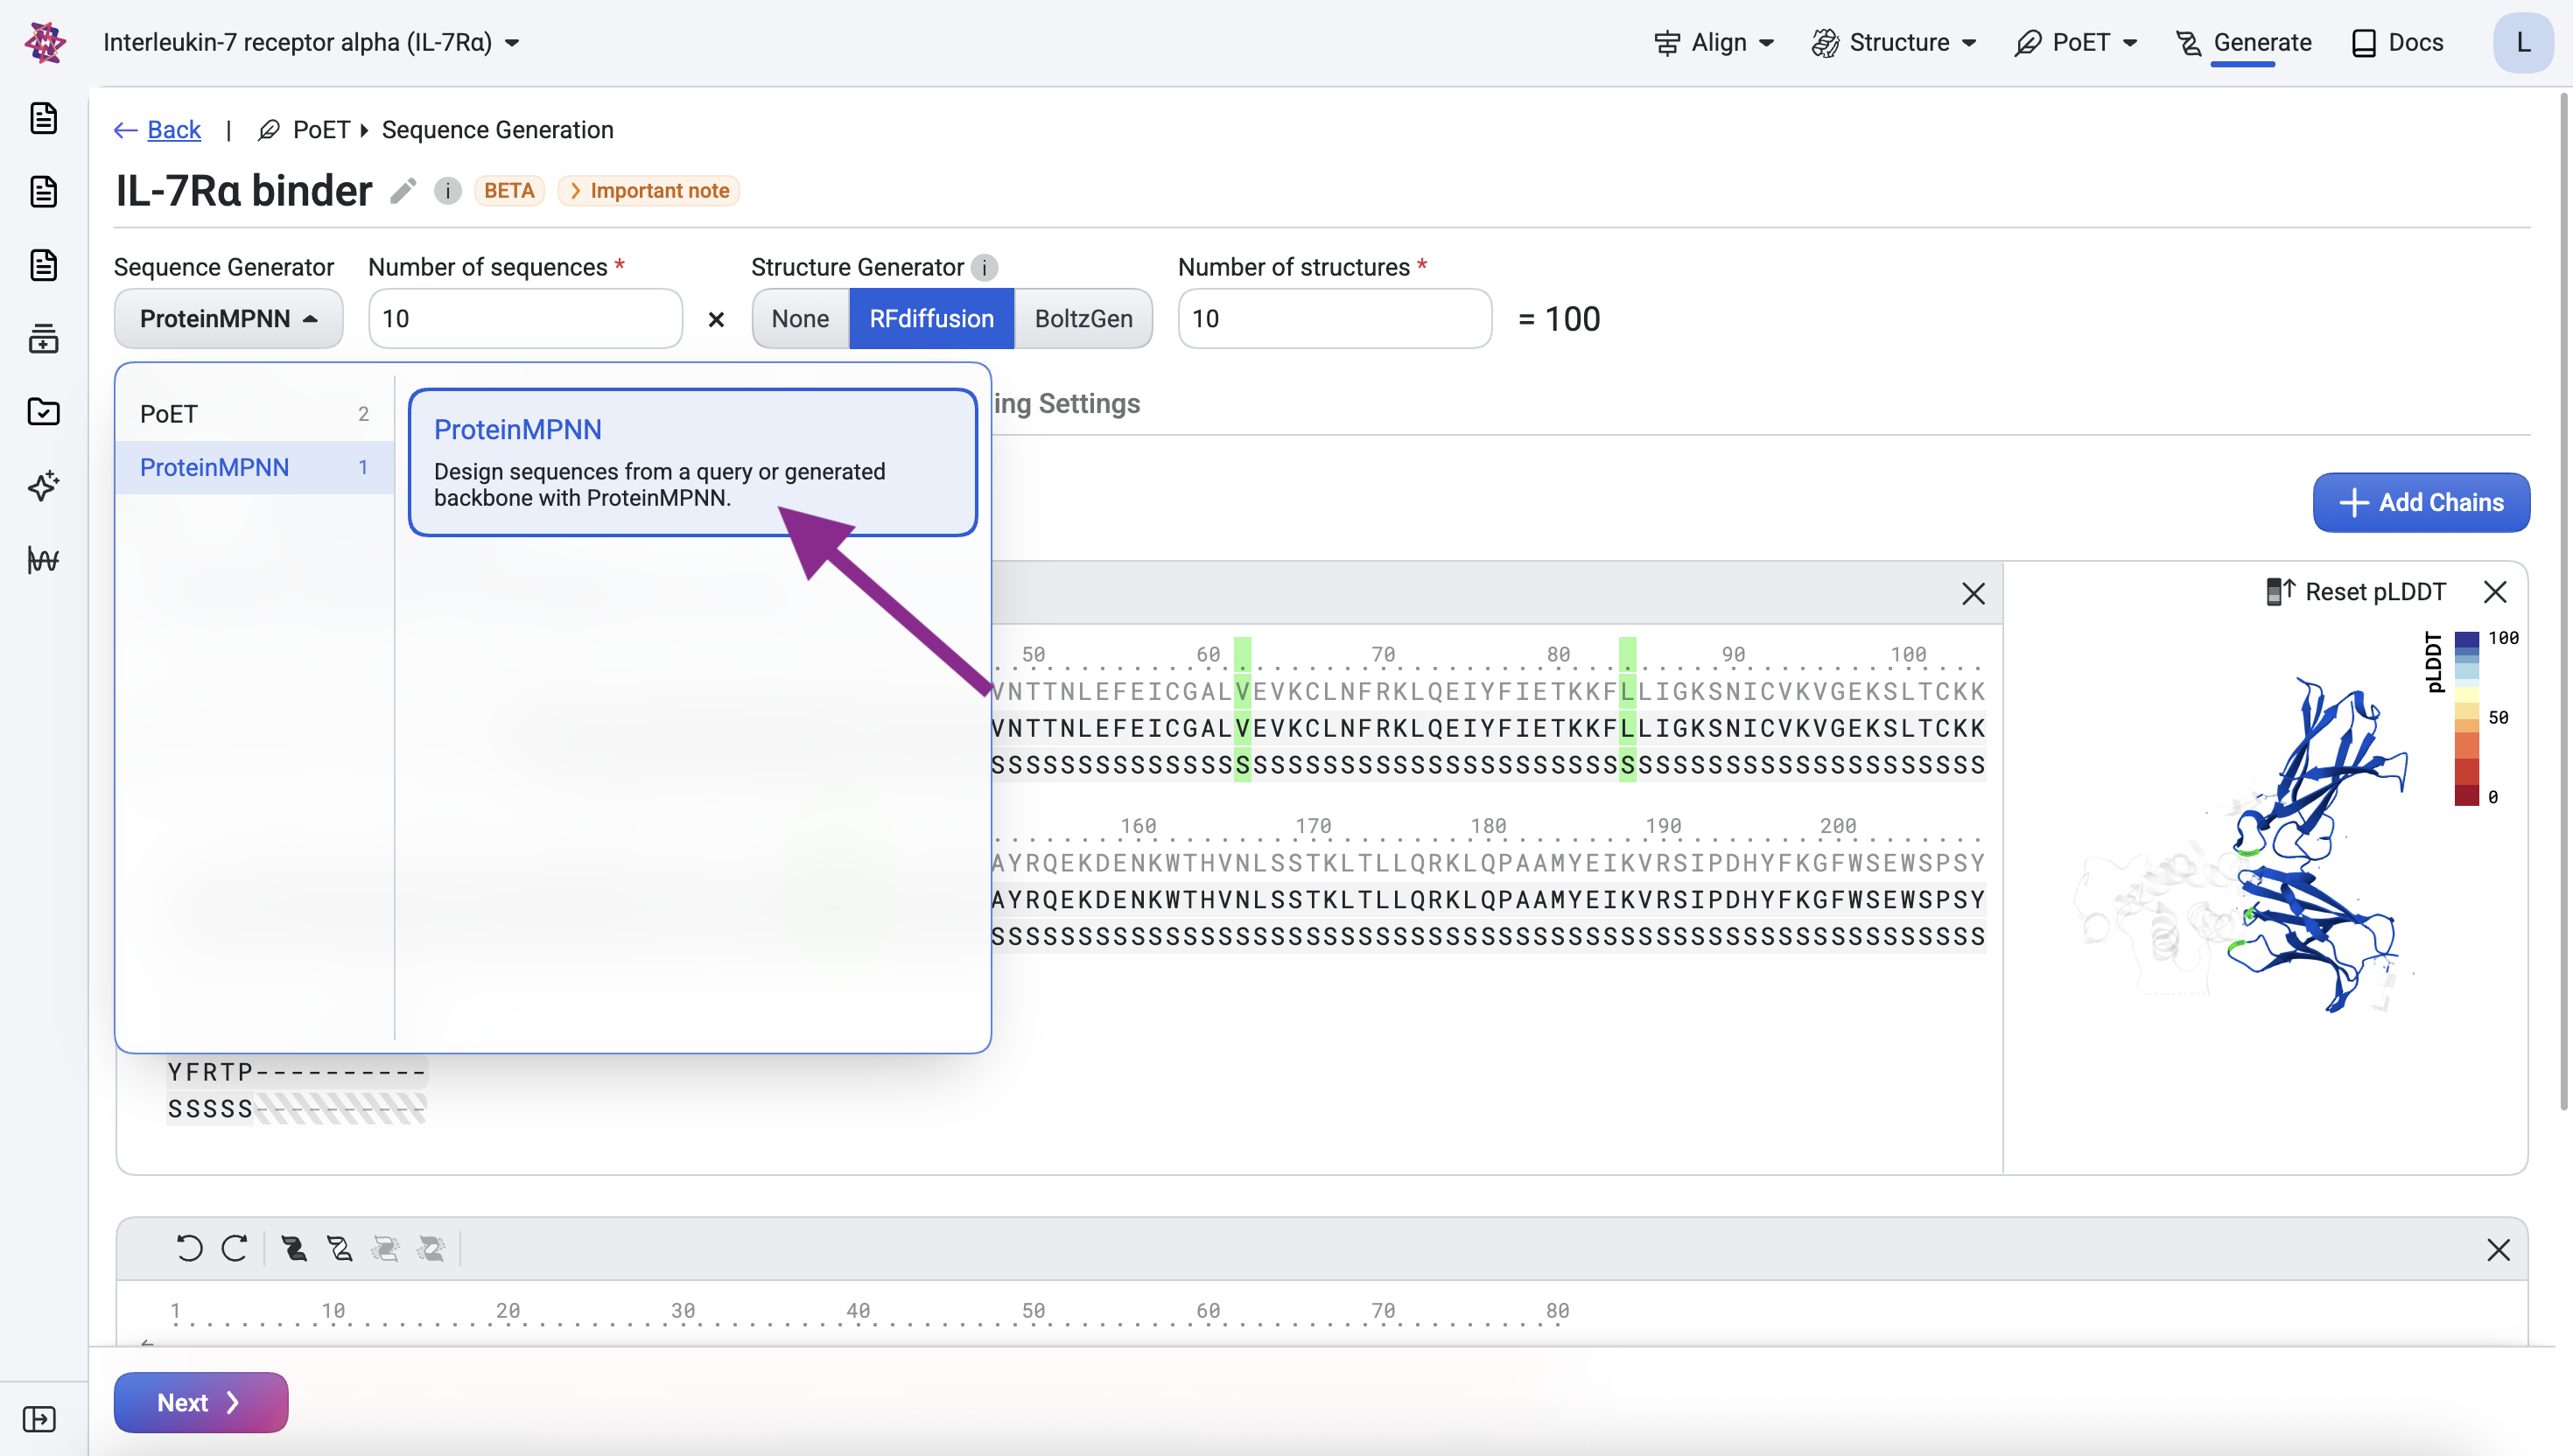
Design sequences with ProteinMPNN#
Select ProteinMPNN as the sequence generator. In the results, the target sequence should be identical to the original, redesigning the target is not intended. The binder sequences should be novel rather than fully masked (all X).
Step 4: In Silico Validation#
Validate, filter, and select designs using structure prediction
We validate our designs by predicting the structure of each designed sequence, with two goals: filtering for sequences likely to adopt the desired structure, and selecting promising candidates for experimental evaluation based on predicted structure metrics shown to correlate with expression and binding across previously engineered binders.
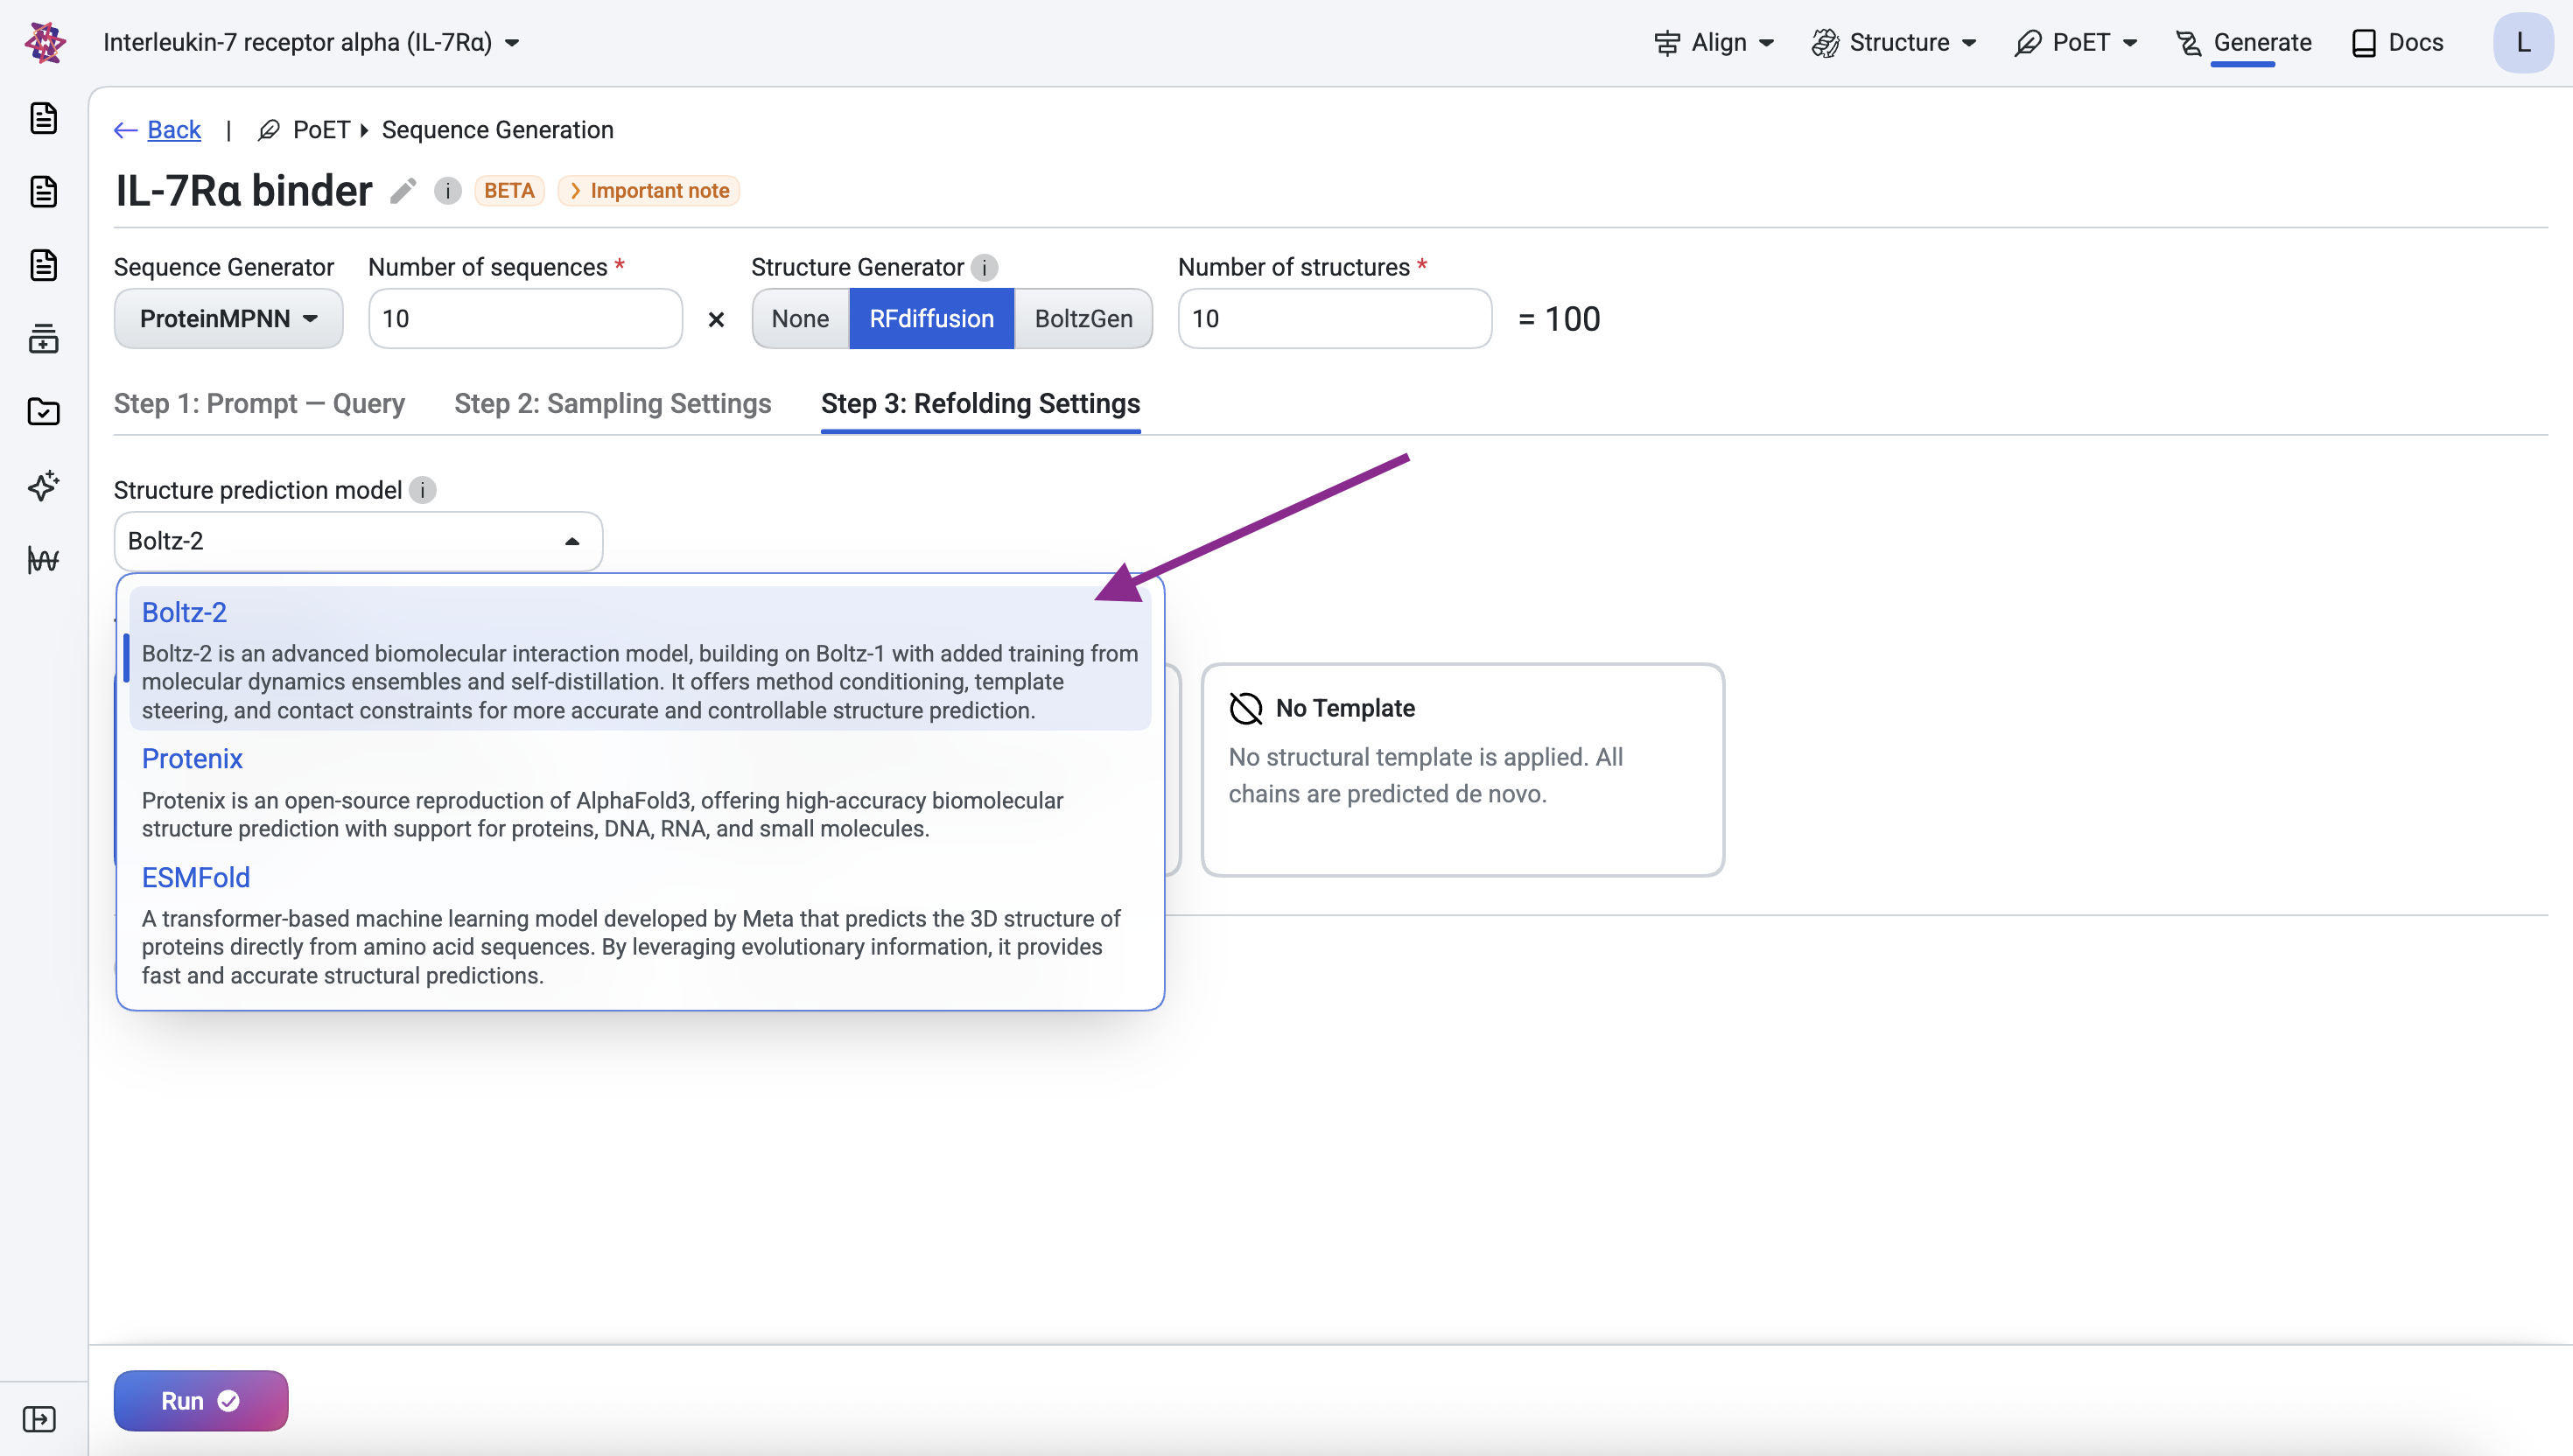
Predict structures with Boltz-2#
We validate our designs by predicting their structures with Boltz-2 (Passaro et al., 2025).
For each design, we predict the full target-binder complex and check it for consistency with the original designed structure and binding interface. Since the target structure is known but the binder’s is not, we run prediction in single sequence mode, meaning no multiple sequence alignment is used for the binder. This keeps screening tractable when evaluating large numbers of designs, as homology search would otherwise become a bottleneck.
To begin, navigate to Step 3: Refolding Settings and select Boltz-2.
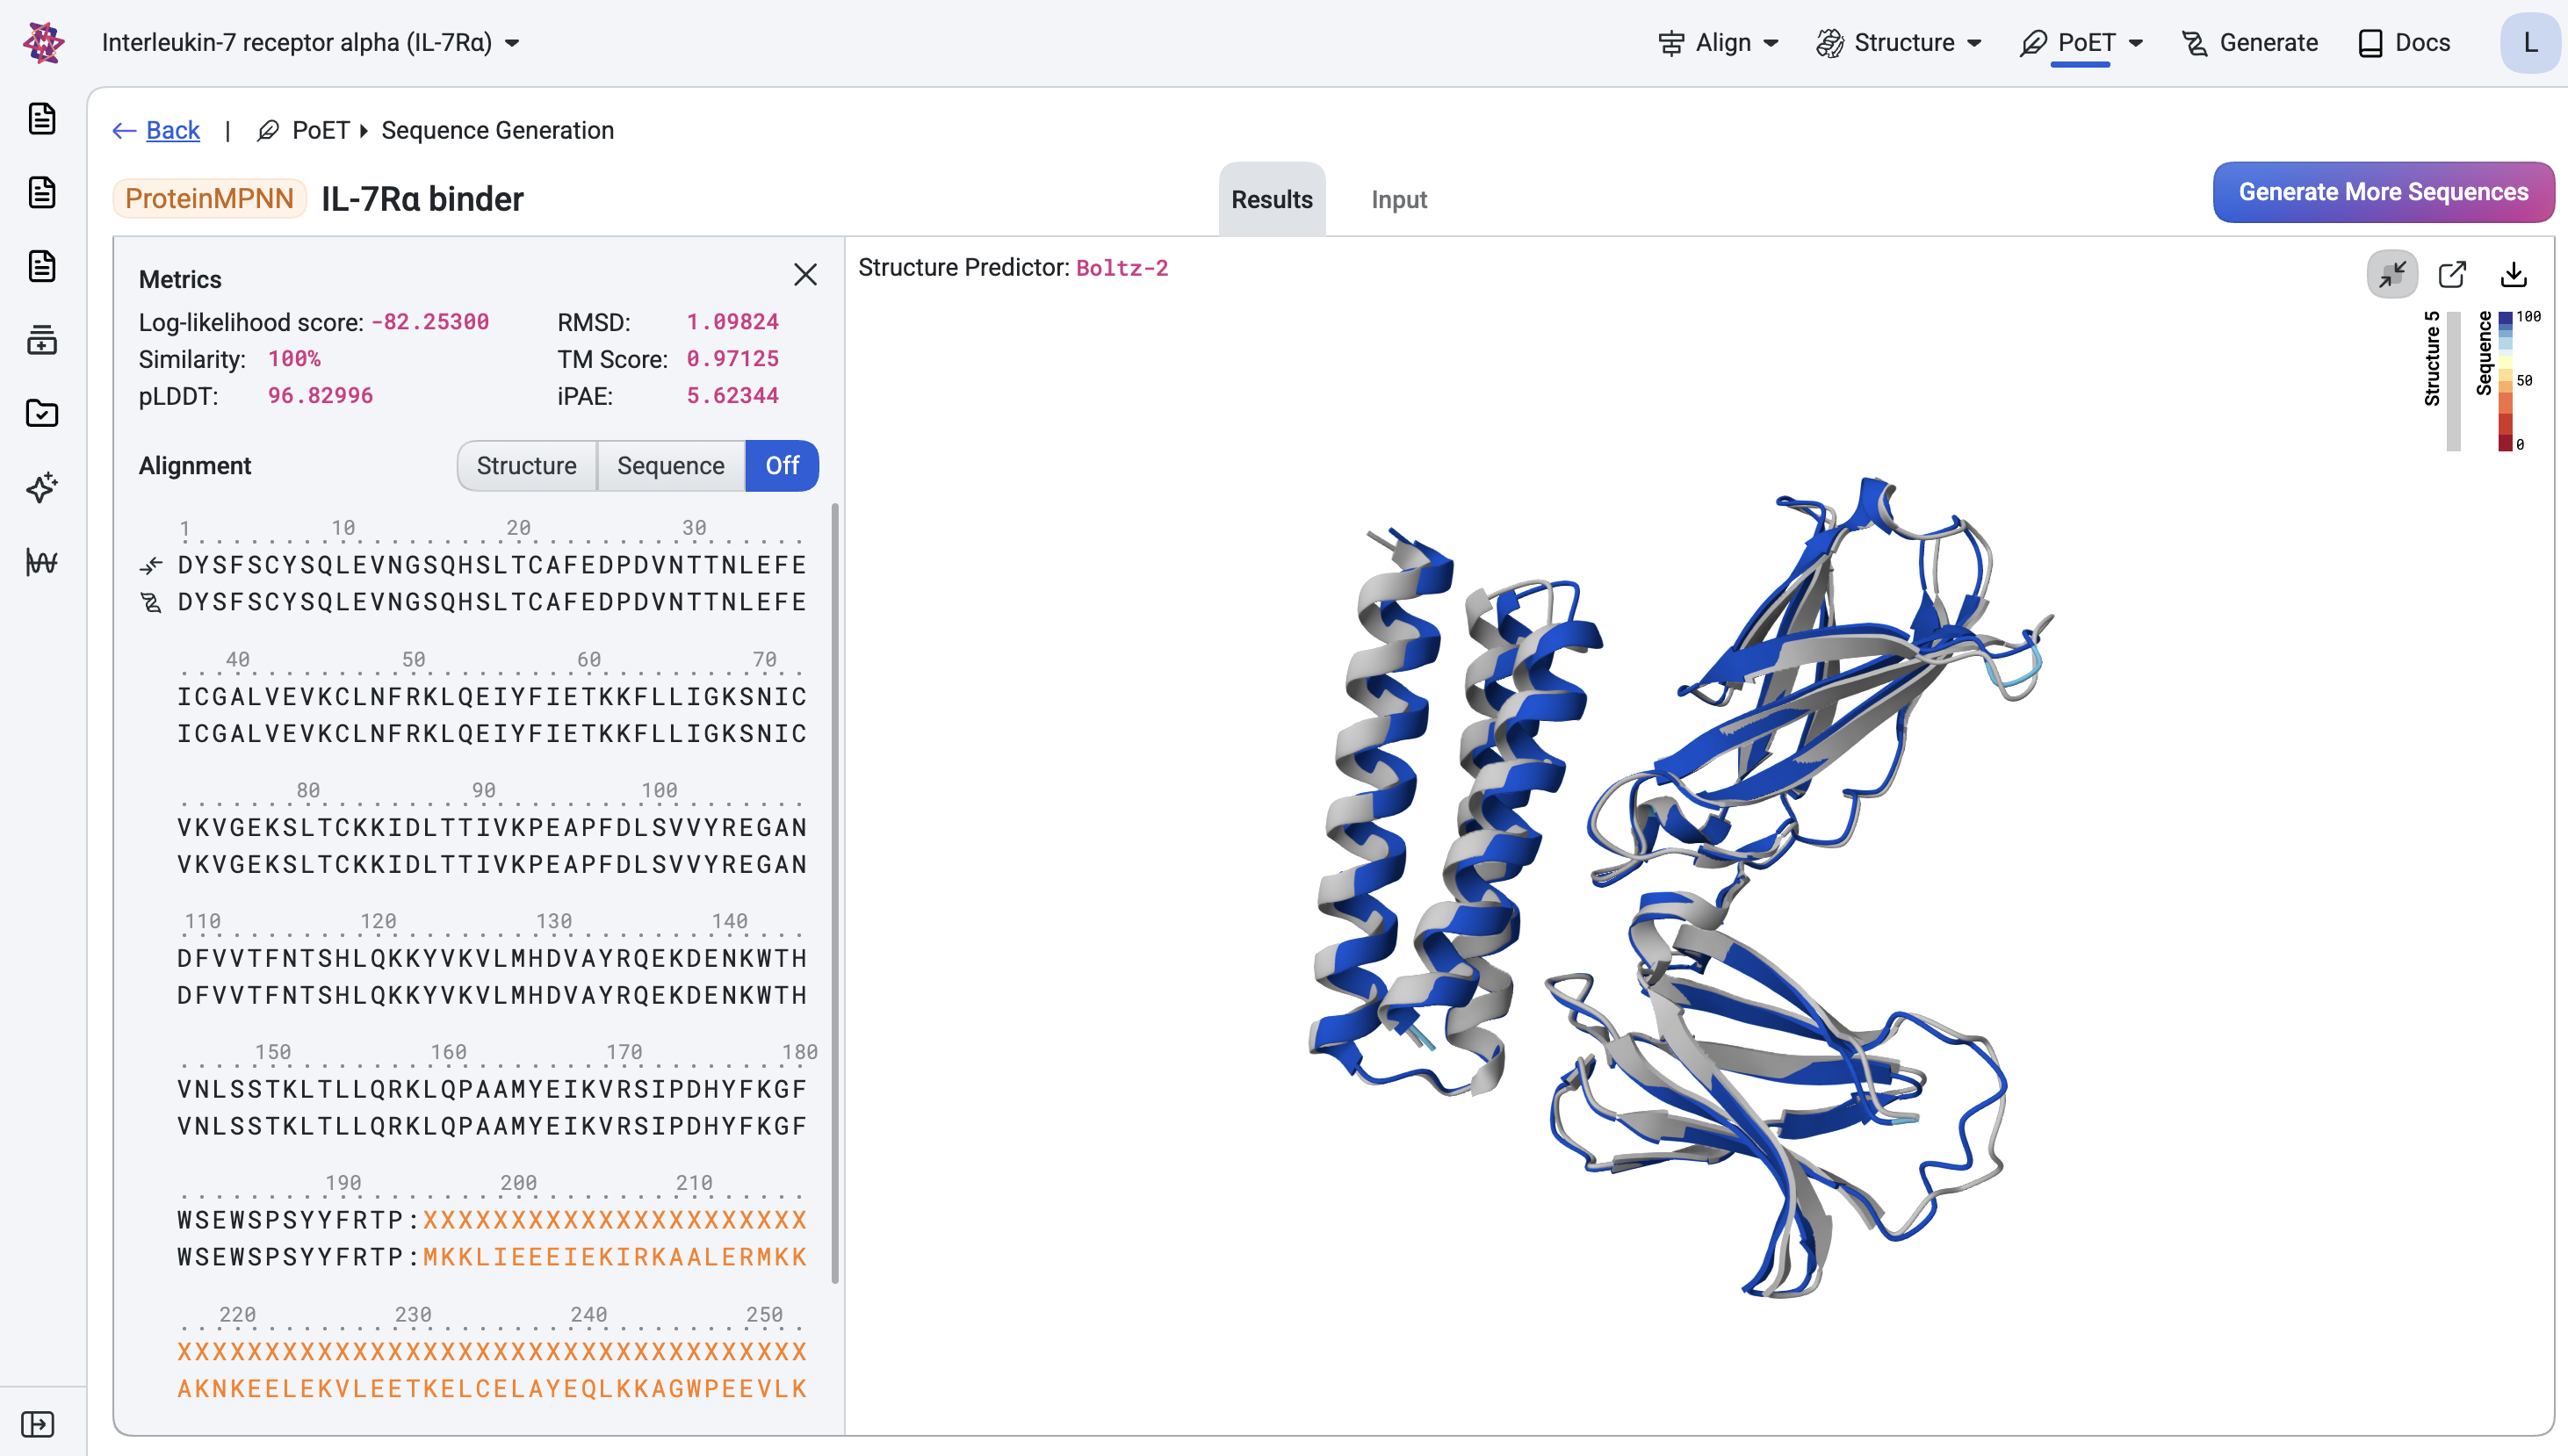
The predicted structure shows the binder positioned close to the target chain. We also retrieve the predicted aligned error (PAE) for each design, a confidence metric that has proven highly effective at identifying successful binders and which we use to compute the filtering metrics below.
Filter and select designs by metrics#
We compute, filter, and select designs using standard structure prediction metrics and thresholds adapted from the RFdiffusion study (Watson et al., 2023).
Metric |
Description |
Ideal Value |
|---|---|---|
RMSD |
Measures how closely the predicted structure of the entire complex matches the generated structure. |
< 2.5 Å |
iPAE |
Confidence that the binder forms an interface with the target. |
< 10 |
Binder RMSD |
Measures how closely the predicted structure of just the binder matches the generated structure. |
< 1 Å |
Binder pLDDT |
Confidence in the predicted structure of the binder. |
> 80 |
We first filter designs against the ideal metric thresholds, then rank the passing designs by iPAE to prioritize those with the highest confidence of interaction, keeping only the top design per unique structure to ensure diversity across the final candidate set.
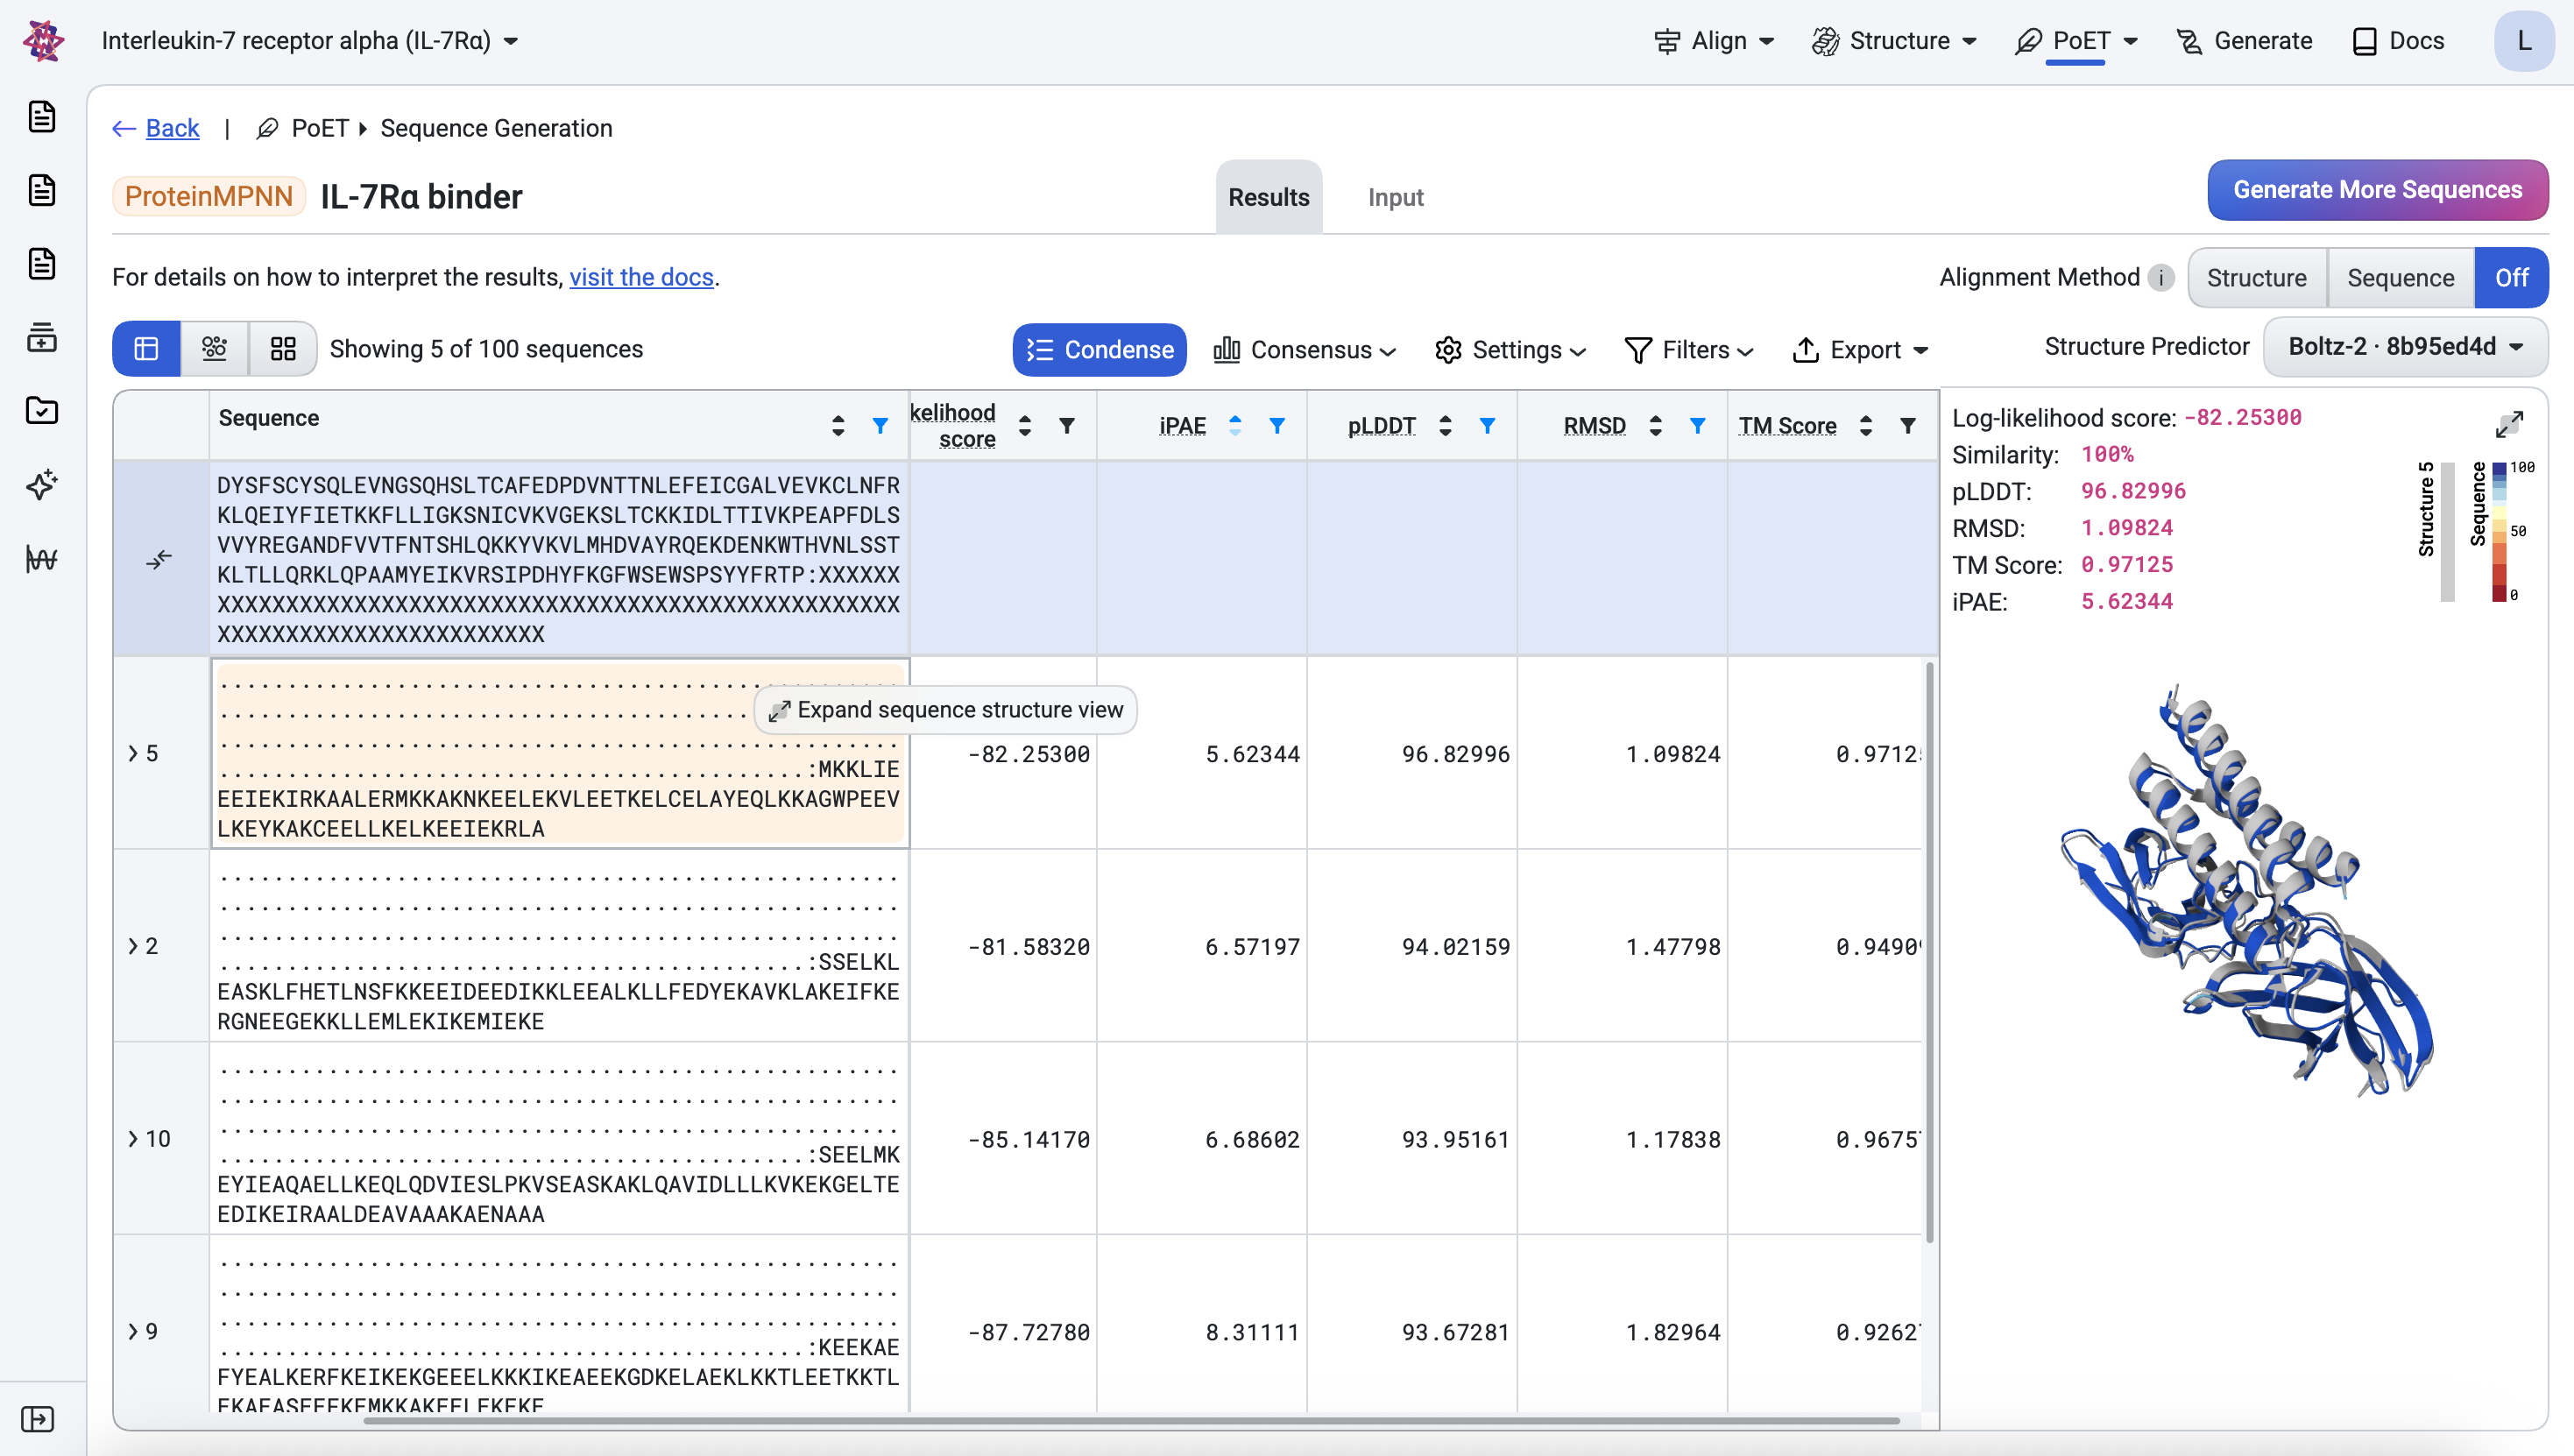
Below, the top ranked design is shown with its predicted structure superimposed onto the corresponding generated structure (light gray).
Once you are satisfied with the designs and have applied any additional assay-specific filters, they are ready for experimental testing.
Conclusion#
In this tutorial, we’ve demonstrated how to design novel binders for a target of interest. We validated the designs using in-silico metrics and visualized them to ensure their viability. The top-ranked designs from this workflow can be:
Expressed and purified for experimental validation
Tested for binding affinity
Further optimized through additional rounds of design, for example, with OpenProtein.AI’s property regression models.
Read more about our binder design workflows and other de novo design tools here:
Or see the detailed API references: