Nanobody binder design with BoltzGen using the GUI#
Designing de novo nanobody binders to PDL1 using BoltzGen and ProteinMPNN with the web interface
In this tutorial, we’ll demonstrate how to use the OpenProtein.AI web interface to design a nanobody that binds to a target protein. We refer to the designed protein as the binder and the protein being bound as the target.
Unlike general protein binder design, for nanobody design we utilize a scaffold-based approach. We will start with an existing nanobody framework and essentially “graft” new Complementarity-Determining Regions (CDRs) onto it. This ensures that our designed binder retains the stable, expressible framework regions of a natural nanobody while tailoring the binding loops (CDRs) to our specific target. The design process consists of four main steps:
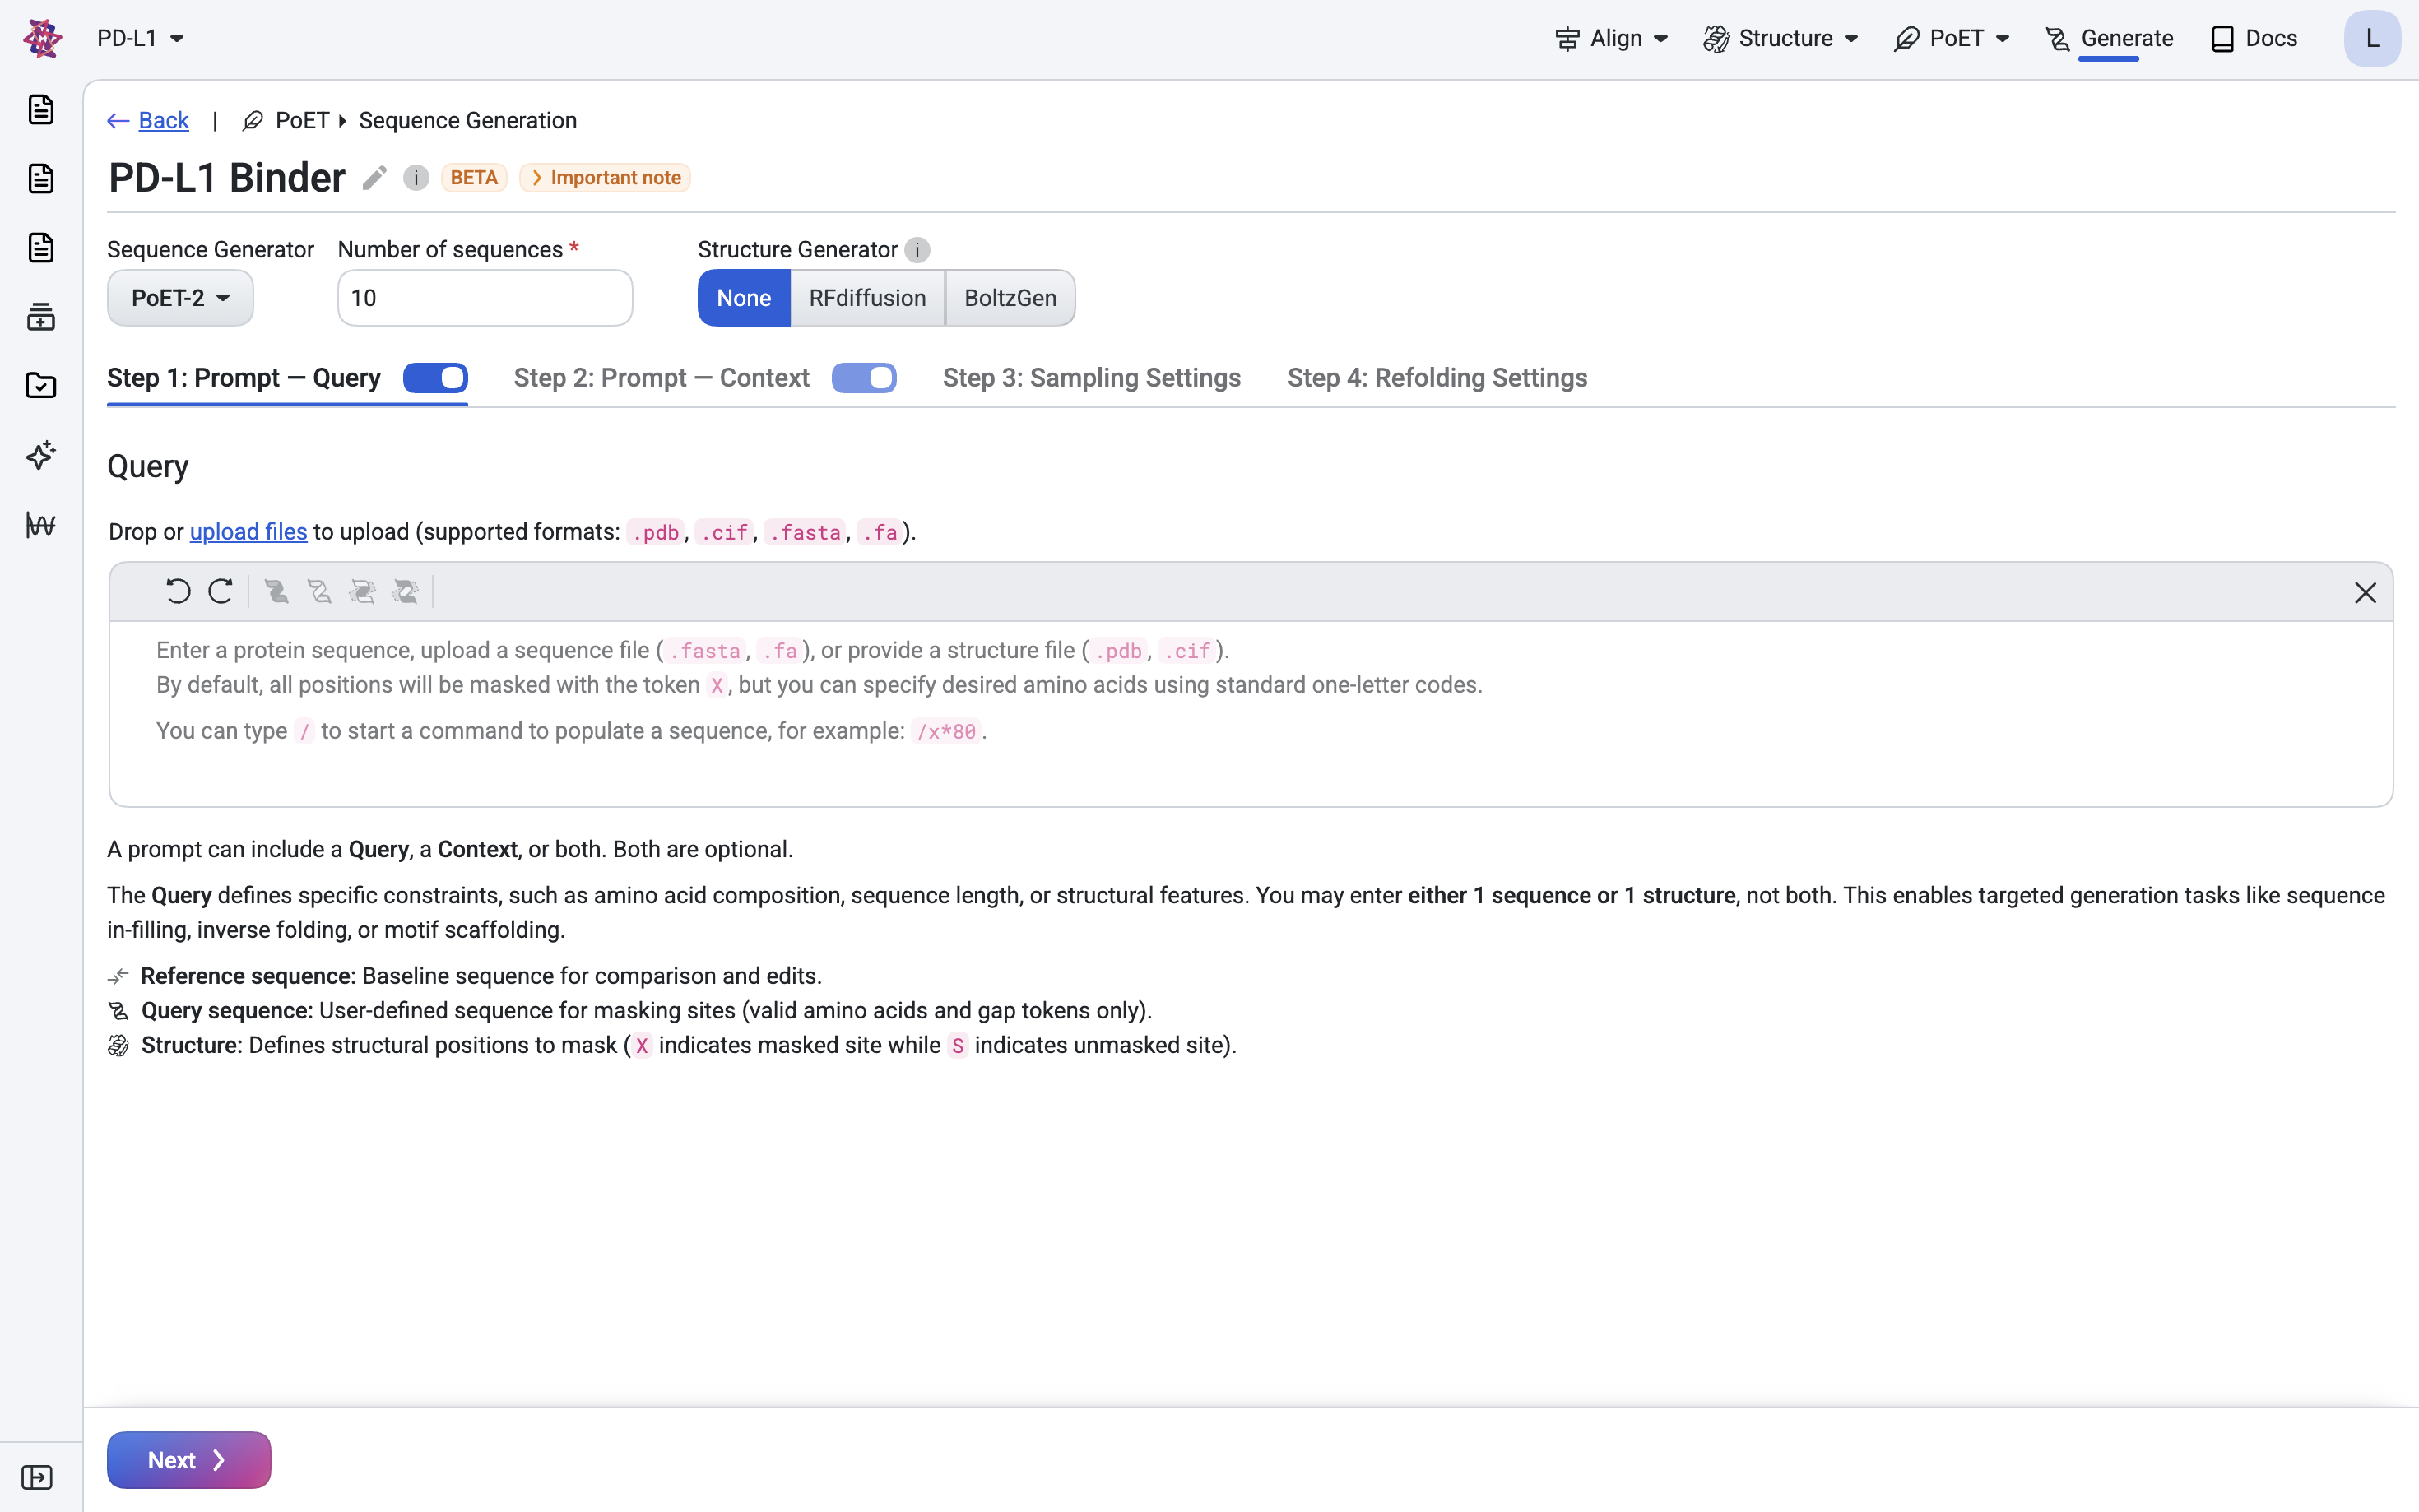
Query Specification: Specify the design problem as a “query”, including
the target protein (PDL1)
the nanobody scaffold (framework regions)
the lengths of the CDR loops to be designed
Structure Generation: Generate plausible structures for the nanobody binder CDRs using BoltzGen (Stark et al., 2025), a generative model capable of designing backbone structures using scaffolds.
Sequence Design: Design sequences for the generated CDRs using ProteinMPNN (Dauparas et al., 2022), an inverse folding model for generating the binder sequence conditioned on the generated structure.
In Silico Validation: Validate the designs by predicting their structures with Boltz-2 (Passaro et al., 2025) and computing metrics to select the best candidates for experimental testing.
Step 1: Binder design problem specification#
Specify the nanobody binder design problem
In this tutorial, we will design nanobody binders against Programmed Death-Ligand 1 (PDL1). This design problem is adapted from the BoltzGen study (Stark et al., 2025).
We will design a nanobody binder, which is a single-domain antibody fragment derived from heavy-chain-only antibodies found in camelids. To restrict the BoltzGen structure generator to specifically design nanobody binders, we will use a scaffold. The scaffold defines an overall framework structure and specific designable regions for binding to the target. This means we will keep the framework regions of an existing, well-behaved nanobody constant, while redesigning the Complementarity Determining Regions (CDRs) to bind our specific target. Later, we will use ProteinMPNN to fill in the CDR sequences conditioned on the generated binder CDR structures.
The scaffold provides convenient ways to generate binders of other types such as scFvs for FAbs.
Note
We are using ProteinMPNN for inverse folding the CDRs here, but we could use other generative models such as PoET-2 instead. PoET-2 is unique in its ability to use prompt context sequences that define specific families of proteins, e.g., human VHH domains, that can be used to guide the generated proteins towards specific characteristics. This is especially useful if we want to redesign the whole binder sequence (framework regions and CDRs). Because we are only redesigning the CDRs here, we’ll use ProteinMPNN for simplicity. Learn more about PoET-2.
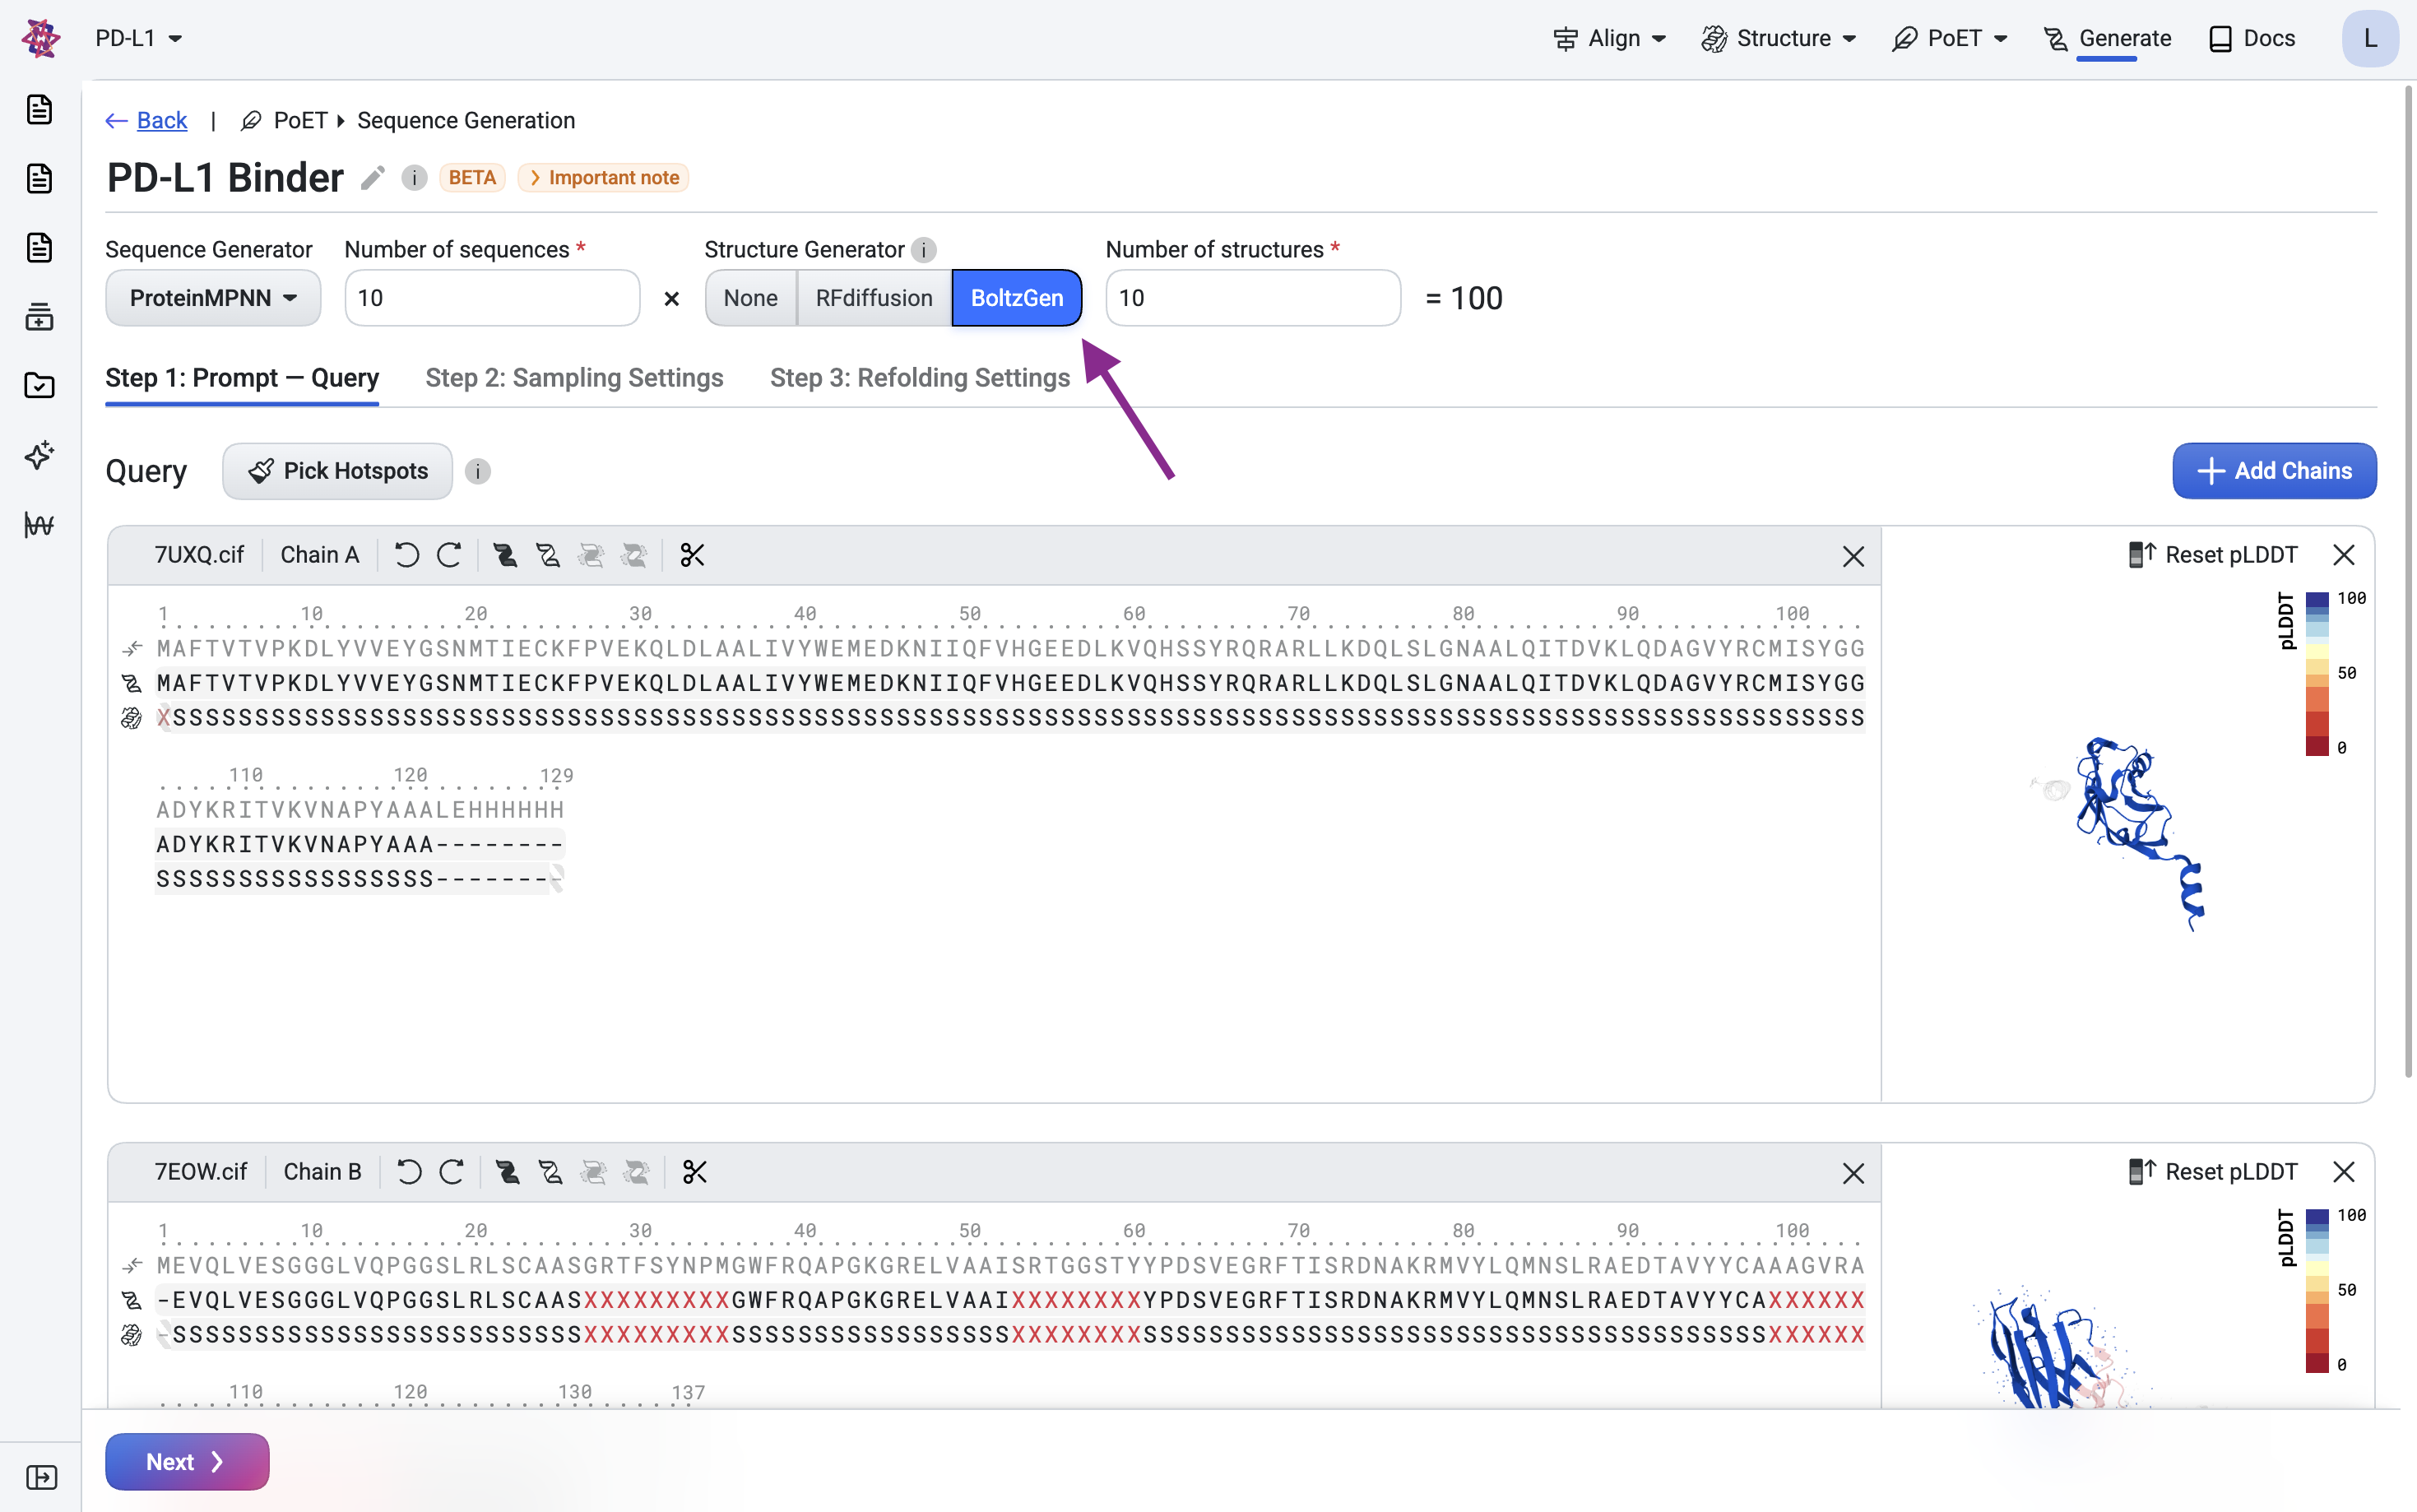
Step 1.1: Define and visualize the target#
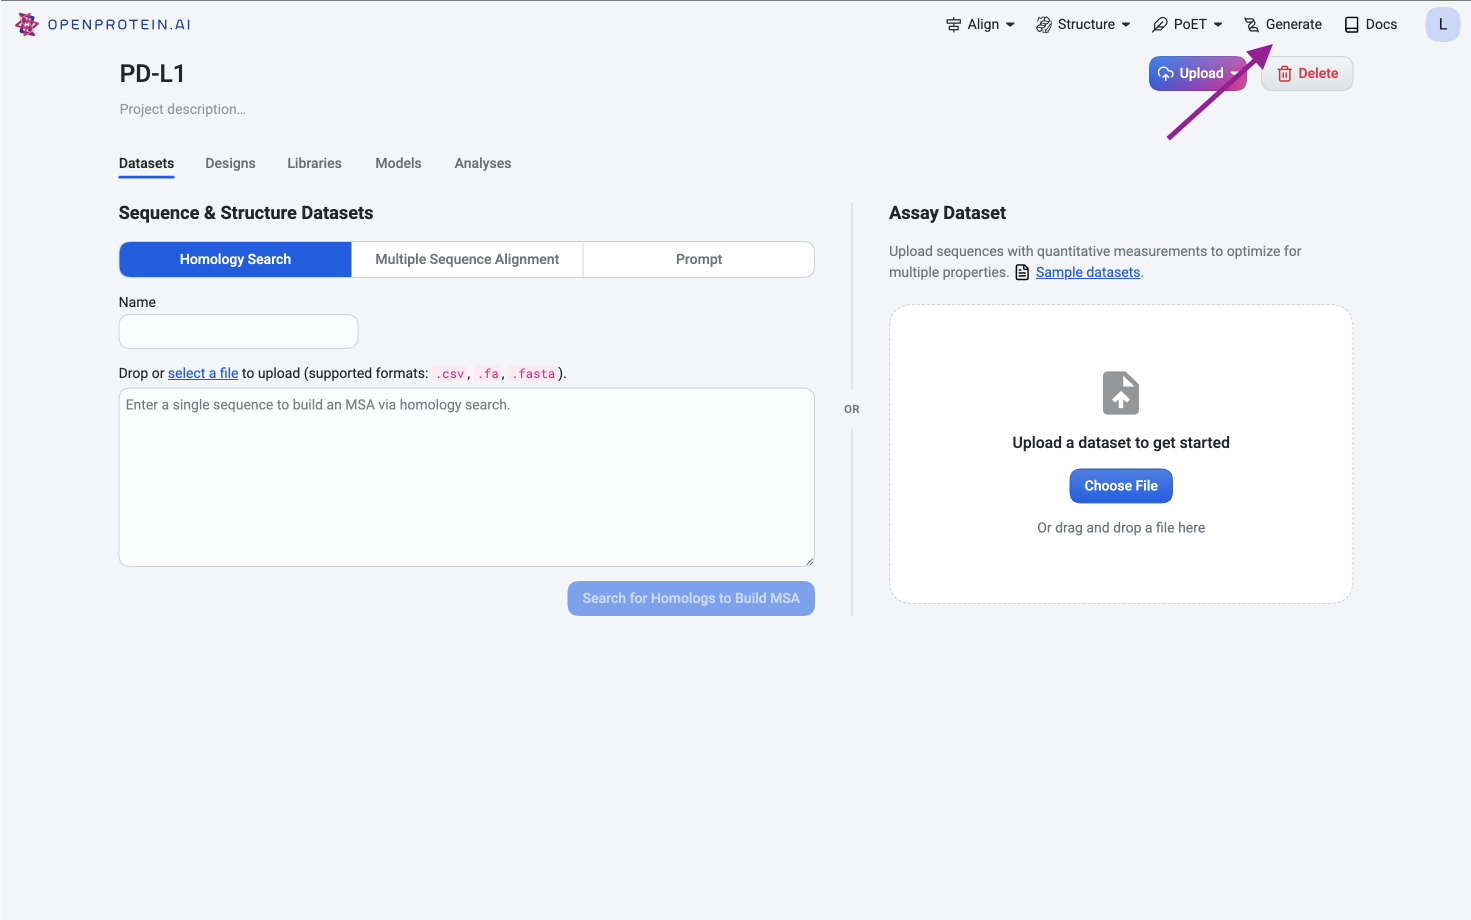
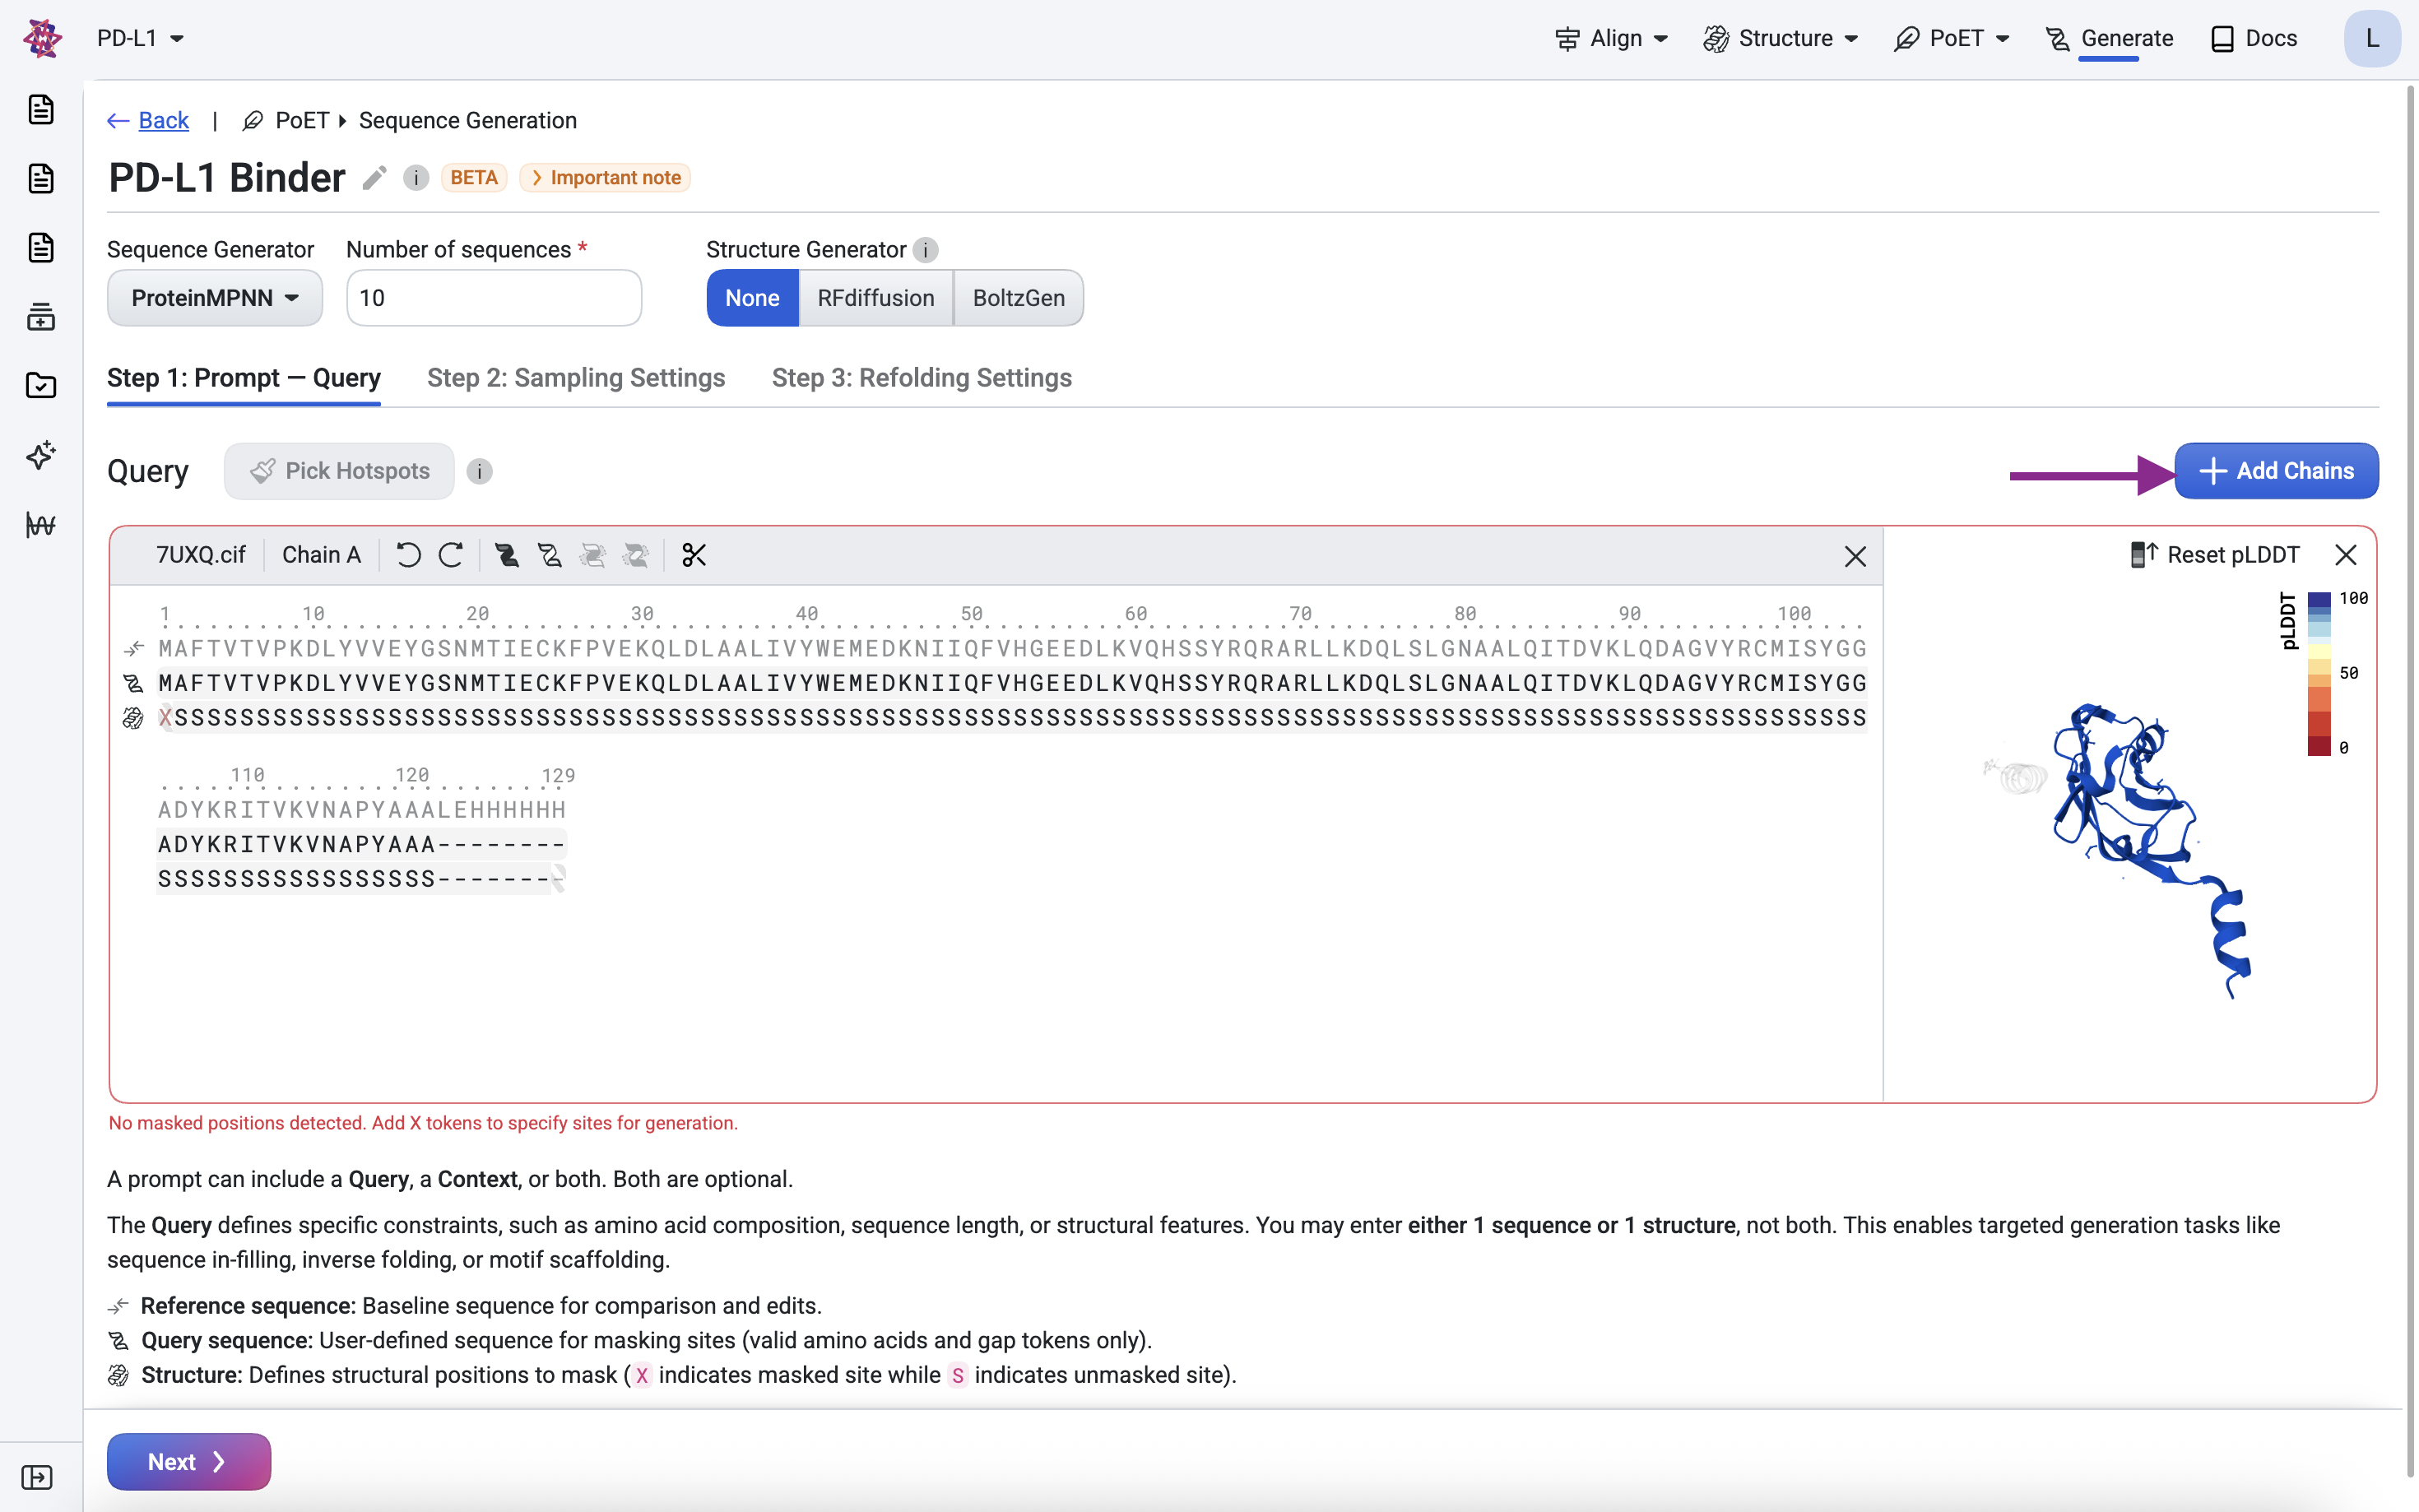
Navigate to the Generate tool in the top-right corner.
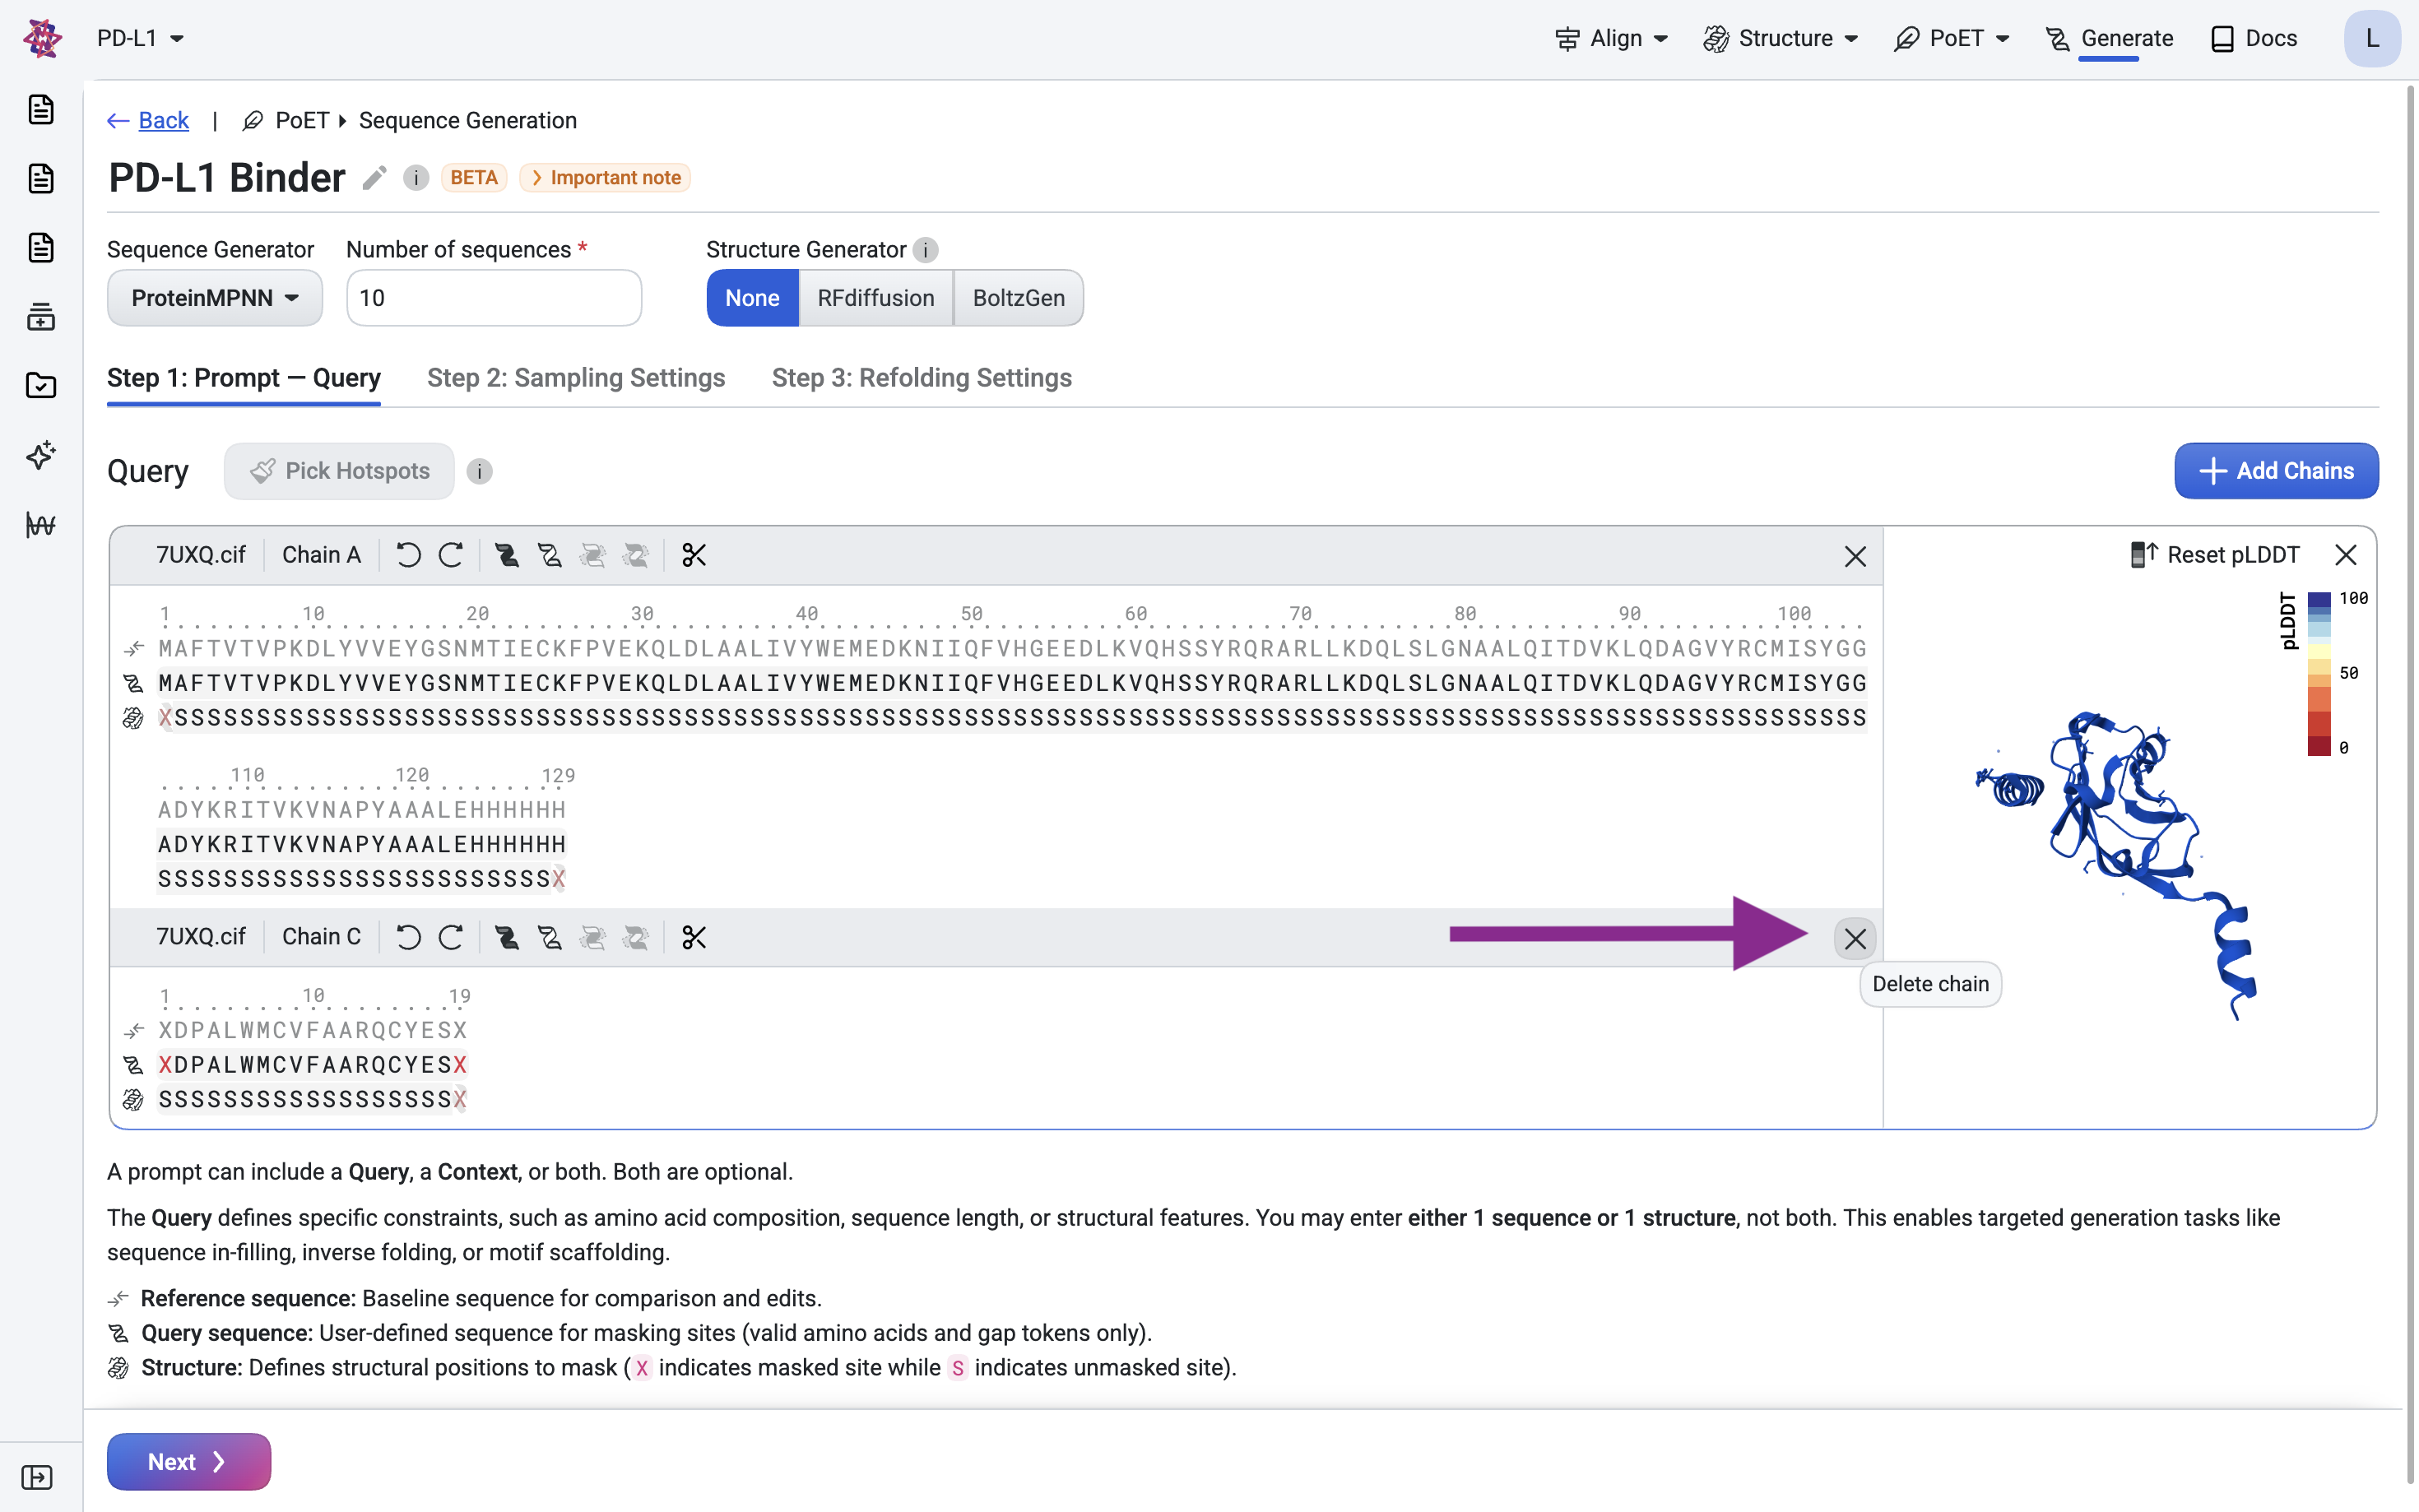
Click Upload files and upload
7UXQ.cif(PDB: 7UXQ). The sequence and structure will appear in the sequence component.
Remove chain C by clicking the × button.
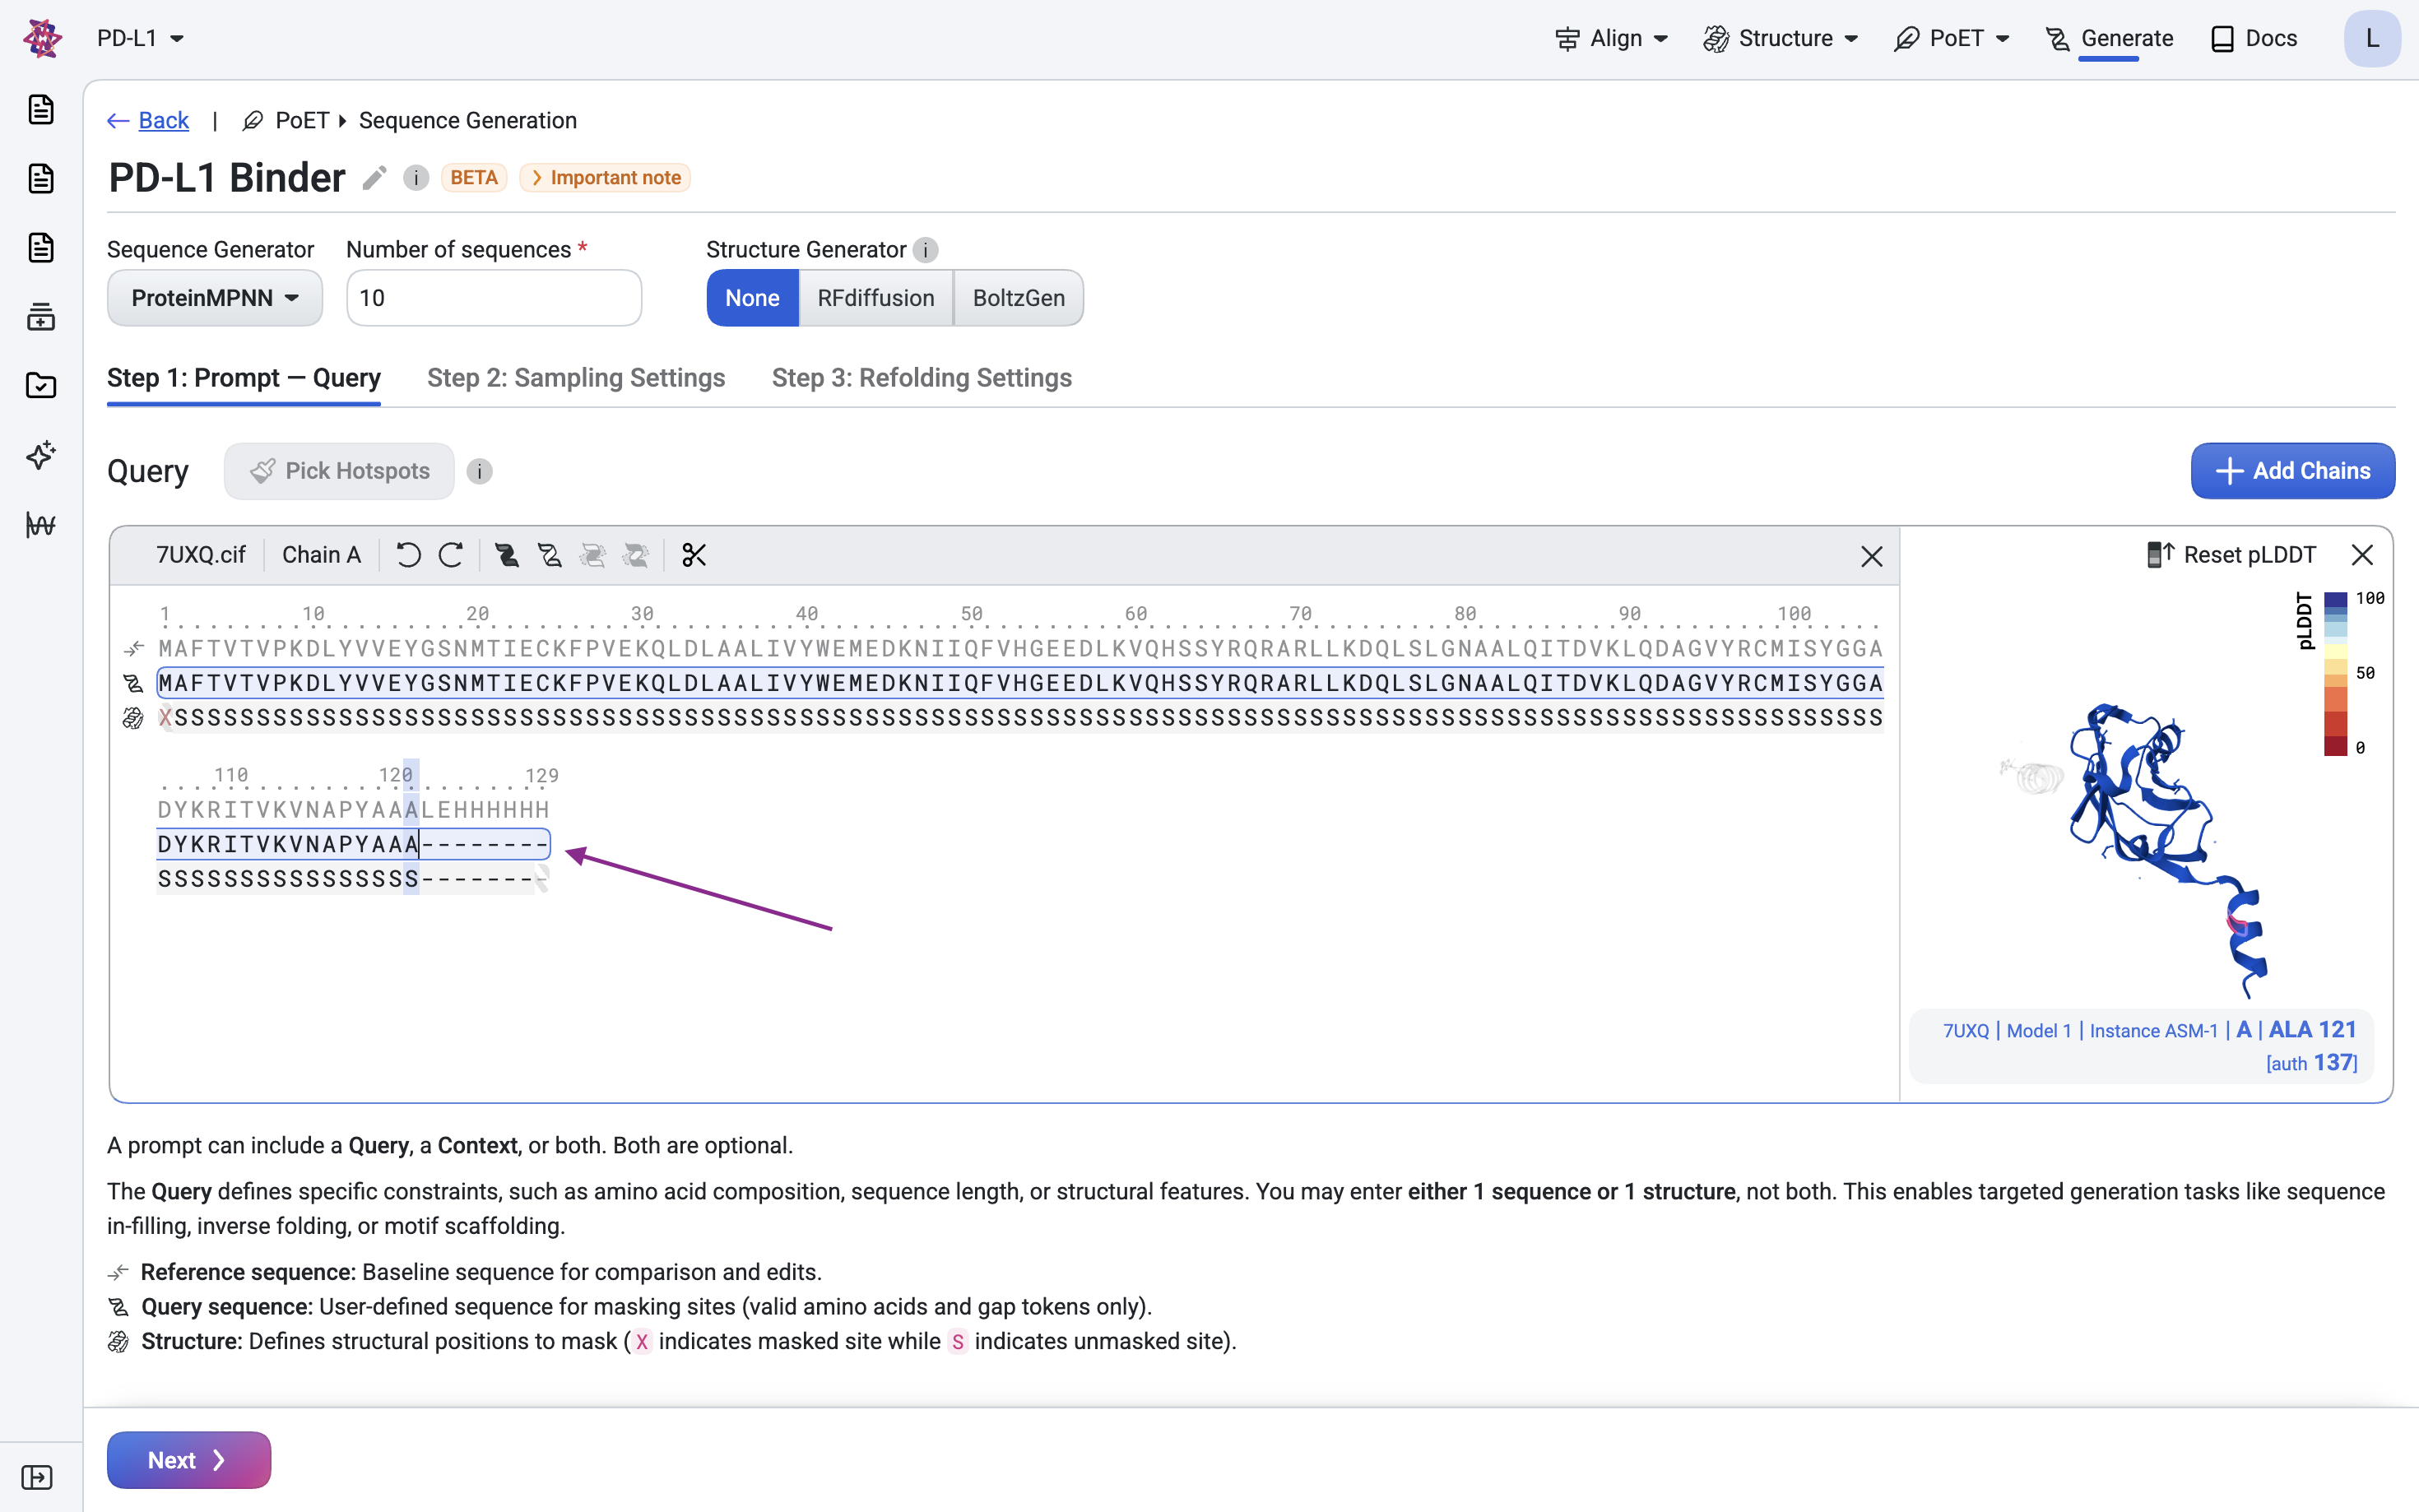
Remove the His-tag and linker (LEHHHHHH) at positions 122–129, as we don’t want the binder to target this expression artifact.
Step 1.2: Define the nanobody scaffold#
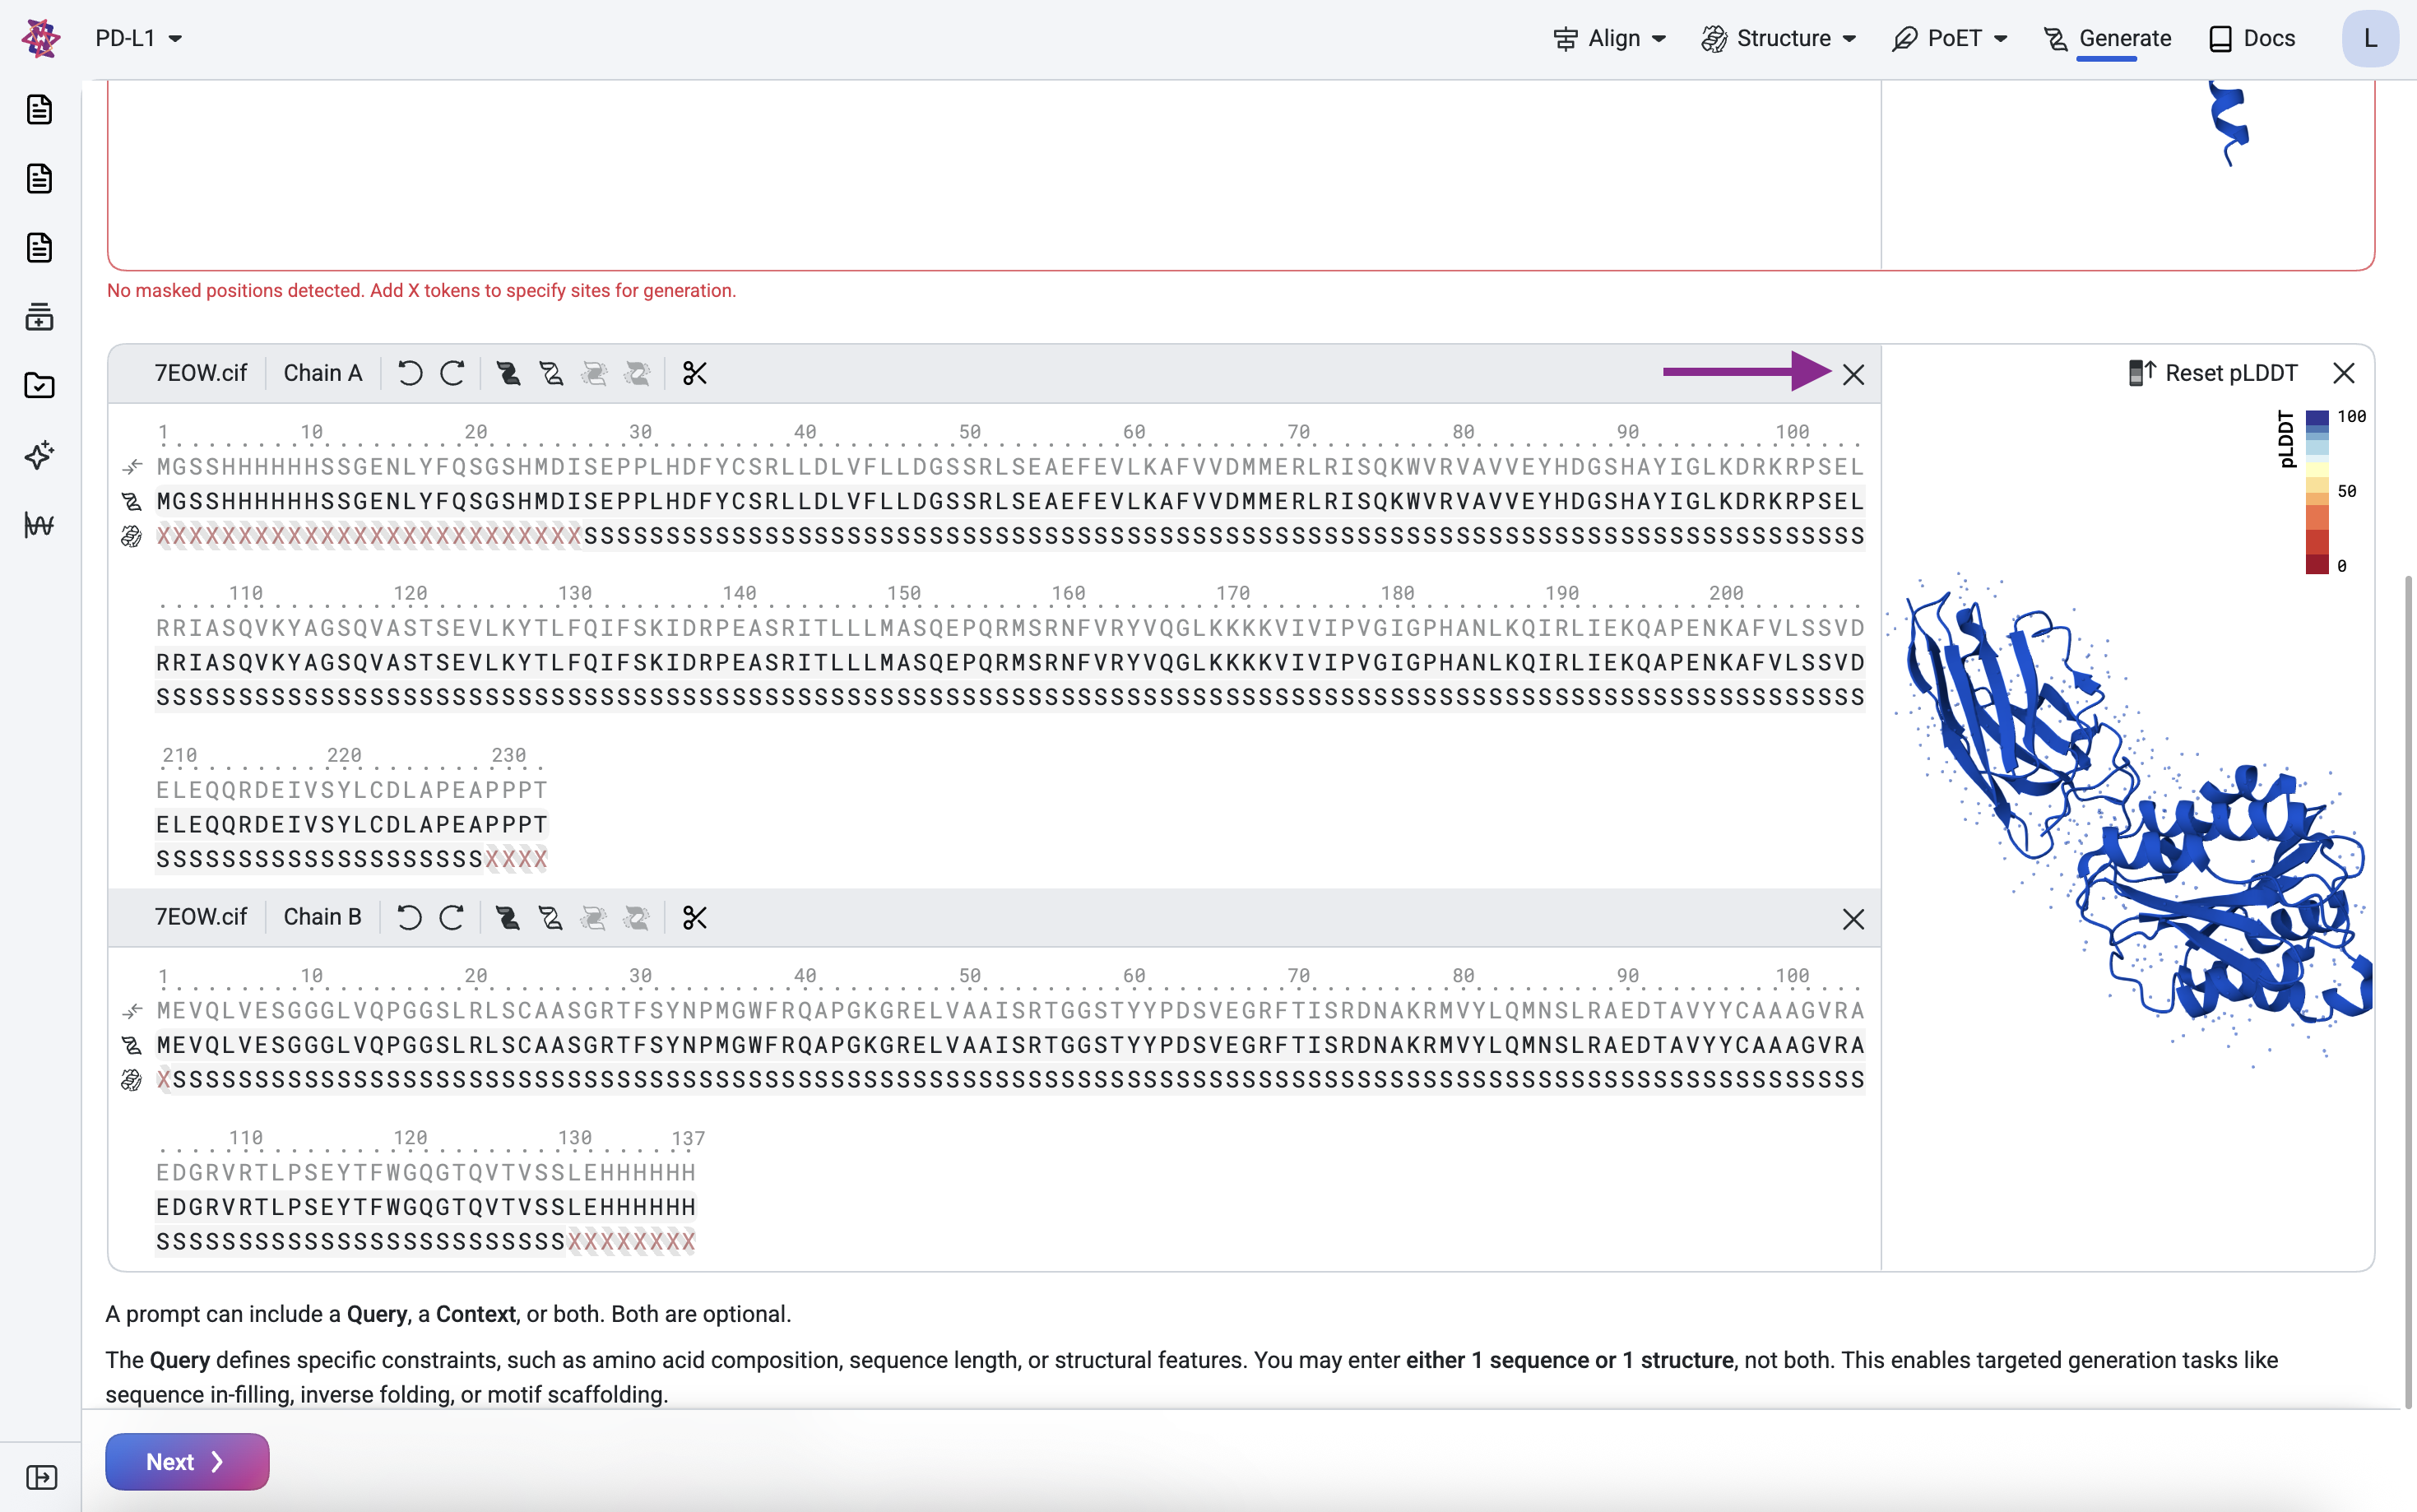
We will use the structure from PDB: 7EOW as our scaffold. This scaffold is from caplacizumab, a humanized VHH. We’ll use the structure and framework region of this VHH as the scaffold for our binder, but design new CDRs for binding to our target.
Load the scaffold:
Click Add chain and upload the
7eowfile.
Remove chain A, keeping only chain B.
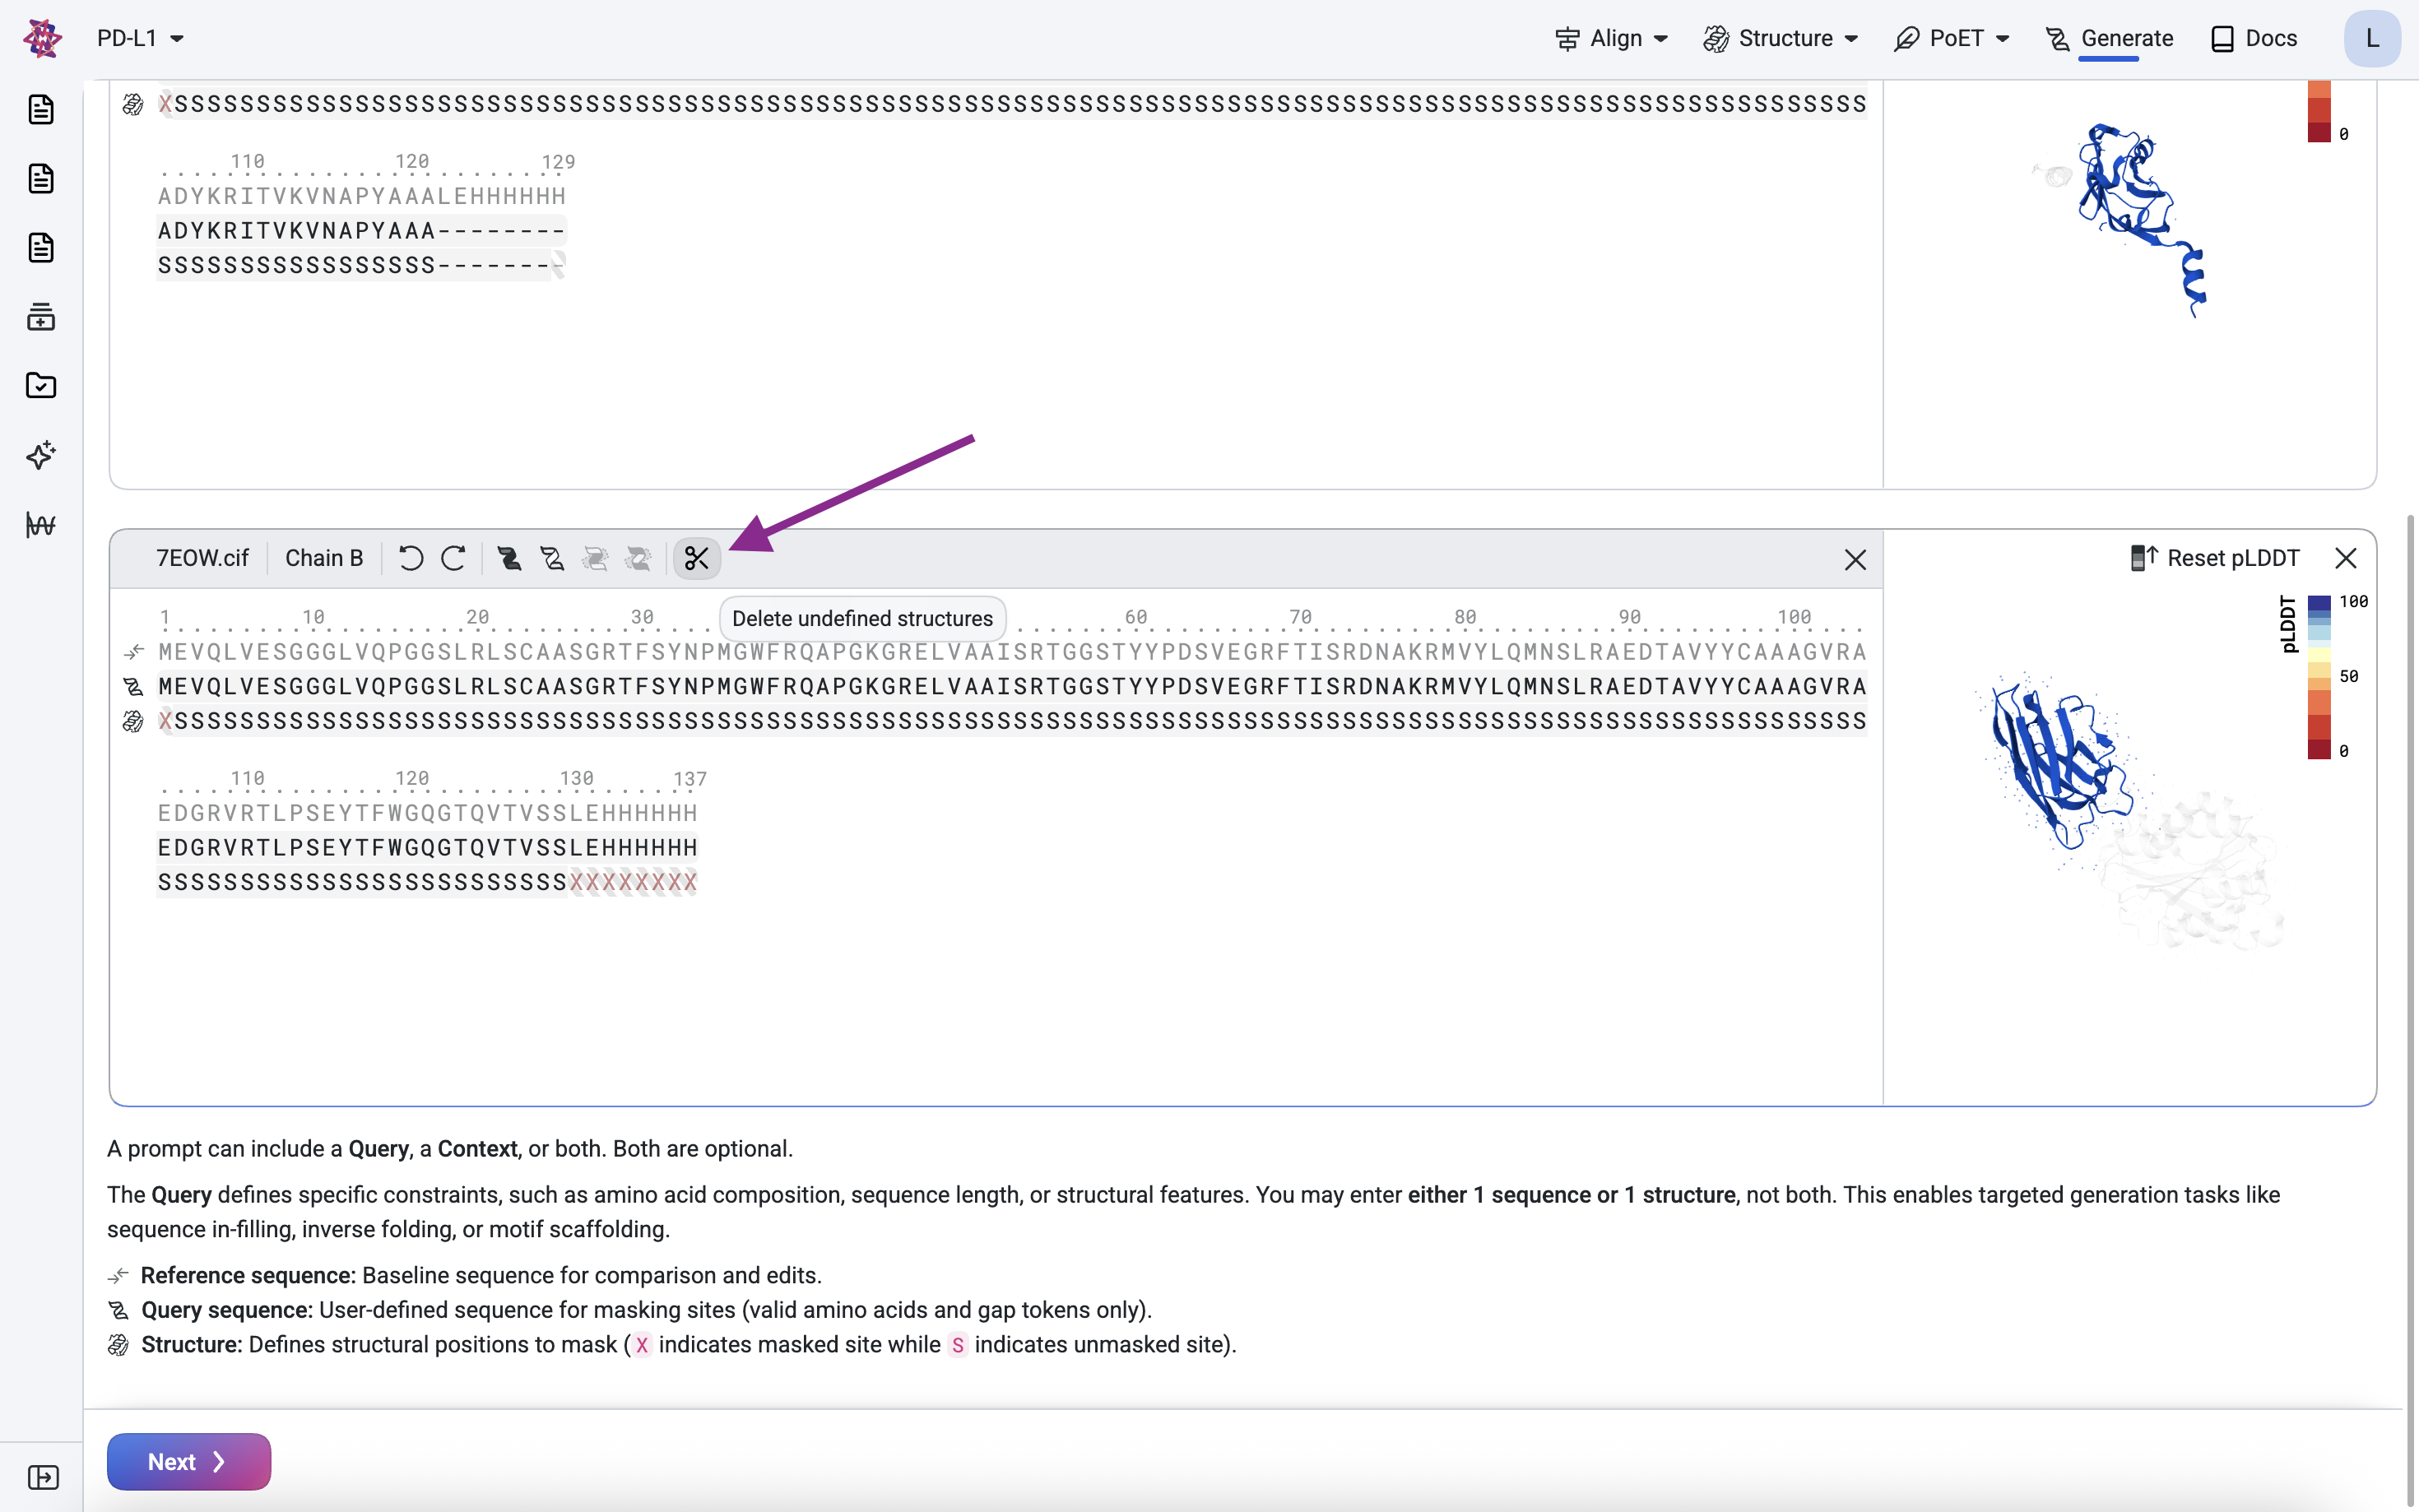
Clean the scaffold#
We remove the leading Methionine (M) and the trailing Histidine tag (His-tag) because they are expression artifacts. The structure mask above confirms these residues have no defined structure. Use the scissor icon to delete undefined structures.
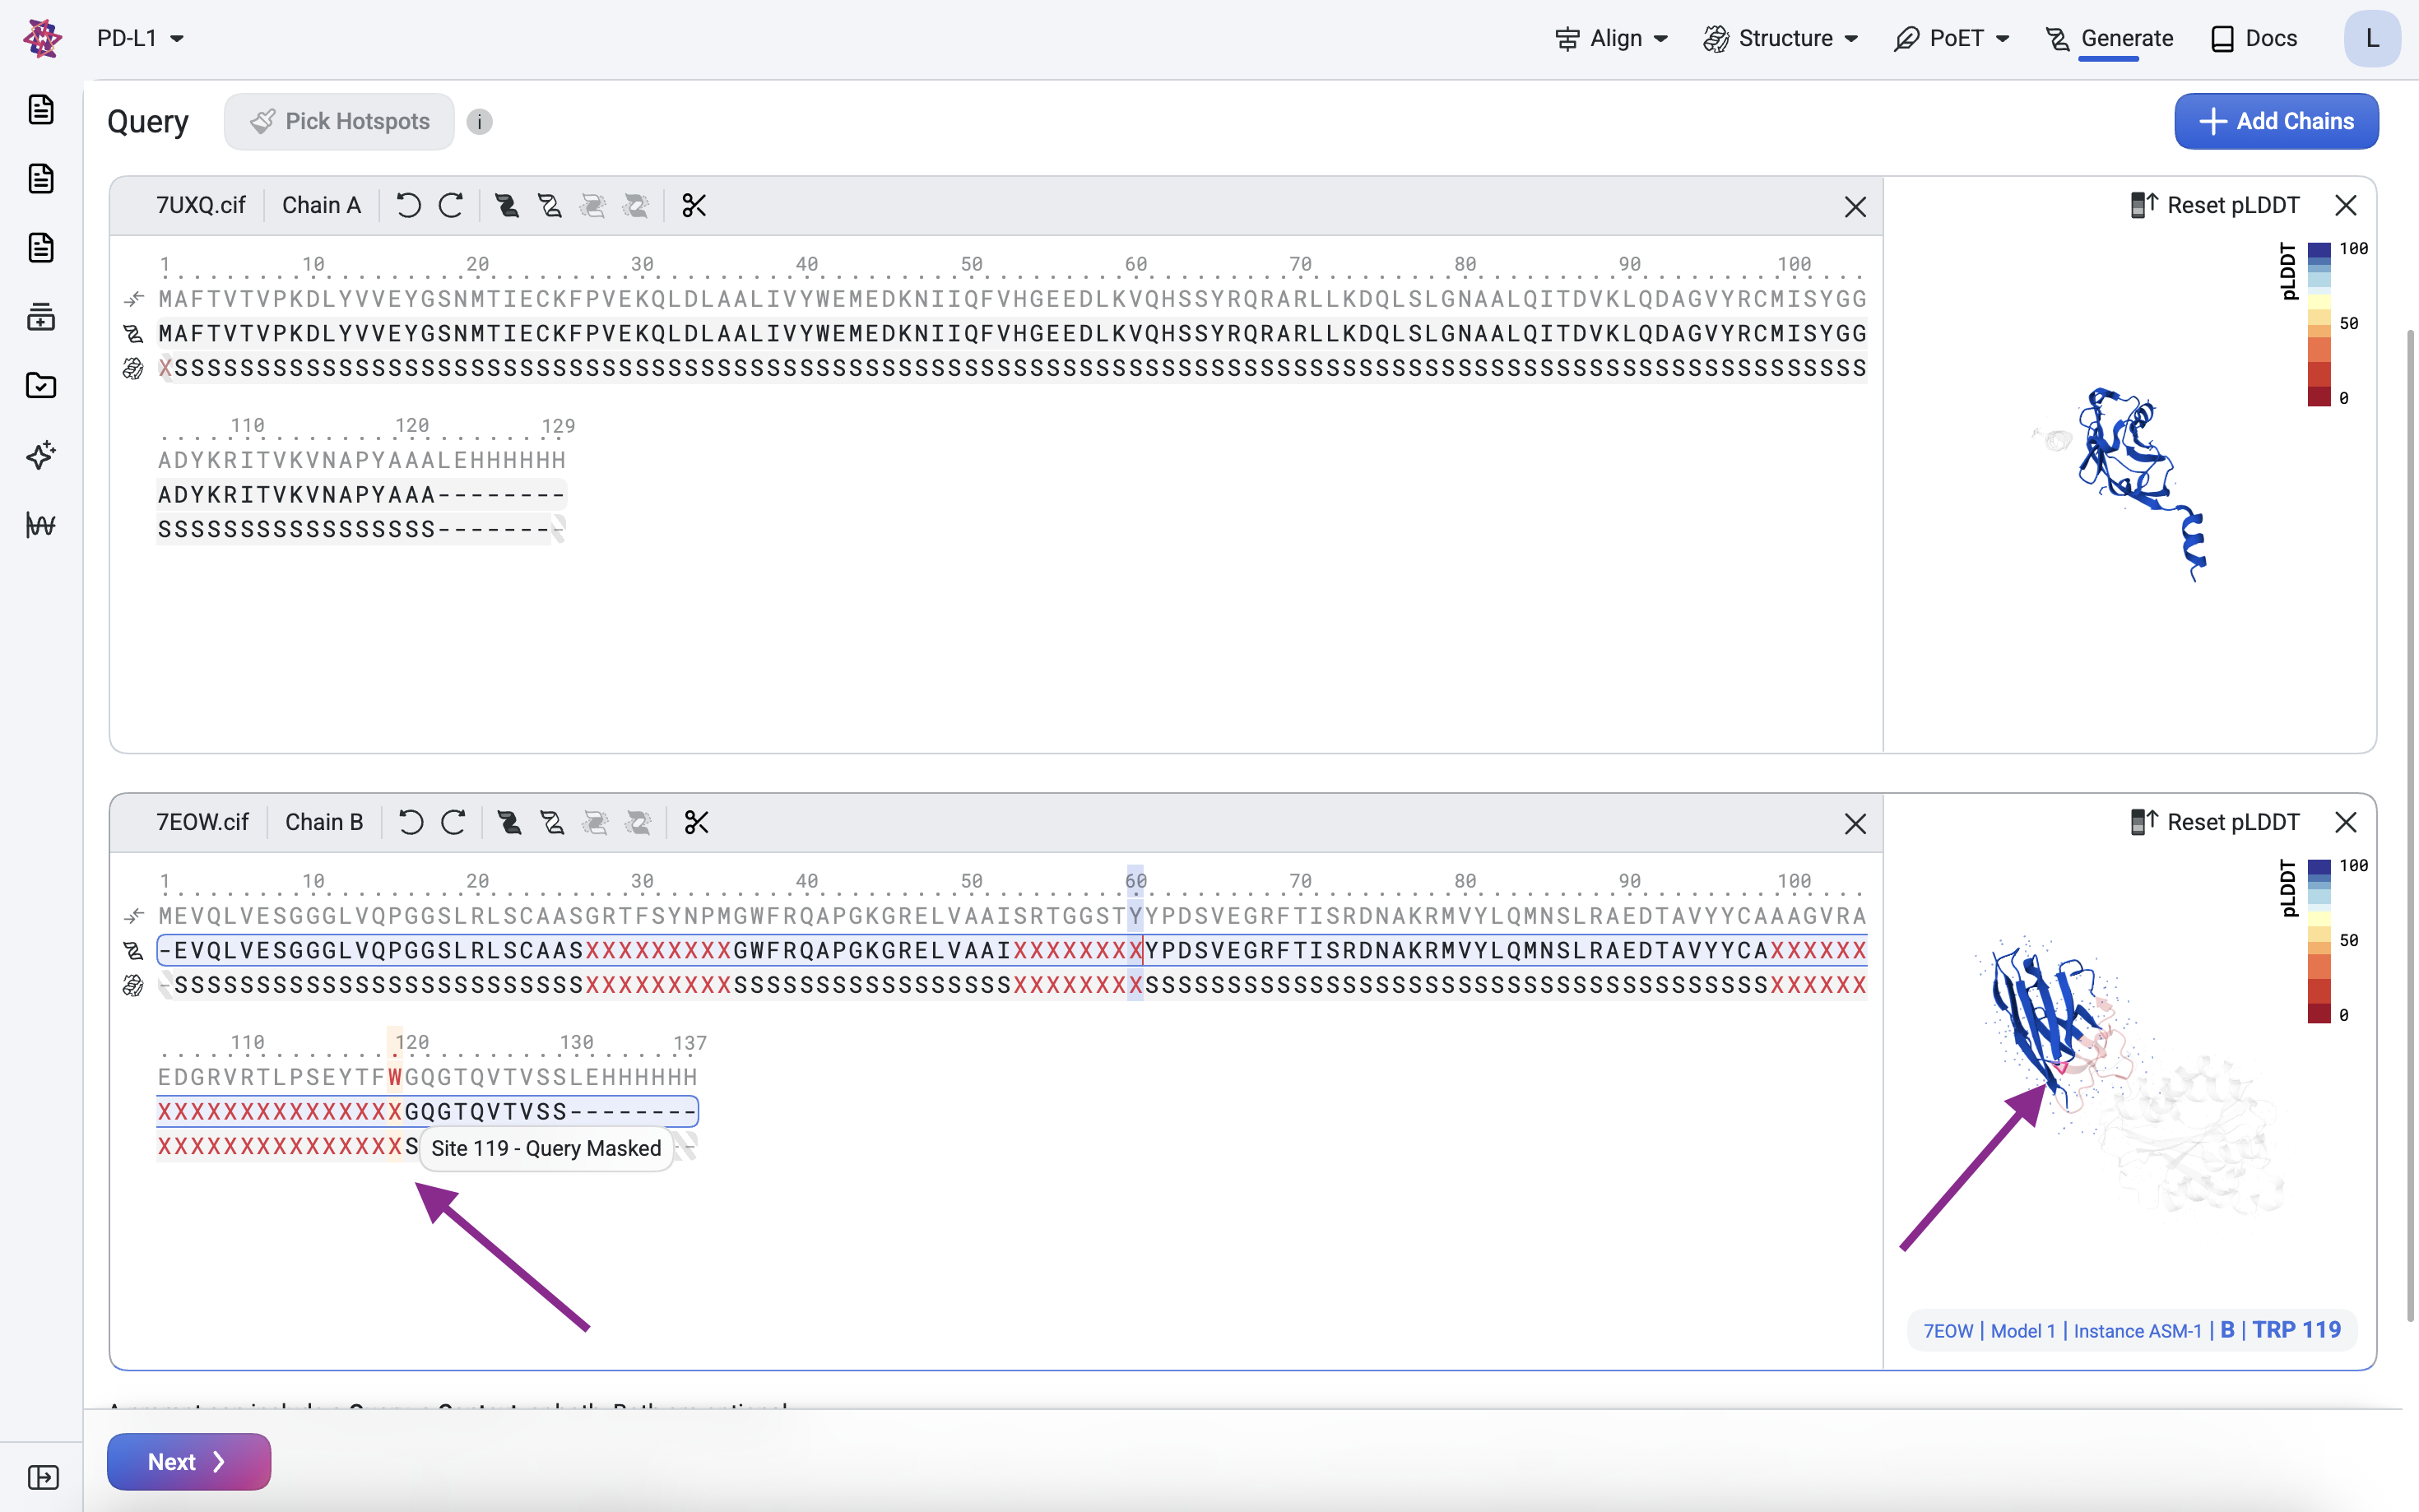
Define the framework and binding regions#
We want to use the nanobody structure as a framework, but design new CDRs for binding to our target. To do this, we keep the framework regions (FWRs) constant but replace the CDRs with designable regions.
For this example, use the following CDR masked positions:
CDR |
Masked position number |
|---|---|
CDR1 |
27 - 35 |
CDR2 |
53 - 60 |
CDR3 |
99 - 119 |
The X characters represent residues to be designed. In the sequence and structure tracks, highlight each CDR position and press X to mask it.

Step 1.3: Configure relative positioning (Groups)#
By default, all residues are in “group 0”, which implies their relative positions are fixed. Since we want the nanobody to dock against the target (i.e., its position relative to the target is not fixed), we assign the scaffold to a different group (group 1). When you added the scaffold via Add chain, it was automatically assigned to a new group, no further action is needed here.
Visualize the structure of the query#
Before submitting, verify the query looks correct in the 3D structure viewer on the right. Masked and deleted residues should appear greyed out. Hover over residues in the sequence track to highlight their corresponding positions in the viewer, and use your mouse to rotate or zoom for a closer look.
Step 2: Structure generation with BoltzGen#
Generate plausible structures for the nanobody binder
We use BoltzGen, a structure generation model that supports scaffolds, to generate plausible backbone structures for our nanobody that complement the target.
Select BoltzGen as the structure generator and submit your query.
Step 3: Sequence generation with ProteinMPNN#
Design the CDR sequences using inverse folding
BoltzGen produces a backbone structure along with an initial sequence estimate. To improve sequence quality, particularly for expression and stability, we use ProteinMPNN, an inverse folding model that generates amino acid sequences conditioned on a backbone structure.
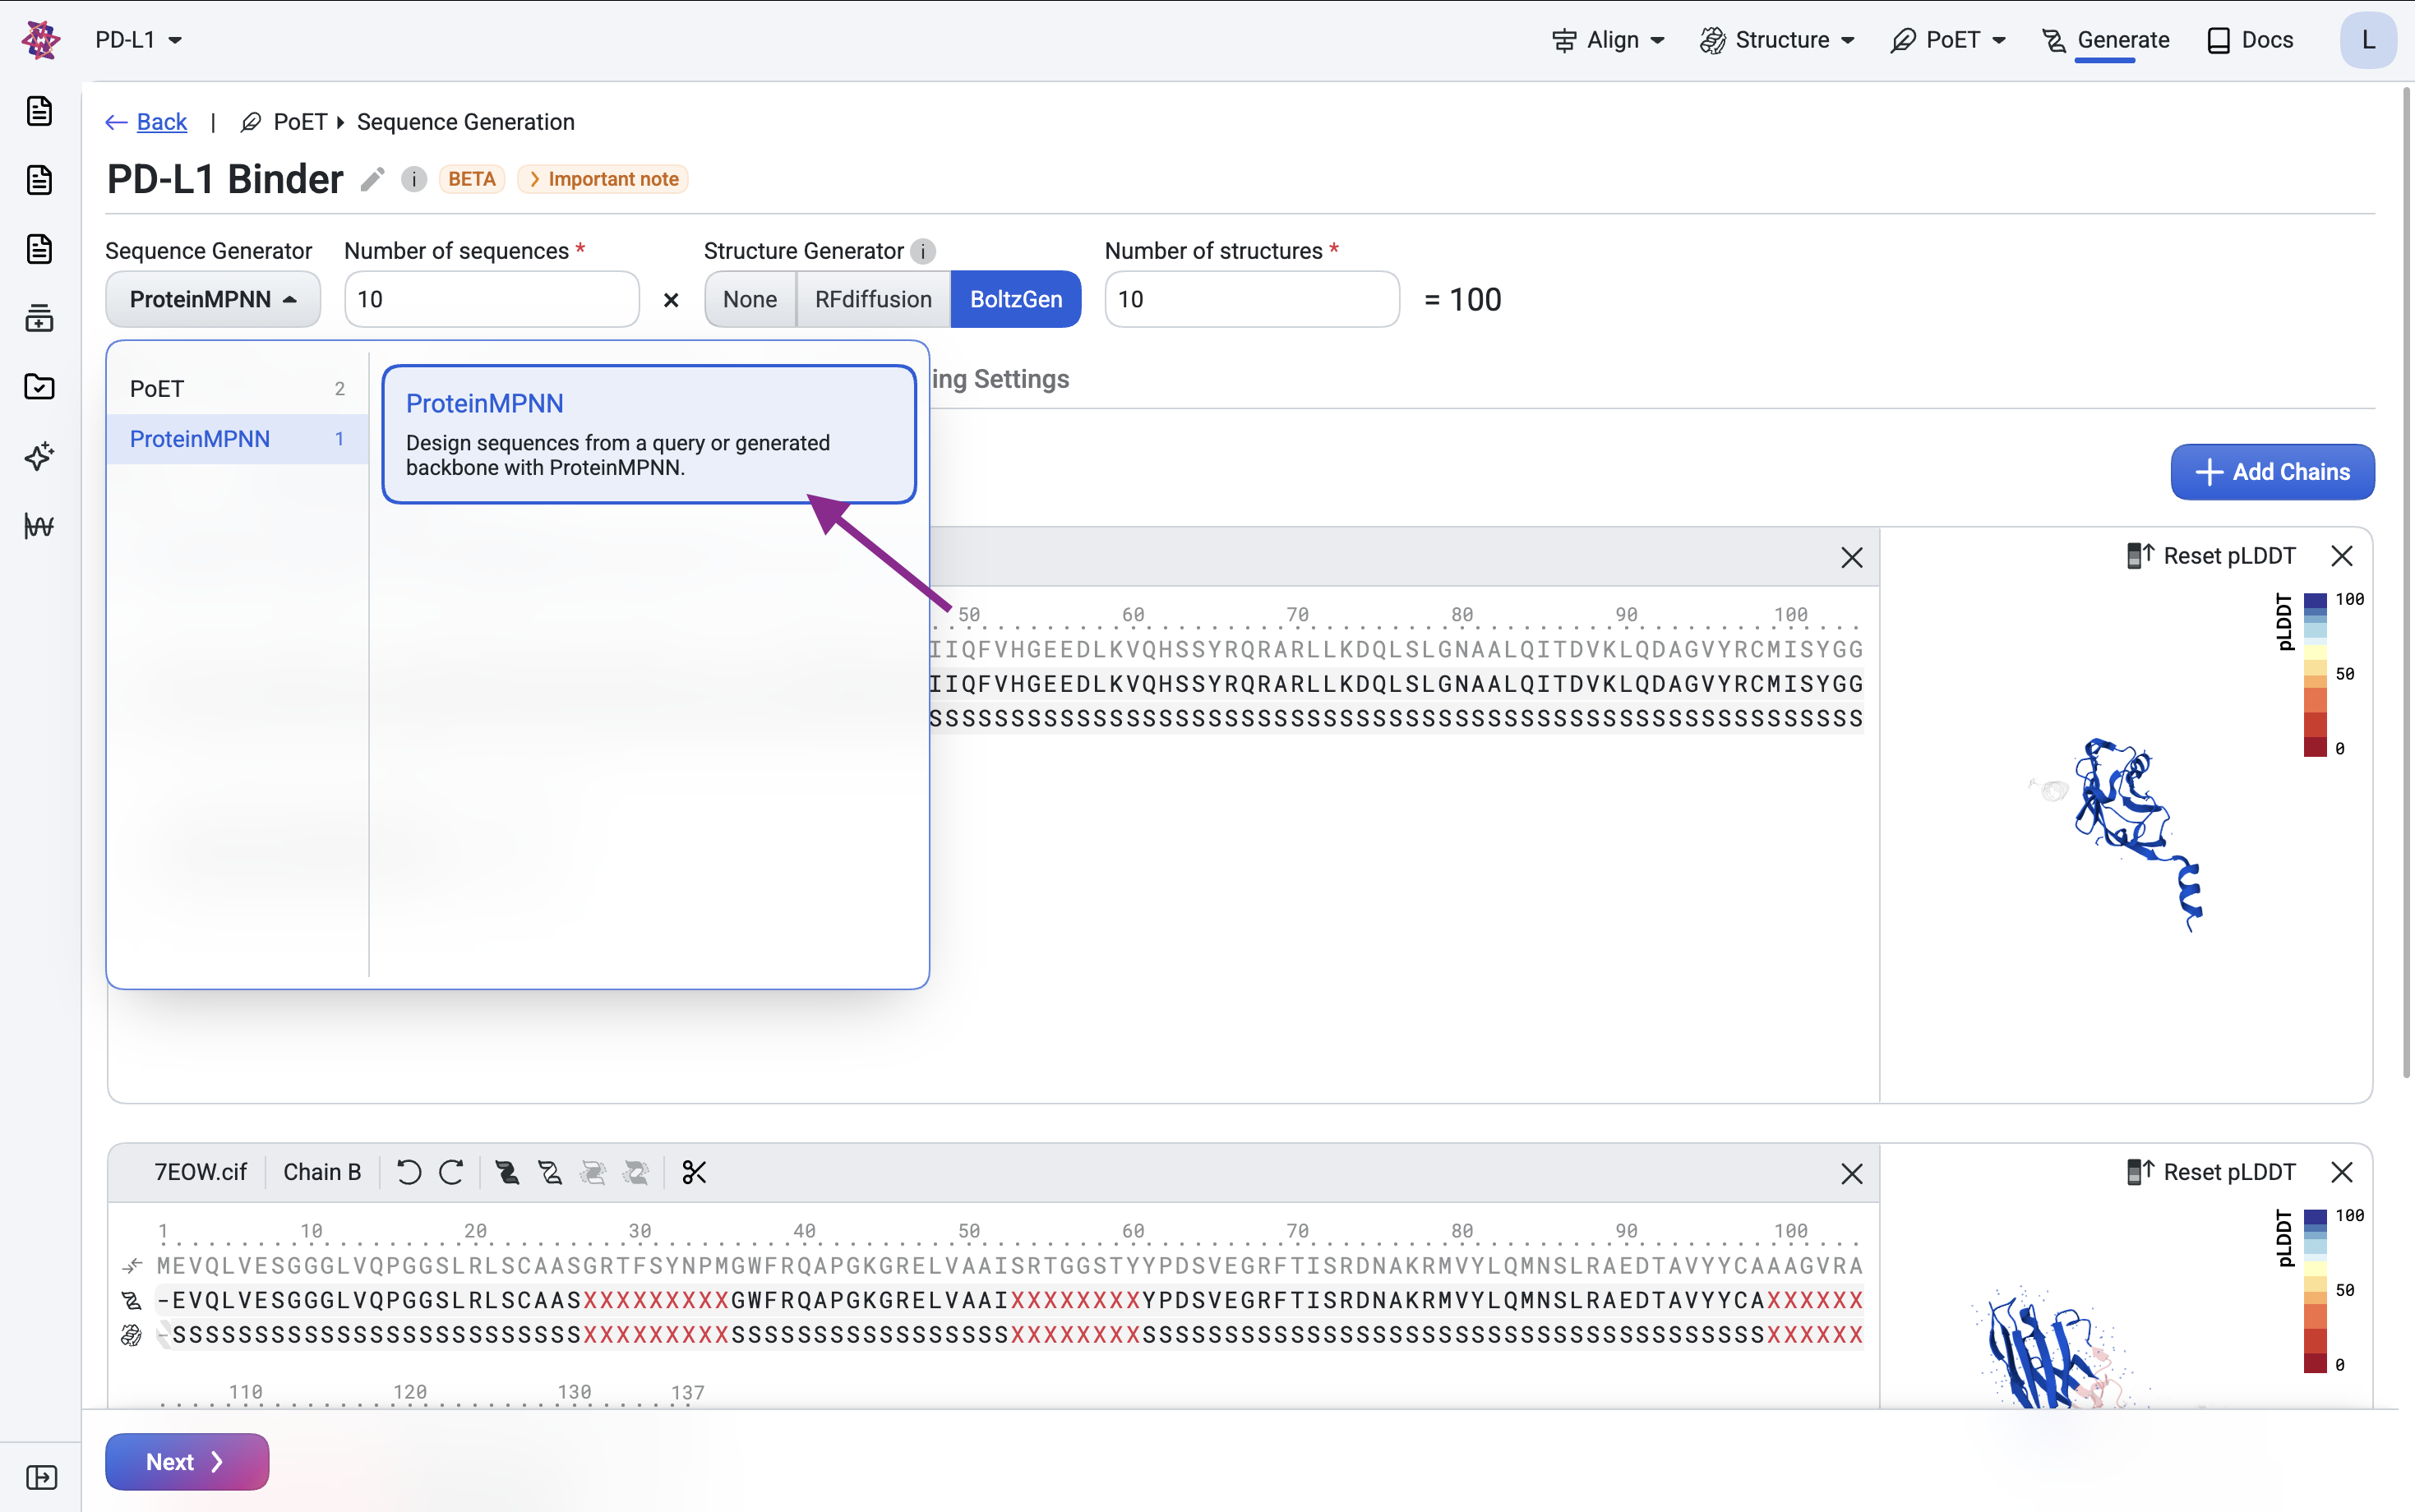
Generate sequences#
Here, we redesign only the CDR sequences while keeping the framework regions fixed from the scaffold, preserving the backbone structure throughout.
To redesign both the framework and CDRs, you could mask the entire nanobody sequence — however, ProteinMPNN will not produce natural-like framework regions. In that case, we recommend using PoET-2 with a human or camelid VHH context instead.
Multi-chain complexes: ProteinMPNN supports multi-chain inputs either as separate chains or as
a single chain with a linker (e.g., GGGGSGGGSGGGS). We use the single-chain linker approach
here since it is also compatible with PoET-2. For the separate-chains approach, see the
RFdiffusion binder design tutorial.
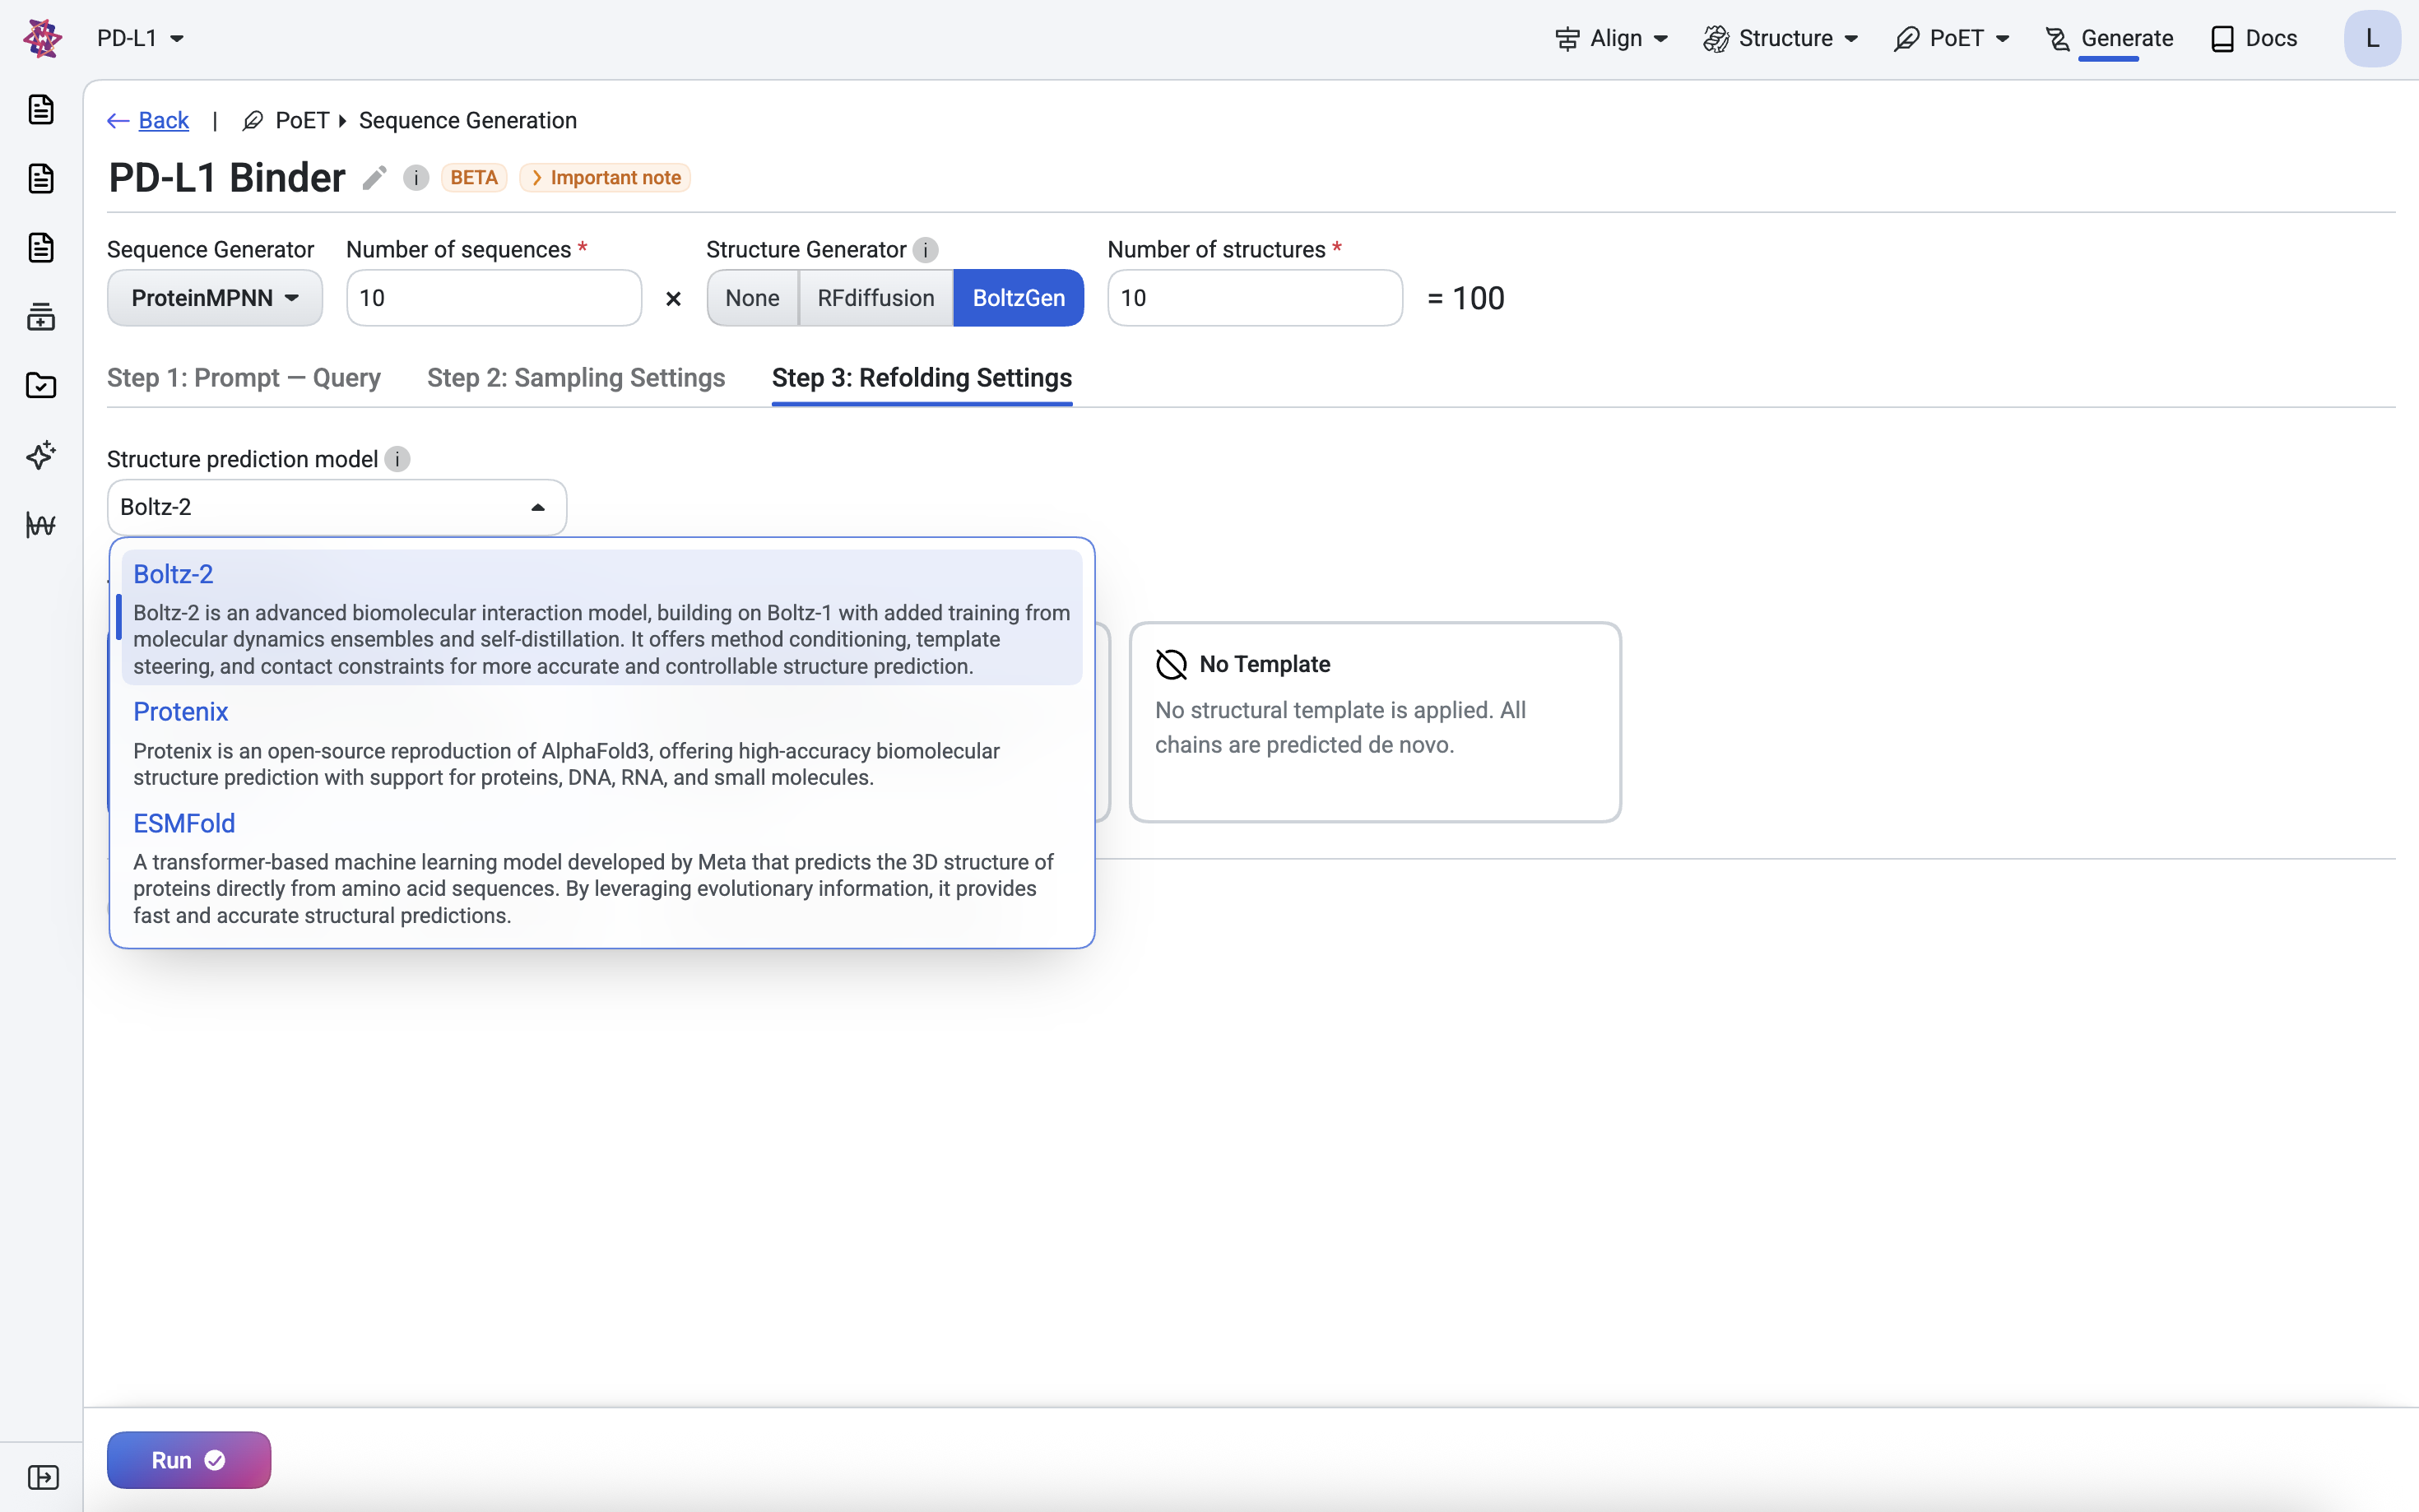
Step 4: In silico validation#
Validate designs using structure prediction
Finally, we validate our designs by predicting the structure of the designed sequences using Boltz-2. We will predict the complex structure and compute metrics to filter for high-confidence designs.
Predict structures with Boltz-2#
We validate our designs by predicting their structures with Boltz-2 (Passaro et al., 2025).
For each design, we predict the full target-binder complex and check it for consistency with the original designed structure and binding interface. Since the target structure is known but the binder’s is not, we run prediction in single sequence mode, meaning no multiple sequence alignment is used for the binder. This keeps screening tractable when evaluating large numbers of designs, as homology search would otherwise become a bottleneck.
Predicting all designed sequences typically takes around 50 minutes. To begin, select Boltz-2 in the Step 4: Refolding Settings tab.
In the results table, hover over any sequence to preview its predicted structure, or click to open the full structure viewer. Use the dropdown in the top-right corner to switch between structure prediction models.
We also retrieve the predicted aligned error (PAE) for each design — a confidence metric that has proven highly effective at identifying successful binders and which we use to compute the filtering metrics below.
Filter and select designs by metrics#
We compute, filter, and select designs using standard structure prediction metrics and thresholds adapted from the RFdiffusion (Watson et al., 2023) and BoltzGen studies.
Metric |
Description |
Ideal Value |
|---|---|---|
RMSD |
Measures how closely the predicted structure of the entire complex matches the generated structure. |
< 2.5 Å |
iPAE |
Confidence that the binder forms an interface with the target. |
< 10 |
Binder RMSD |
Measures how closely the predicted structure of just the binder matches the generated structure. |
< 1.0 Å |
Binder pLDDT |
Confidence in the predicted structure of the binder. |
> 80 |
We then rank the designs by iPAE to prioritize those with the highest confidence of interaction, keeping only the top design per unique structure to ensure diversity across the final candidate set.
Before sending designs for experimental validation, visually inspect their predicted structures for anomalies. Below, the top ranked design is shown with its predicted structure superimposed onto the corresponding generated structure (light gray).
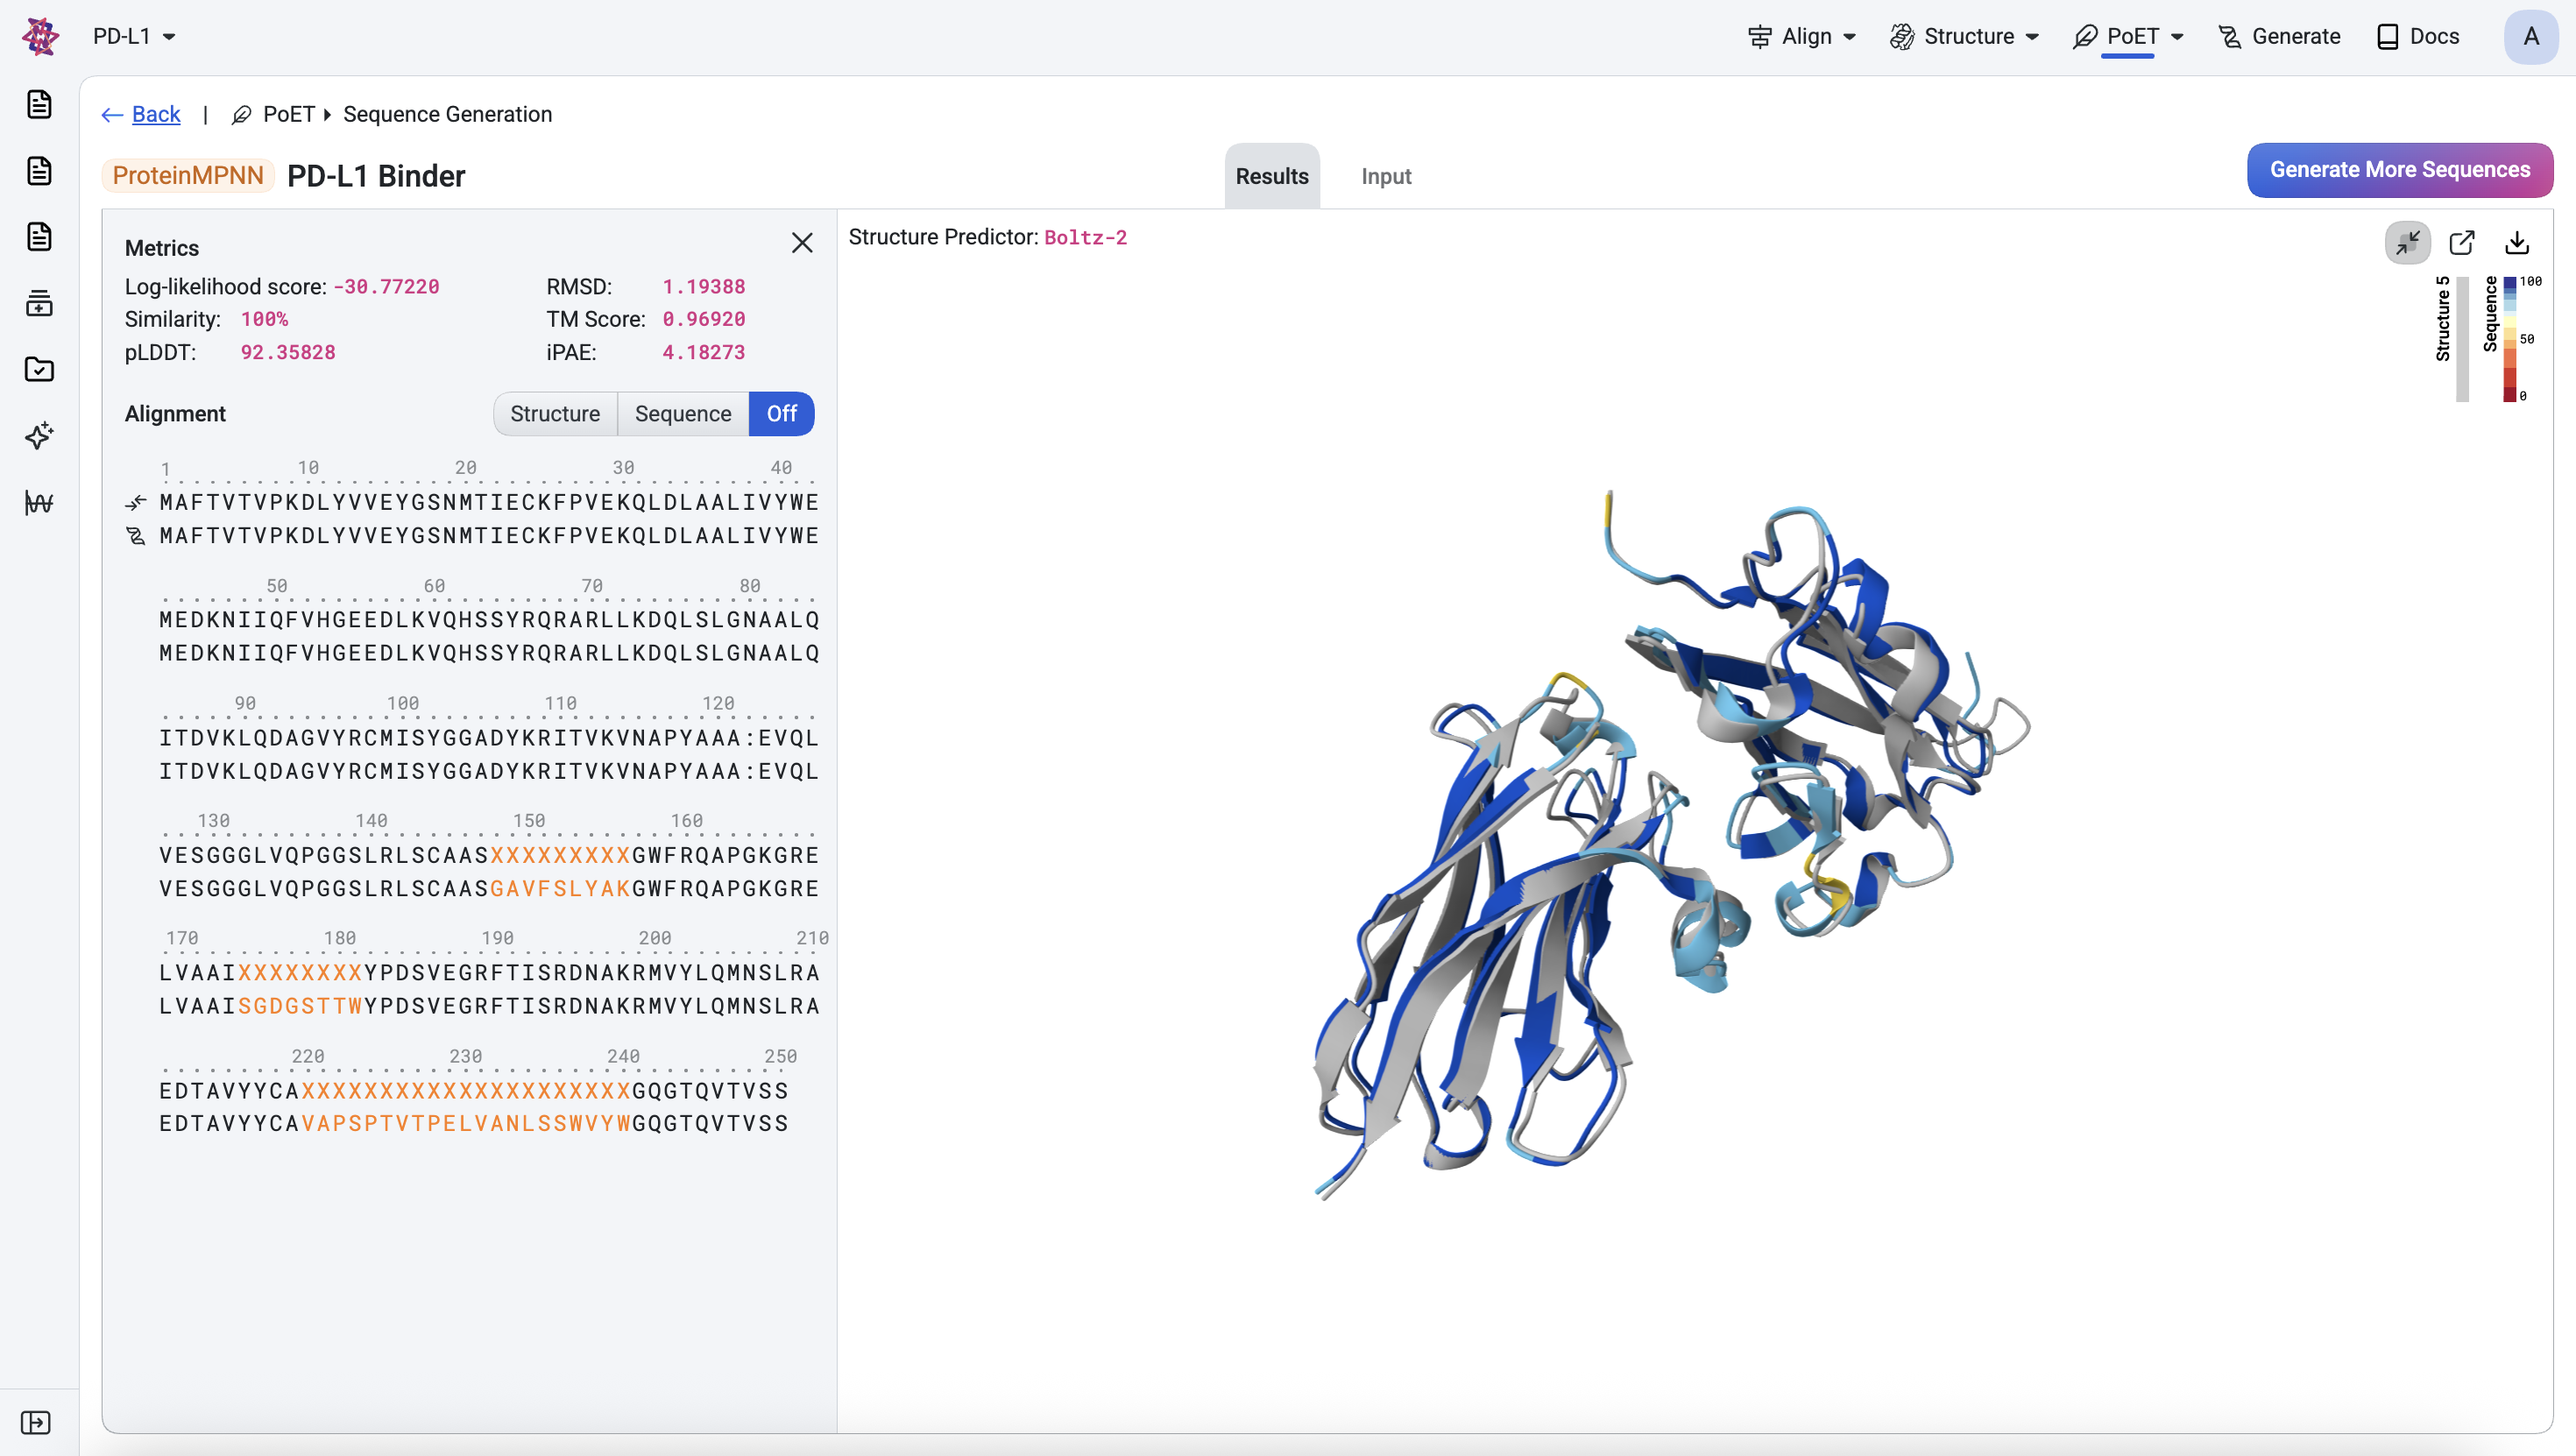
Once you are satisfied with the designs and have applied any additional assay-specific filters, they are ready for experimental testing.
Conclusion#
In this walkthrough, we’ve demonstrated how to design nanobody binders for a target of interest using BoltzGen and ProteinMPNN. We validated the designs using in-silico metrics and visualized them to ensure their viability. The top-ranked designs from this workflow can be:
Expressed and purified for experimental validation
Tested for binding affinity
Further optimized through additional rounds of design, for example, with OpenProtein.AI’s property regression models.
Read more about our binder design workflows and other de novo design tools here:
Or see the detailed API references: